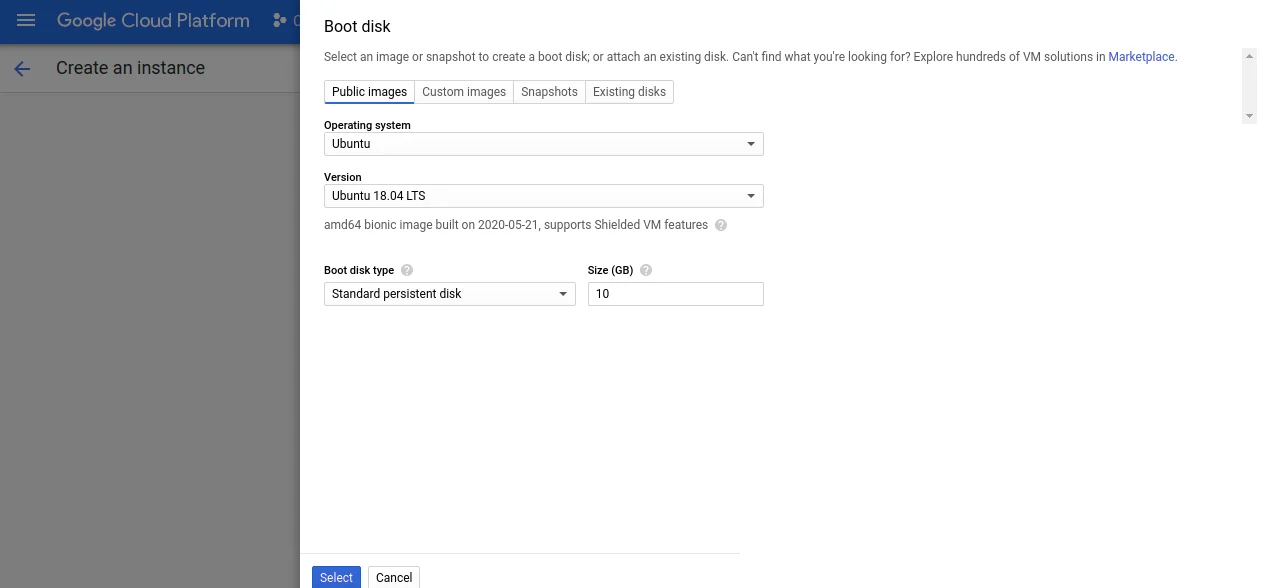
Create a VM instance by filling in required details like name, region, zone, machine type, and boot disk.
Enable full API access and allow HTTP and HTTPS traffic under firewall settings.
Updated 30 January 2026
In our previous blog, we have learned how to install Bagisto on the AWS (under Free-Tier Policy).
We’ll now move on to how to install Bagisto on GCP (under Free-Tier Policy) in this blog.
So let’s move to the installation part of Bagisto on GCP:
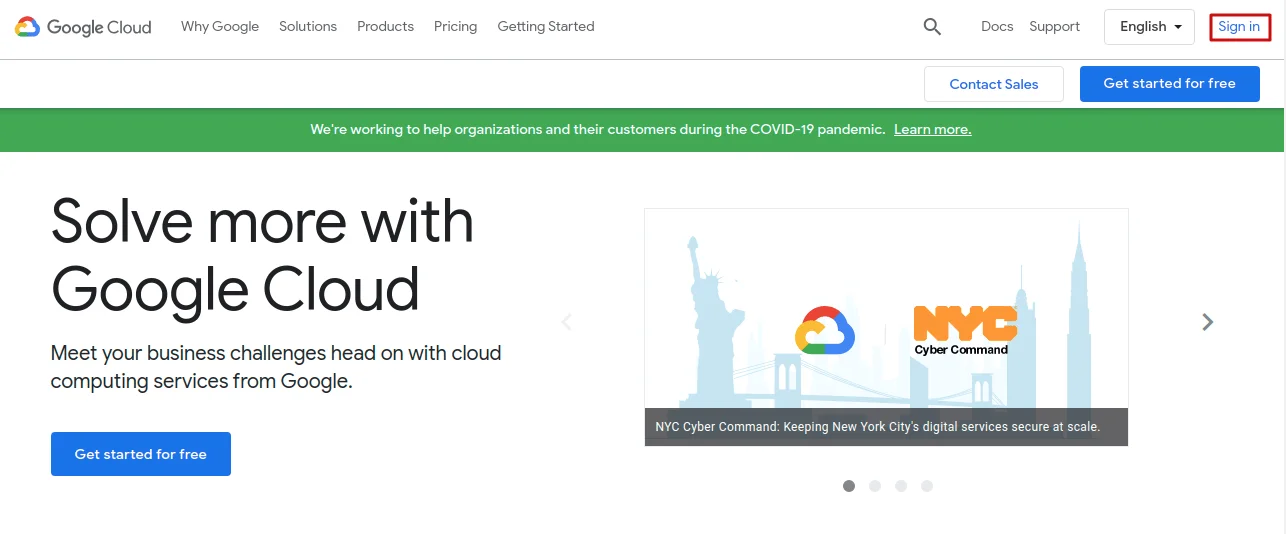
And second, tap the Sign in button on the right-hand side, or you can sign up for FREE (if you open a new account, you can get $300 credit free for 1 year).
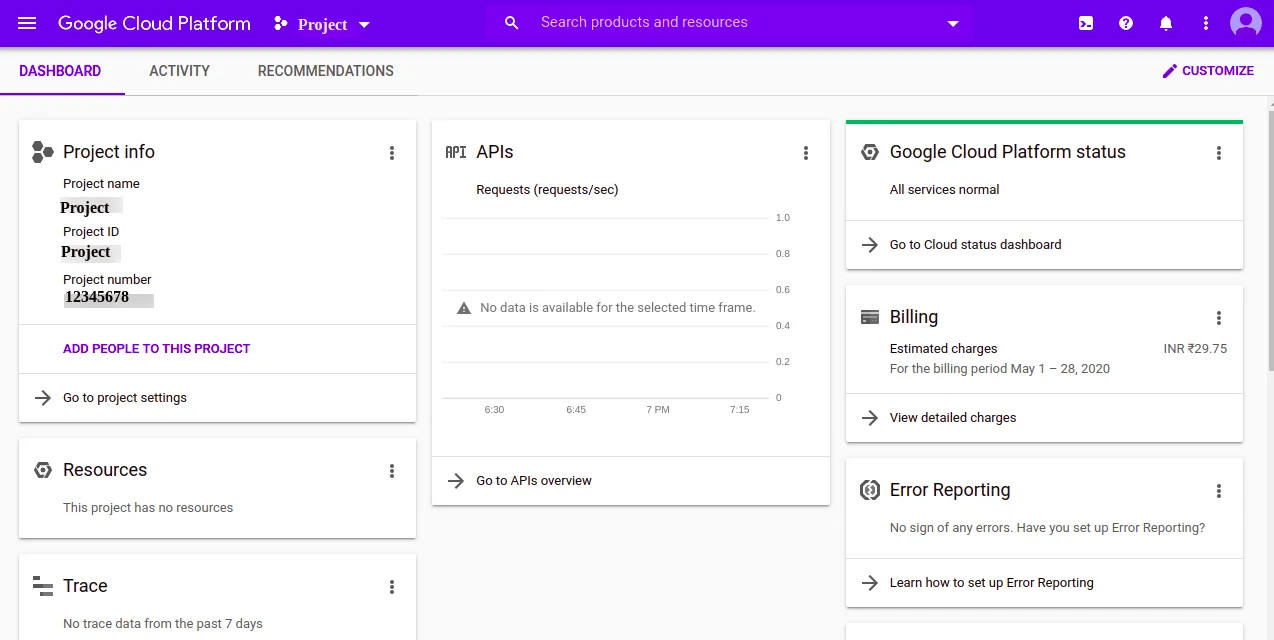
(i) Set up your billing account by linking your credit card before starting, and then create a project and navigate to your project’s dashboard.
(ii) Furthermore, Choose the Console option, once you have to access to the account.

(iii) Accept the Terms of Service offered by Google, and then select the option “AGREE and CONTINUE”.

Finally, after mentioning all the details, press “Create”.


It’s going to take some time to create your new instance. Once the VM instance is created, you will get your public IP address just like the image below :
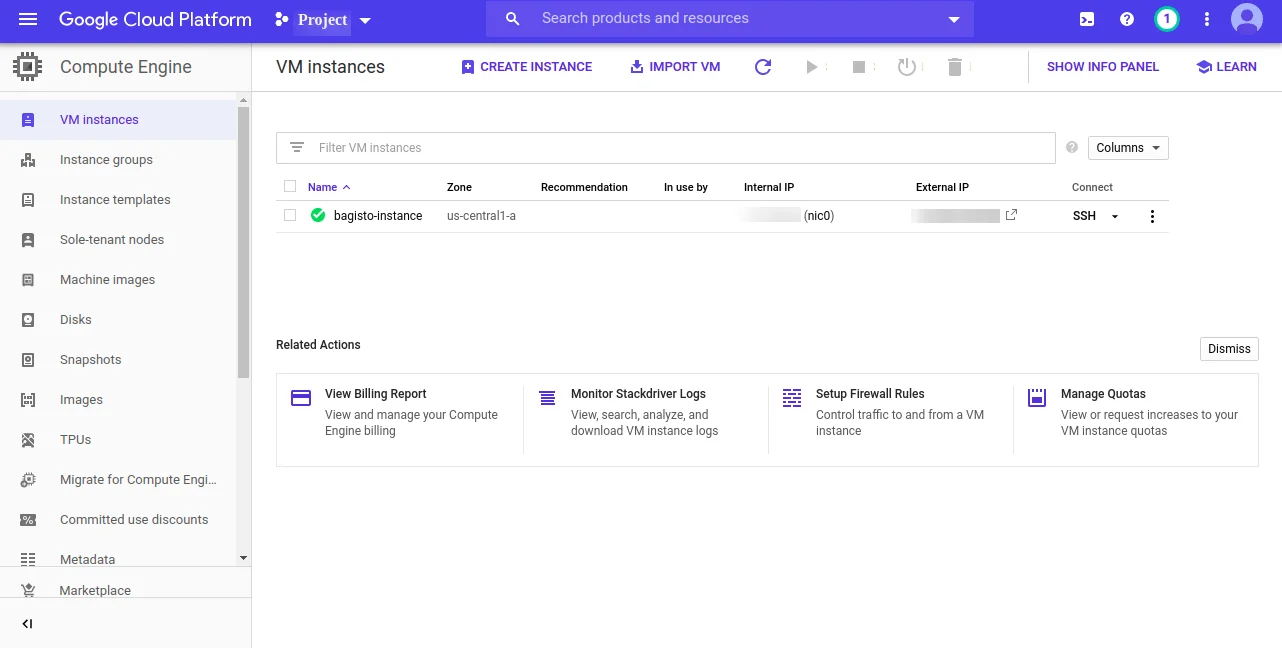
Every VM instance has an IP address, internal and external. Whenever you restart or stop your instance it will be assigned a new IP address.
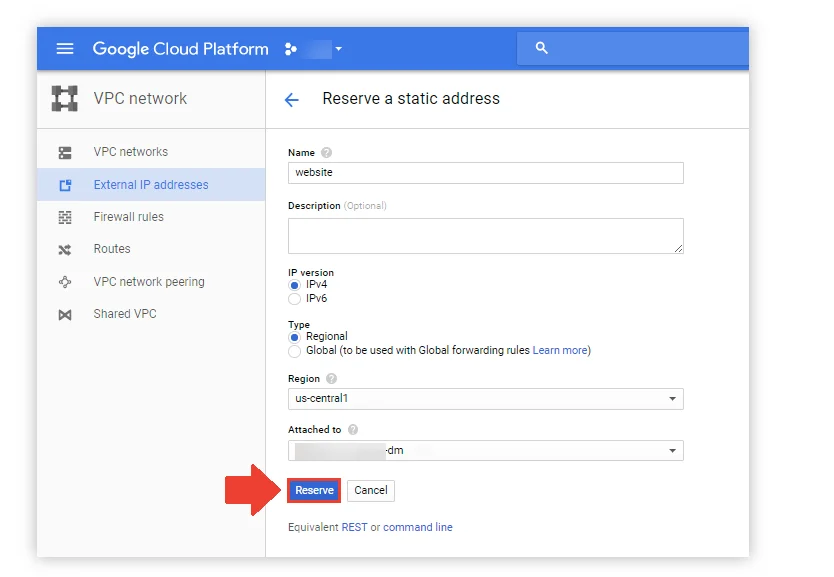
So your external IP address must be reserved as static.
Go to VPC Network — > External IP addresses and IP address reservation.
Configure your settings based on the image below, and ensure that the correct instance is attach to the IP address static.
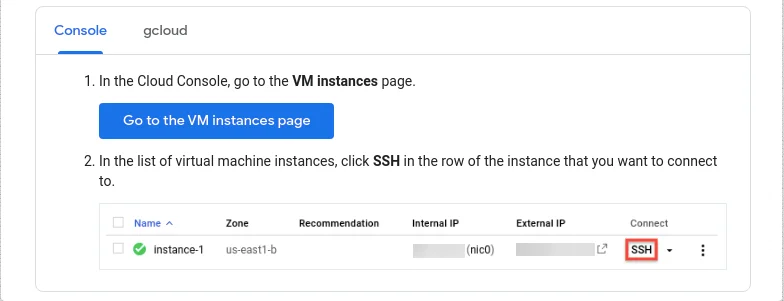
After making a connection, use the terminal to execute commands and when you’ve done, use the exit command to disconnect from the instance.
After logging in, install the necessary application software.
(i) Install Apache2, php7.3, and its modules by executing the listed commands in the correct order.
|
1 2 3 4 5 6 7 8 |
sudo apt update sudo apt install apache2 sudo systemctl start apache2.service sudo systemctl enable apache2.service sudo apt-get install -y software-properties-common sudo add-apt-repository ppa:ondrej/php sudo apt-get update sudo apt-get install -y php7.3 php7.3-{common,gmp,curl,soap,bcmath,intl,mbstring,xmlrpc,mysql,gd,xml,cli,zip} libapache2-mod-php7.3 |
If any of the PHP modules remains, simply through this command you may install it.
sudo apt-get install php7.3-<module_name>
Check the version of PHP, if it is php7.2.x, then allow the PHP-module apache and the rewrite-apache module.
|
1 2 3 4 |
php -v sudo a2enmod php7.3 sudo a2enmod rewrite sudo service apache2 restart |
(ii) Install Curl and Node.js version 10.x.
|
1 2 3 |
sudo apt-get install curl curl -sL https://deb.nodesource.com/setup_10.x | sudo -E bash - sudo apt-get install -y nodejs |
(iii) Install the Composer.
|
1 2 3 |
sudo apt install git curl -sS https://getcomposer.org/installer | sudo php -- --install-dir=/usr/local/bin --filename=composer composer -V |
Presently, we were in our server’s root user, but due to security issues, we do not keep our application code in the directories of the root user.
So, we have to create another SSH user for this.
Create an SSH user who will be the owner of the application code. I create an SSH user with the name “bagisto.” You can pick any name you want.
adduser bagisto
This prompts a password window where you can set the password. The remaining fields can be left empty by simply pressing the enter key.
Additionally, after creating a user, we will switch to a new user.
composer create-project bagisto/bagisto
After downloading, a directory name “bagisto” will be created inside the public HTML directory, then go to the public directory / bagisto.
It is the directory that loads index.php.
cd bagisto/public
To support the web pages we will configure apache. So, we need to switch again to the root user for configuring apache.
|
1 2 |
exit sudo nano /etc/apache2/sites-enabled/000-default.conf |
You will find the following lines as shown below, after executing the above command.
![]()
Now, change this to :

Save it, and exit after this.
Furthermore, configure the envvars file by executing the below command :
|
1 |
sudo nano /etc/apache2/envvars |
And find these lines :
![]()
Modify the apache SSH username by this way :
![]()
Configure file apache2.conf by the following command :
|
1 |
nano /etc/apache2/apache2.conf |
You will find the block code as shown below :
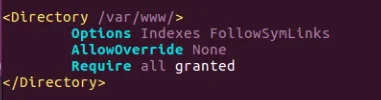
Modify it to the following code :
|
1 2 3 4 5 |
<Directory /home/bagisto/bagisto/public/> Options FollowSymLinks AllowOverride All Require all granted </Directory> |
Save the file and exit it.
and when a password is asked after the below two commands, simply press ENTER.
|
1 2 3 4 5 6 7 |
sudo apt-get install mysql-server sudo mysql -u root -p create database bagisto; CREATE USER 'bagistouser'@'localhost' IDENTIFIED BY 'bagisto'; GRANT ALL ON bagisto.* TO 'bagistouser'@'localhost' WITH GRANT OPTION; flush privileges; exit; |
Meanwhile, make some changes to php.ini file
|
1 |
sudo nano /etc/php/7.3/apache2/php.ini |
file_uploads = On
allow_url_fopen = On
short_open_tag = On
memory_limit = 256M
upload_max_filesize = 100M
max_execution_time = 360
date.timezone = America/Chicago
After all the above mentioned steps, please enable permission to access your Bagisto root directory as shown below:
|
1 2 3 |
sudo chmod -R 755 /home/bagisto/bagisto sudo chown -R bagisto:bagisto /home/bagisto/bagisto sudo service apache2 restart |
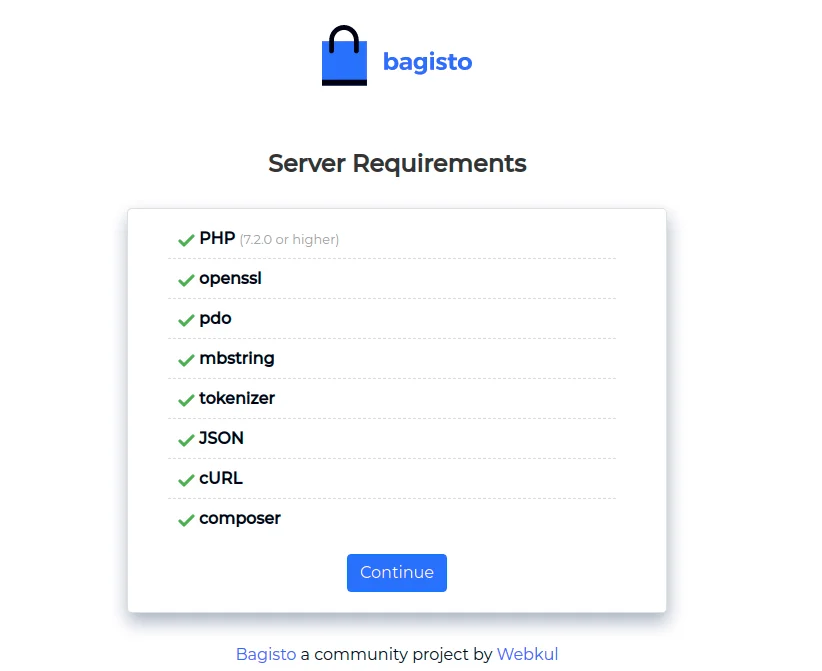
After all the above steps, go to your browser and enter the IP address of your VM instance or domain name.
A page similar to the one below will open and then click the “continue” button.
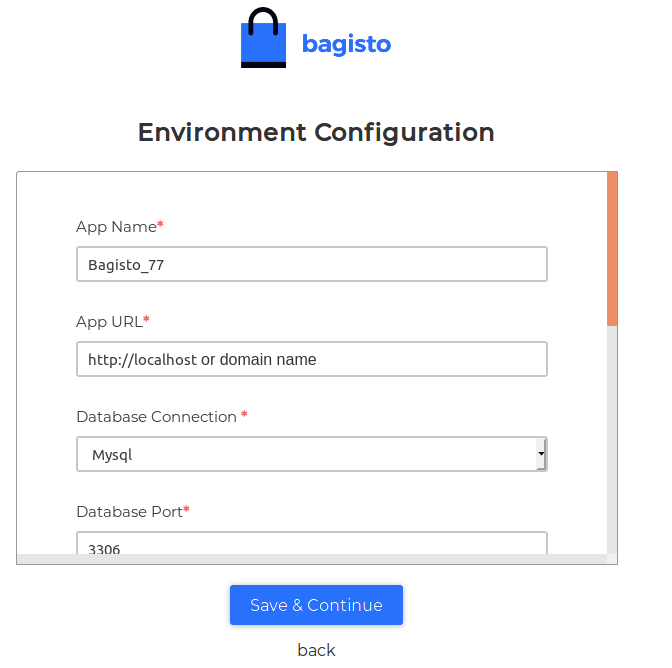
Similarly, a new Environment Configuration page will appear after selecting the “continue” option.
Then enter the details and enter the same credentials you obtain while creating a database. You can also use your domain name in the Default URL.

Firstly the front end will be open after Continue.
After that to access, the dashboard hit the URL “example.com/admin/” in the Admin panel, the admin login will open as in the image below.

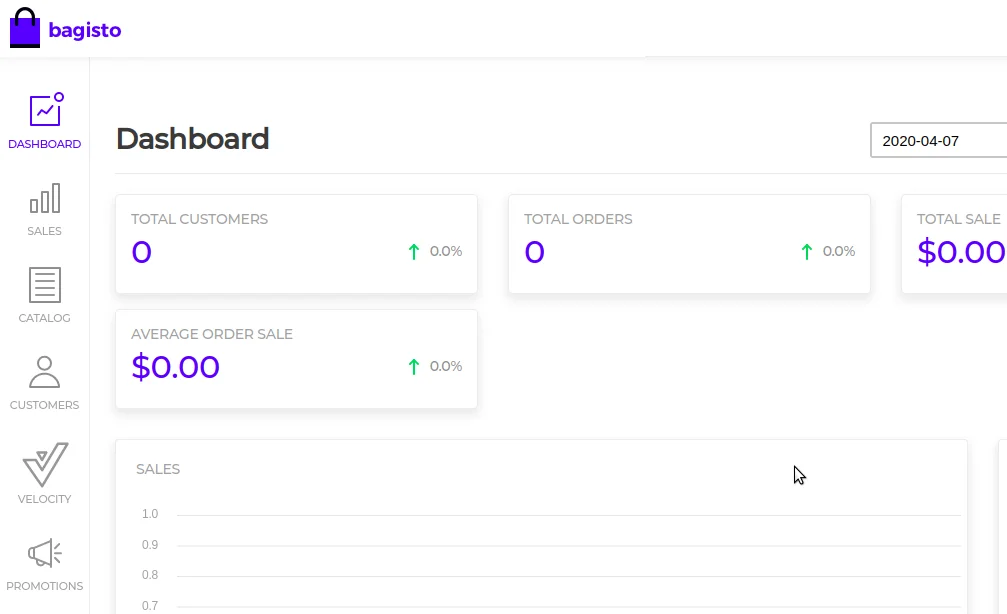
In addition, this is what the default admin dashboard looks like.
As a result, the homepage of your default eCommerce website will be like this:

In case of any help, query, or feedback please contact us or raise a ticket.
Thank you for reading this article,
Keep in touch!!


If you have more details or questions, you can reply to the received confirmation email.
Back to Home
Be the first to comment.