Next, to connect to your Ubuntu server, copy and paste the command directly into your terminal, as mentioned in point 3 and shown in the example below.
An eCommerce platform is the foundation of online business regardless of whether it’s B2B or B2C.
The right eCommerce platform will also help in simplifying the business interaction process with the consumers, employees, and clients.
Therefore, if you don’t have a strong eCommerce platform then you can’t compete online.
So, the right eCommerce platform plays a very important role in expanding and increasing the market, And Bagisto is amongst them.
In this blog, we’ll learn how to install Bagisto on AWS (Under Free-Tier Policy).
You may wonder why I prefer Bagisto as an eCommerce platform and AWS as a hosting provider to host my website, while we have other hosting providers too?
So, let’s keep answering the simple question.
What’s the bagisto, exactly?
Bagisto is an open-source eCommerce platform, which is built on various open source technologies, such as PHP framework, laravel, Vue.js, MySQL.
It is built for merchants to launch their own shopping cart system with a wide variety of fully controllable features.
It also offers numerous post-commerce solutions, such as Marketplace solutions, POS solutions, PWA App, and Dropship solutions.
Why we’re using AWS?
Cloud Computing allows an eCommerce platform to cater to the changing market demand and scenarios.
It also offers scalable technology tailored to business needs and allows upscale or downscale facilities depending on demand and traffic.
Amazon Web Services (AWS) is a leading and widely trusted cloud platform worldwide.
It offers 175 plus fully integrated data center services across global locations.
A million users use AWS to cut costs, to make themselves more agile, and to innovate faster.
Installation requirements for Bagisto:
Before starting the installation, make sure your system meets the following requirements.
- OS:
- Windows 7 or above with WAMP/XAMPP environment
- Compatible with macOS
- Ubuntu 16.04 LTS or higher
- SERVER: Apache 2 or NGINX
- RAM: 3 GB or higher
- PHP: 7.2.0 or higher
- For MySQL users: 5.7.23 or higher
- For MariaDB users: 10.2.7 or higher
- Node: 8.11.3 LTS or higher
- Composer: 1.6.5 or higher
- Processor: Clock Cycle 1 GHz or higher.
- php7.1-intl extension
- php7.1-gd extension
What we’re going to use :
- OS: Ubuntu 18.04
- SERVER: Apache 2
- RAM: 1 GB
- PHP: 7.3
- MY SQL: 5.7.23 (We’re creating a localhost database rather than RDS, you can also create it through RDS.)
- Node.js: 10.x
- cURL
- Composer
How to install Bagisto on AWS
So let’s move to the installation part:
STEP 1: Creation of AWS Account:
(i) To start with, create a new AWS account by using Sign-up.

(ii) And then log in to your AWS account by Sign-in.
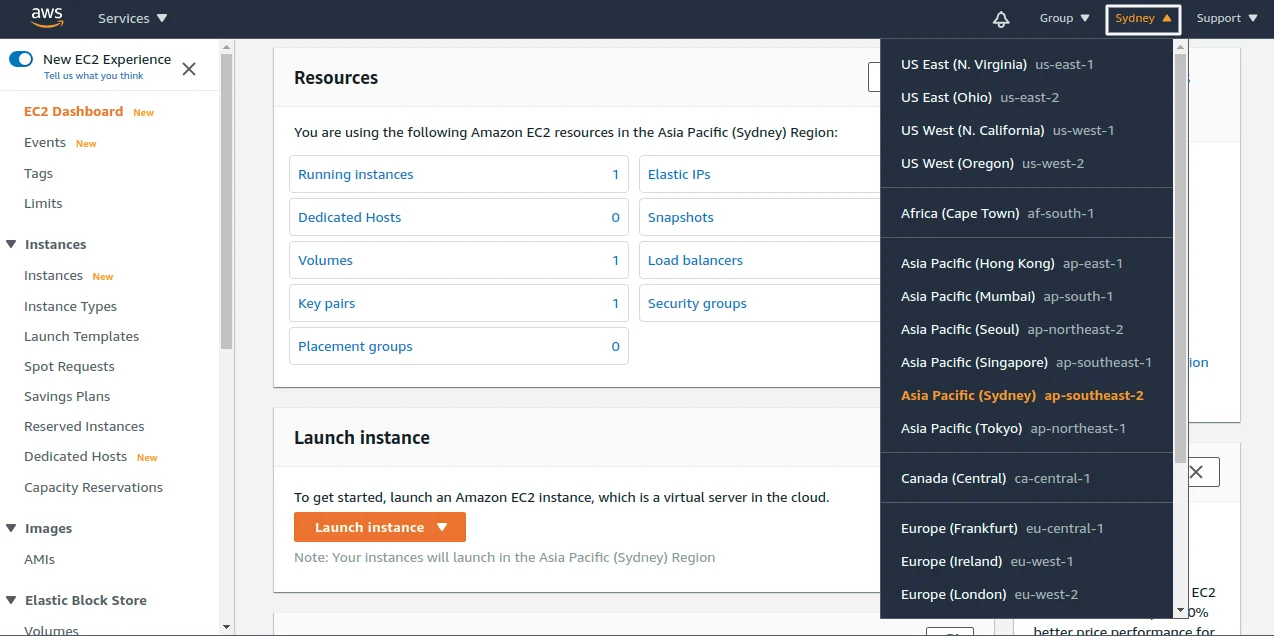
(iii) Also, select the web server location ie AWS region from the list available. where you want to launch the EC2 instance.
The option is at the top of the bar on the right hand side.
STEP 2: Creation of EC2 Instance
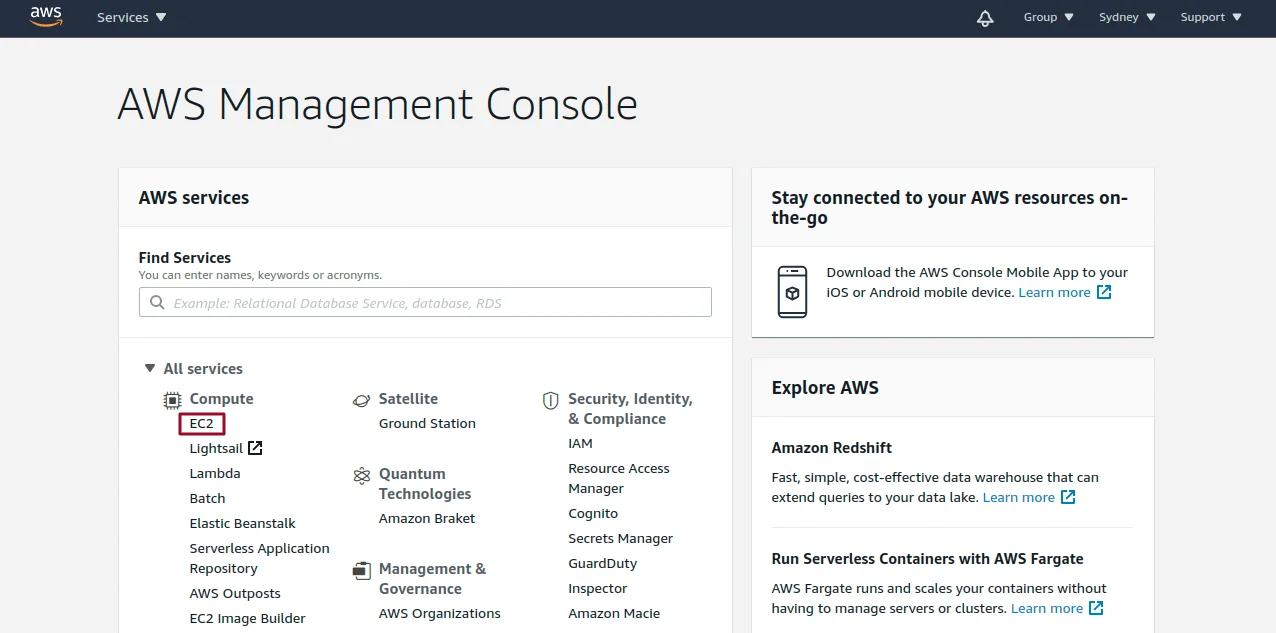
(i) After your account has been successfully created, select the EC2 among the available AWS services or you can search for an EC2 service in the search box.
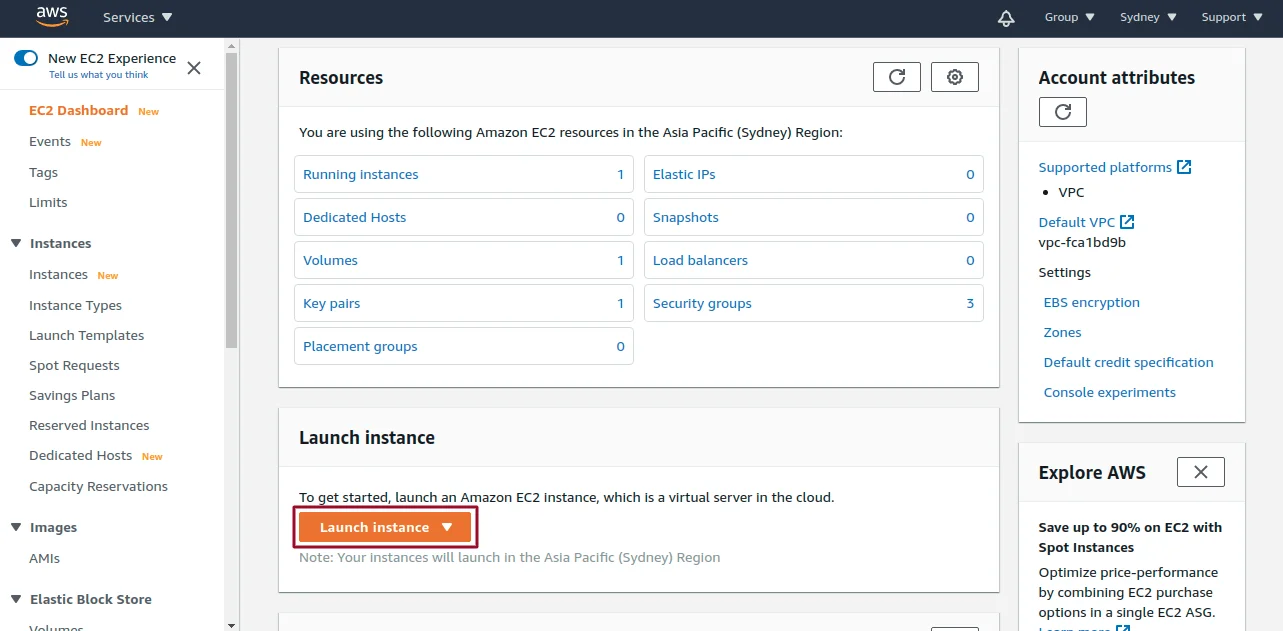
(ii) And then Select the Launch Instance button from the dropdown menu.
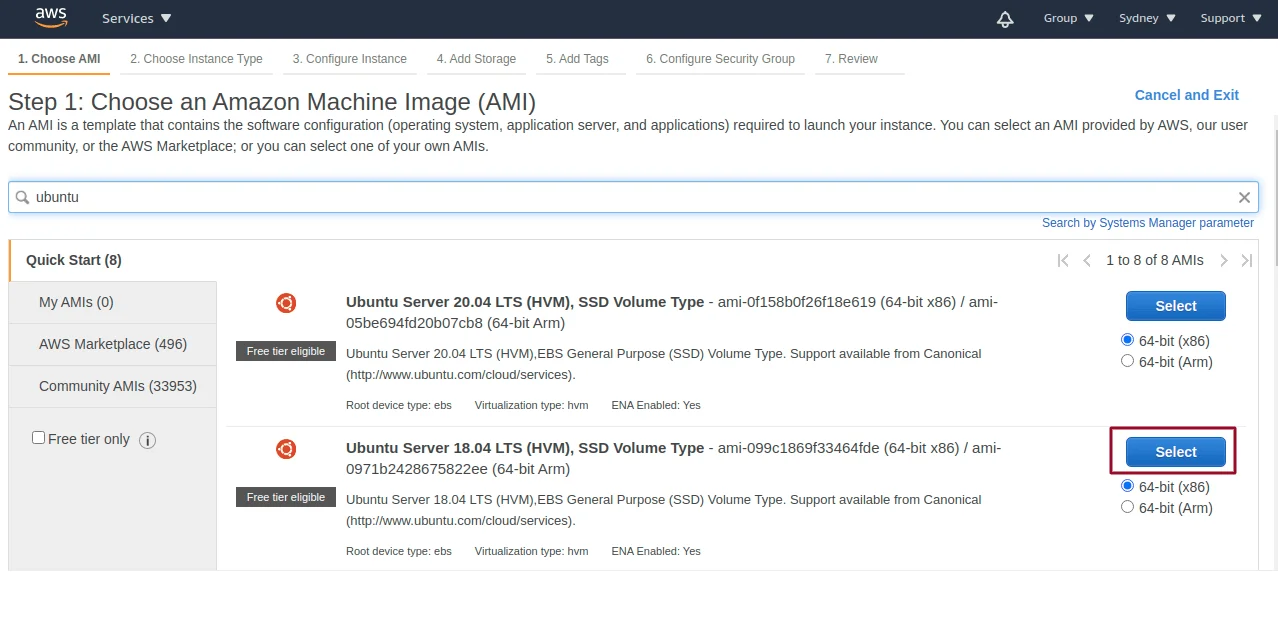
(iii) Select the server ie, Ubuntu Server 18.04 LTS by scroll down or you can directly search in the search box.
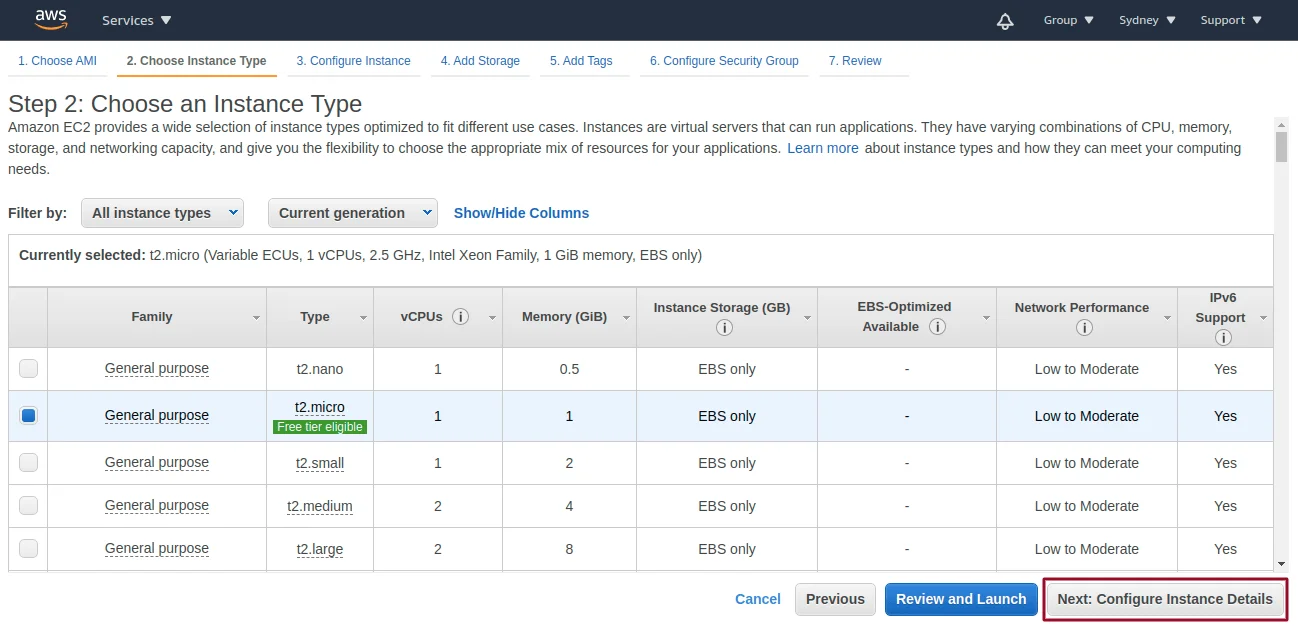
(iv) Now choose the Instance type and click on the tab, Next: Configure Instance Details.
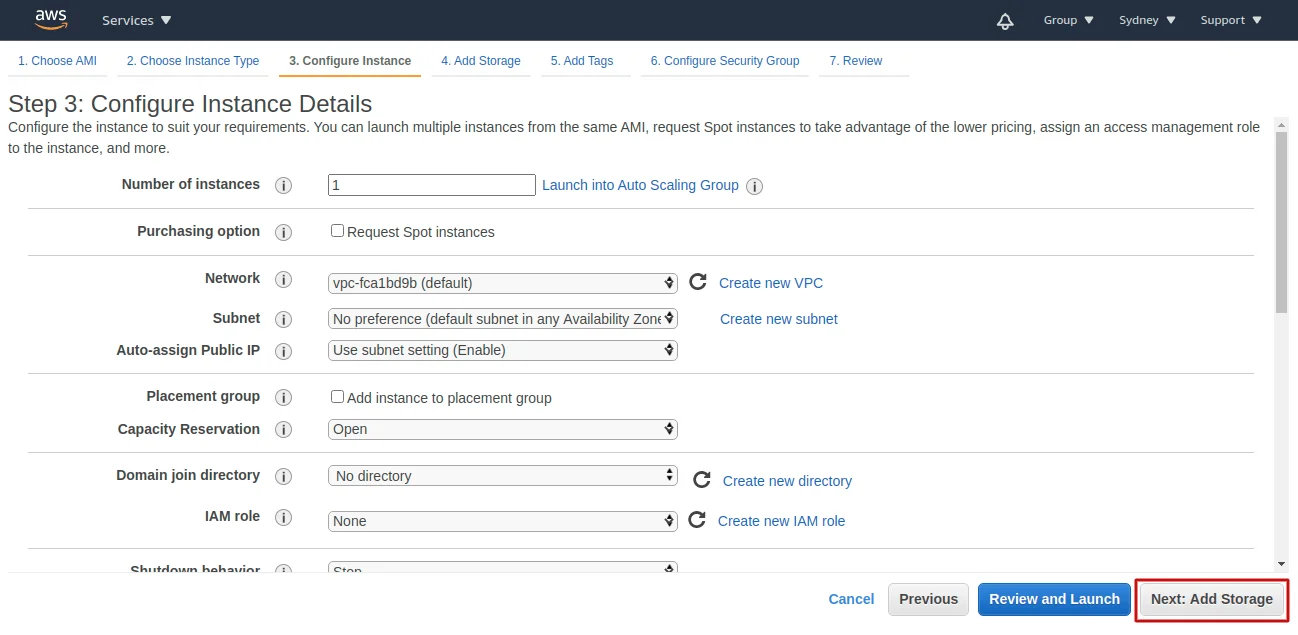
(v) After the above steps, select the number of EC2 Instances, you want to run and then choose the tab, Next: Add Storage.
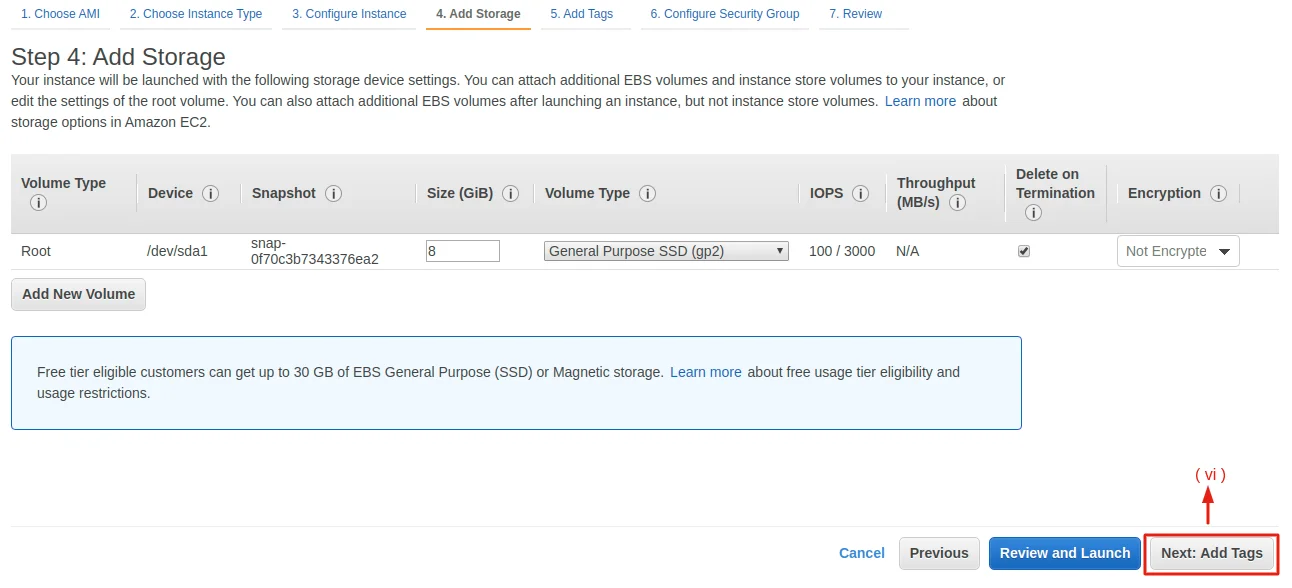
(vi) Now add up the storage as per your requirement and select the tab, Next: Add Tags.
(vii) Add tags and choose the tab, Next: configure security group.

(viii) Now, Click Add rule in configure security group, and ADD the following :
SSH, HTTP, and HTTPS – select anywhere in the source column for all rules. After adding up the rules, select the review and launch tab.
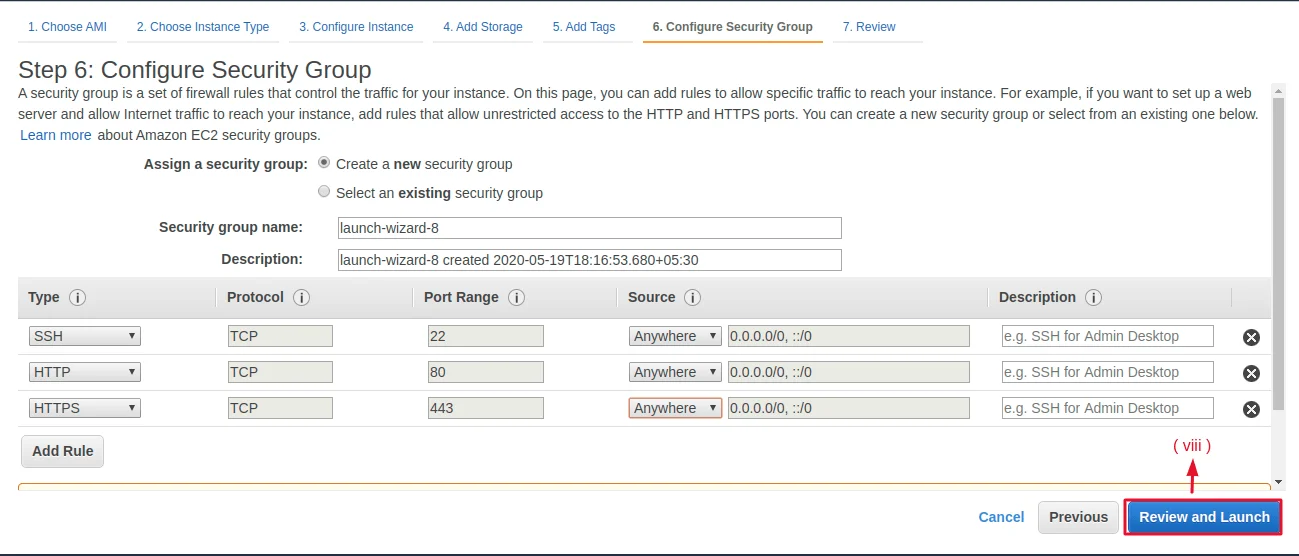
(ix) Under this step, review the instance launch to recheck your Instance settings one more time and if everything goes right, then select the launch button.

(x) This step is concerned with creating a key pair (It’s better to use the domain name for the key pair name) and after the creation, download the key pair.
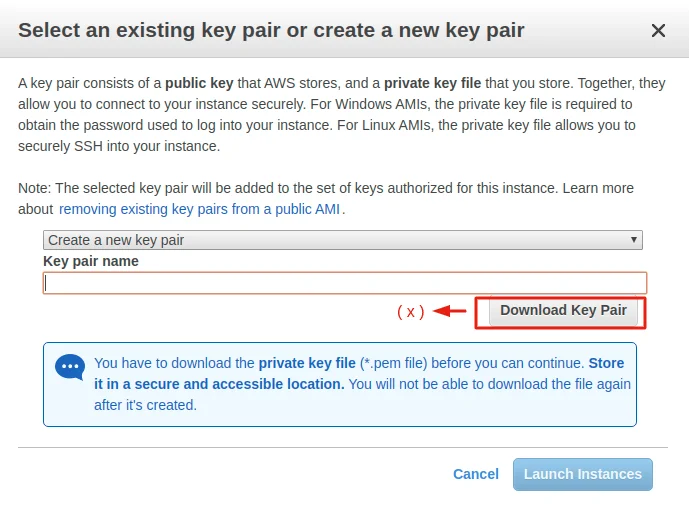
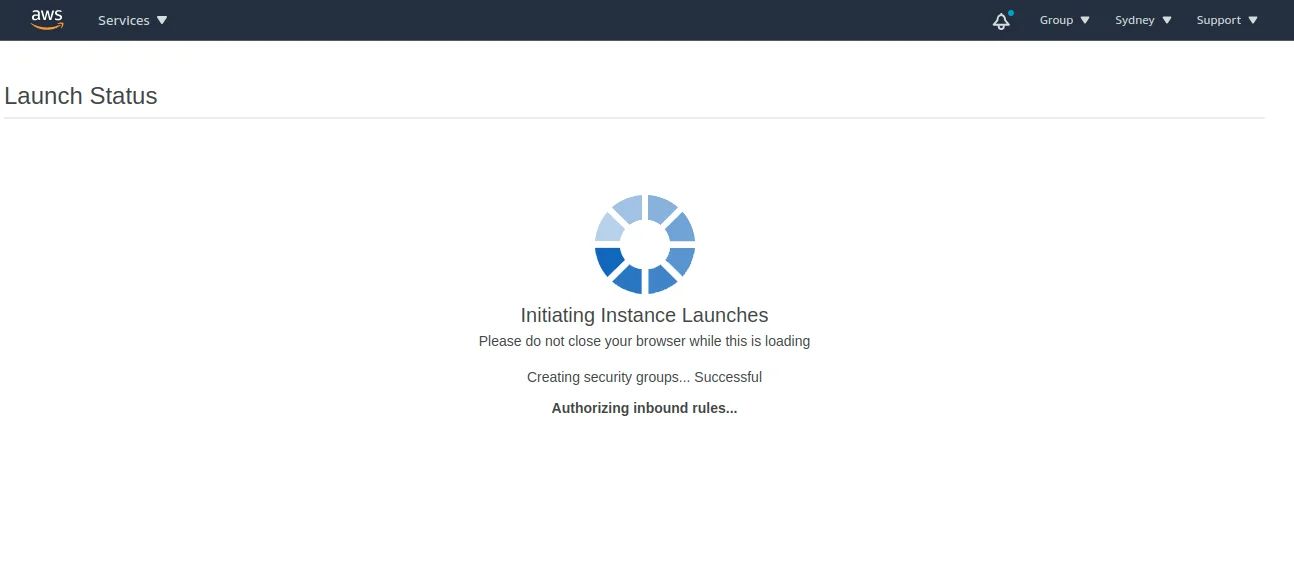
(xi) Once the pem file is downloaded, adhere to the terms and conditions of the AWS, and click the Launch button. You’ll see the image as below.
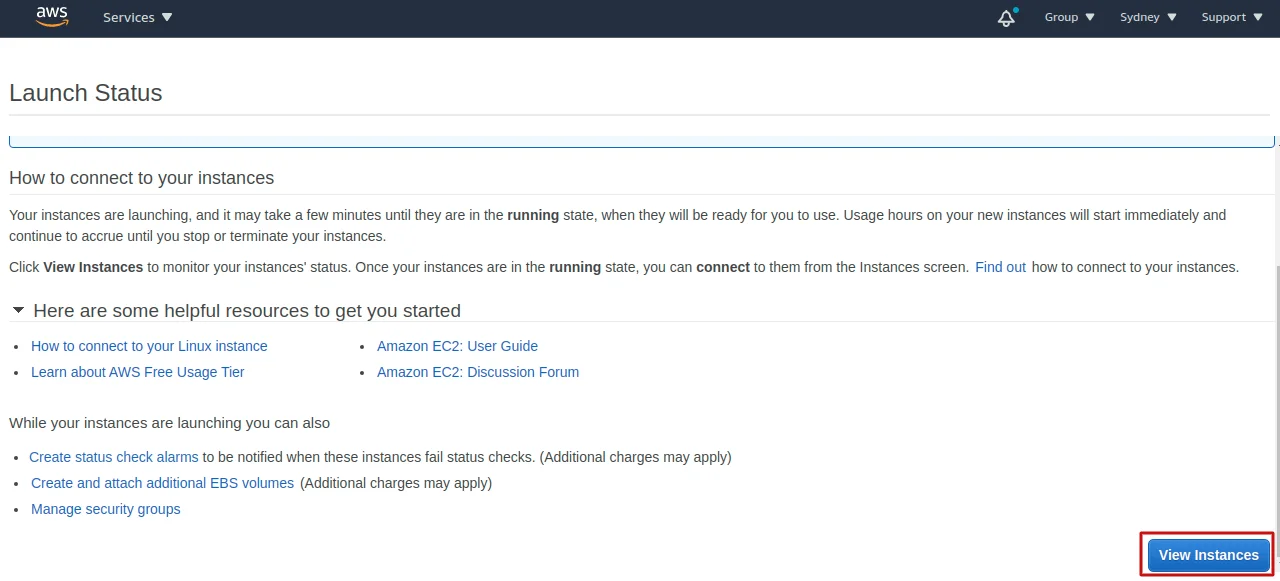
(xii) Scroll down and press the “View Instances” button after the successful launch of the instance.
(xiii) Now, the newly generated instance can be seen. Click on the instance, and you will get your instance’s summary.
To connect the instance, click the “connect” button.
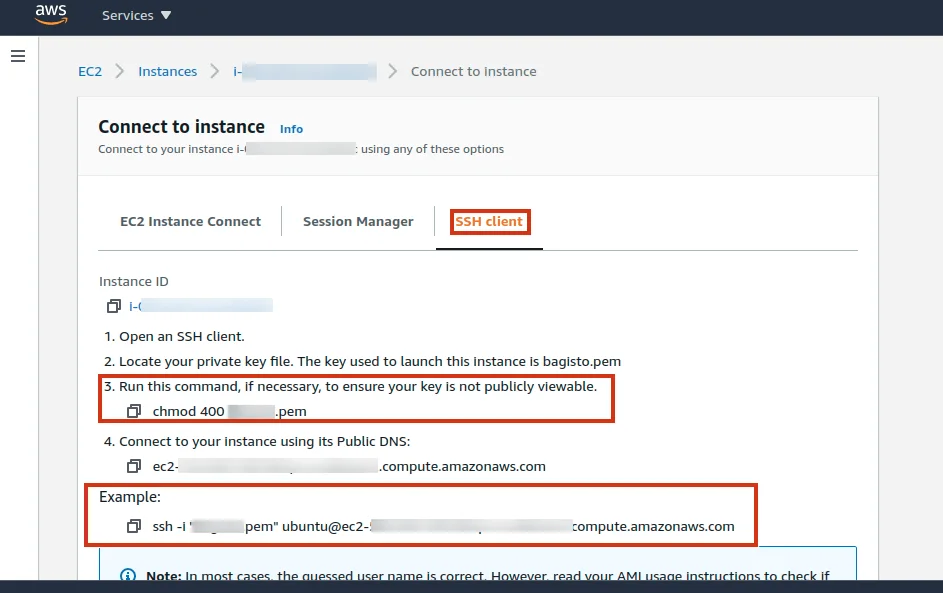
(xiv) Choose the ‘SSH client’ option from the three options below.
Note: **To log in to your Ubuntu Server, please follow either STEP (xiv) or STEP 3. The command is the same in each of these steps.

STEP 3: Log in to your Ubuntu Server by executing the command mentioned below:
|
1 2 |
chmod 400 /path to .pem file ssh -i ".pem file" ubuntu@ec2-ip_address.compute-1.amazonaws.com |
After logging in, install the necessary application software.
(i) Install Apache2, php7.3, and its modules by executing the listed commands in the correct order.
|
1 2 3 4 5 6 7 8 |
sudo apt update sudo apt install apache2 sudo systemctl start apache2.service sudo systemctl enable apache2.service sudo apt-get install -y software-properties-common sudo add-apt-repository ppa:ondrej/php sudo apt-get update sudo apt-get install -y php7.3 php7.3-{common,gmp,curl,soap,bcmath,intl,mbstring,xmlrpc,mysql,gd,xml,cli,zip} libapache2-mod-php7.3 |
If any of the PHP modules remains, simply through this command you may install it.
sudo apt-get install php7.3-<module_name>
Check the version of PHP, if it is php7.3.x, then allow the PHP-module apache and the rewrite-apache module.
|
1 2 3 4 |
php -v sudo a2enmod php7.3 sudo a2enmod rewrite sudo service apache2 restart |
(ii) Install Curl and Node.js version 10.x
|
1 2 3 |
sudo apt-get install curl curl -sL https://deb.nodesource.com/setup_10.x | sudo -E bash - sudo apt-get install -y nodejs |
(iii) Install the Composer
|
1 2 3 |
sudo apt install git curl -sS https://getcomposer.org/installer | sudo php -- --install-dir=/usr/local/bin --filename=composer composer -V |
STEP 4: SSH User creation
Presently, we were in our server’s root user, but due to security issues, we do not keep our application code in the directories of the root user.
So, we have to create another SSH user for this.
Create an SSH user who will be the owner of the application code. I create an SSH user with the name “bagisto.” You can pick any name you want.
sudo adduser bagisto
This prompts a password window where you can set the password. The remaining fields can be left empty by simply pressing the enter key.
Additionally, after creating a user, we will switch to a new user.
|
1 |
su - bagisto |
STEP 5: Download Bagisto by using the command below :
composer create-project bagisto/bagisto
After downloading, a directory name “bagisto” will be created inside the public HTML directory, then go to the public directory / bagisto.
It is the directory that loads index.php.
cd bagisto/public
STEP 6: Apache configuration
To support the web pages we will configure apache. So, we need to switch again to the root user for configuring apache.
|
1 2 |
exit sudo nano /etc/apache2/sites-enabled/000-default.conf |
You will find the following lines as shown below, after executing the above command.
![]()
Now, change this to :

Save it, and exit after this.
Furthermore, configure the envvars file by executing the below command :
sudo nano /etc/apache2/envvars
And find these lines :
![]()
![]()
And configure file apache2.conf by the following command :
sudo nano /etc/apache2/apache2.conf
You will find the block code as shown below :
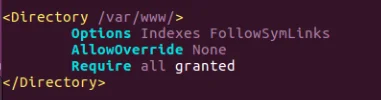
Modify it to the following code :
|
1 2 3 4 5 |
<Directory /home/bagisto/bagisto/public/> Options FollowSymLinks AllowOverride All Require all granted </Directory> |
Save the file and exit it.
STEP 7: Install the MySQL server for database creation by executing the following commands.
When prompted for a password after running the commands, simply press ENTER.
|
1 2 3 4 5 6 7 |
sudo apt-get install mysql-server sudo mysql -u root -p create database bagisto; CREATE USER 'bagistouser'@'localhost' IDENTIFIED BY 'bagisto'; GRANT ALL ON bagisto.* TO 'bagistouser'@'localhost' WITH GRANT OPTION; flush privileges; exit; |
Meanwhile, make some changes to php.ini file
|
1 |
sudo nano /etc/php/7.3/apache2/php.ini |
file_uploads = On
allow_url_fopen = On
short_open_tag = On
memory_limit = 256M
upload_max_filesize = 100M
max_execution_time = 360
date.timezone = America/Chicago
After all the above mentioned steps, please enable permission to access your Bagisto root directory as shown below:
|
1 2 3 |
sudo chmod -R 755 /home/bagisto/bagisto sudo chown -R bagisto:bagisto /home/bagisto/bagisto sudo service apache2 restart |
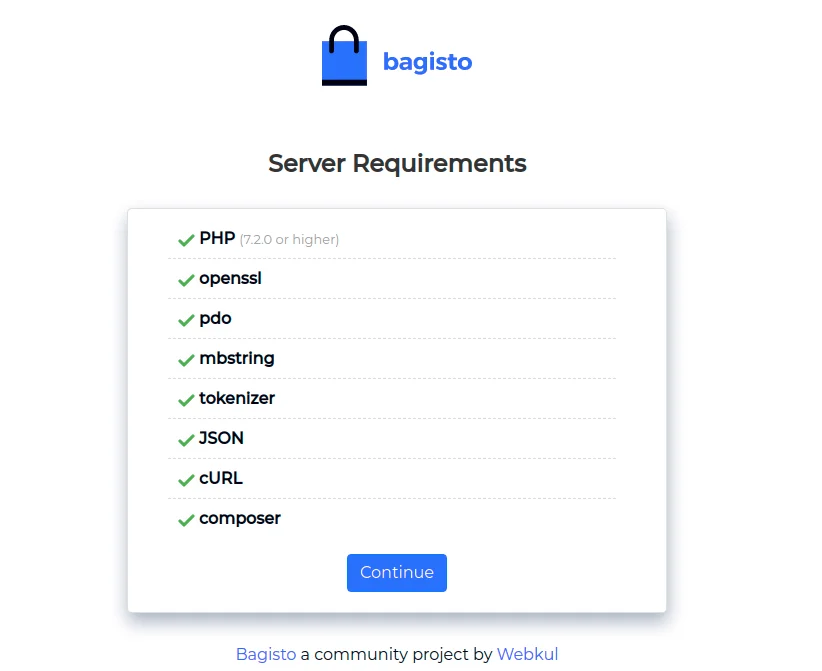
STEP 8: Bagisto configuration
After all the above steps, go to your browser and enter the IP address of your EC2 instance or domain name.
A page similar to the one below will open and then click the “continue” button.
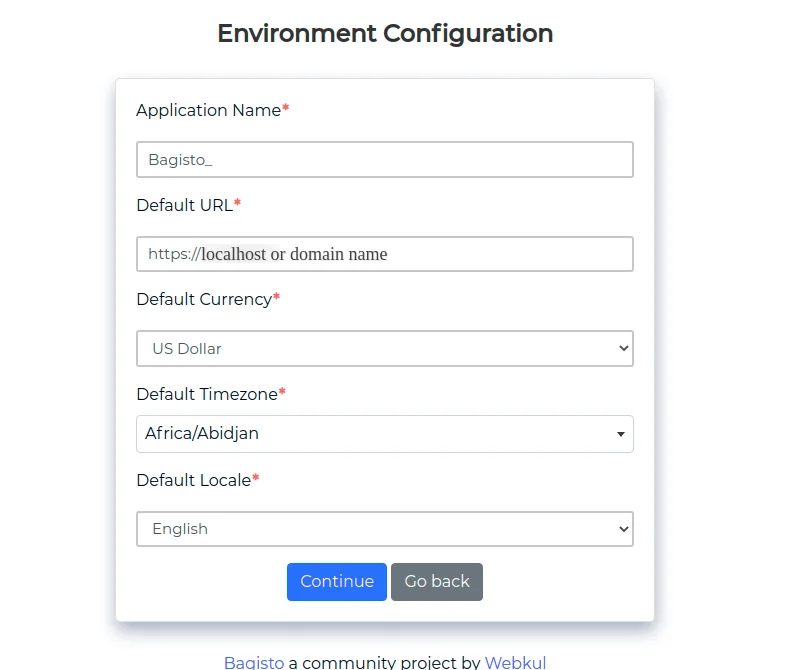
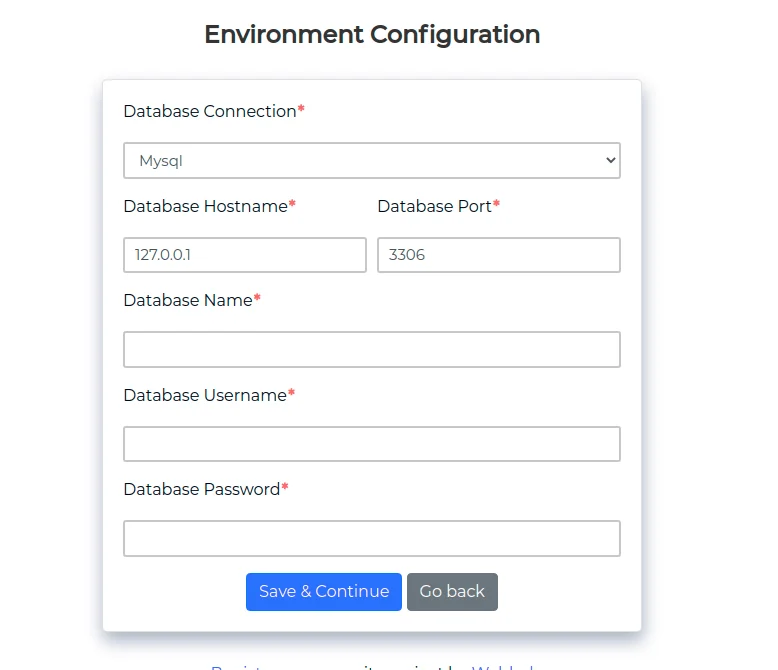
Similarly, a new Environment Configuration page will appear after selecting the “continue” option.
Then enter the details and enter the same credentials you obtain while creating a database. You can also use your domain name in the Default URL.
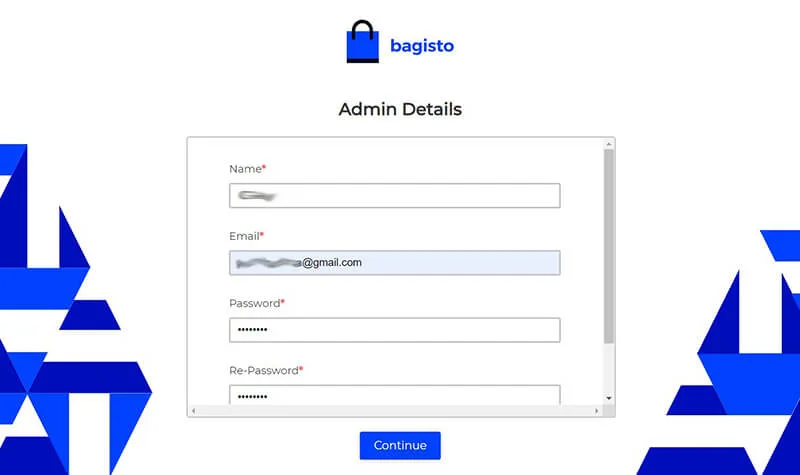
First, the front end will open after clicking Continue.
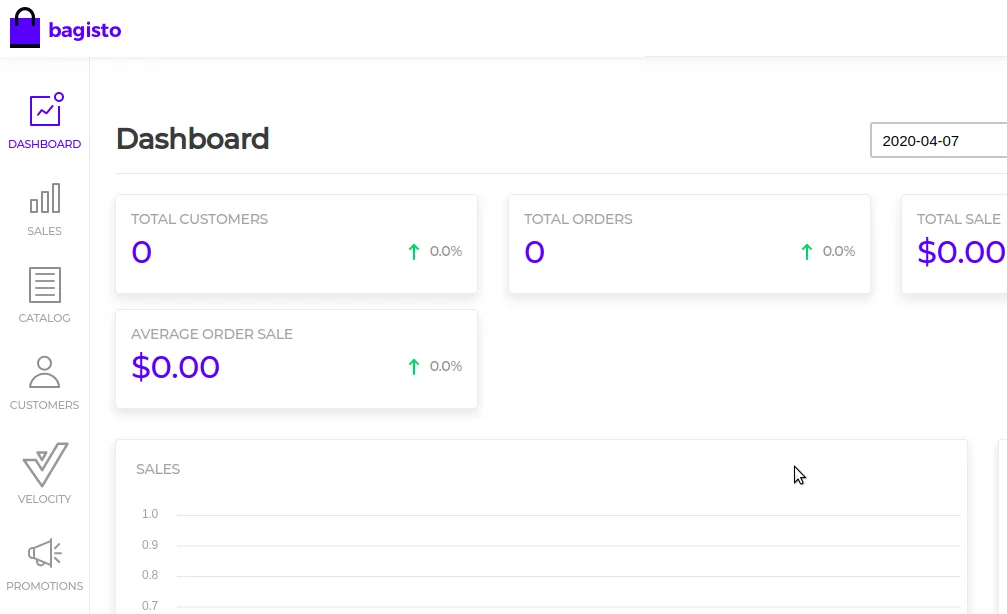
To access the dashboard, open example.com/admin to reach the admin login panel shown below.
In addition, this is what the default admin dashboard looks like.
As a result, the homepage of your default eCommerce website will be like this:

In short, your eCommerce platform is ready to use.
To know more about the Bagisto Installation on Google Cloud Platform (GCP), just click the link.
In case of any help, query, or feedback please contact us or raise a ticket.
Thank you for reading this article,
Keep in touch!!


. . .

Be the first to comment.