Transfer learning with MobileNet
In this tutorial, you will learn how to classify images of cpu, ac, and shoe using transfer learning from a pre-trained model and
we are going to use MobileNet to re-trained with our customize datasets.
we don’t need to make a model from scratch we are going to load mobilenet model which is already trained on 1000 classes of datasets.
Before we start, You should know about Transfer learning and MobileNet. Therefore, here’s a quick intro
Transfer Learning, The idea behind transfer learning is to use some pre-trained networks.
therefore we do not need to train the network from scratch for our datasets some pre-trained networks are like VGG19, MobileNet , VGG16, and more.
MobileNet is based on the CNN architecture model for image classification and mobile vision.
More models are available as well but Mobilenet is special because it consumes very little computation power to run also apply transfer learning.
that’s why mobileNet is perfect for mobile devices also best for web browsers.
MobileNet has 28 layers. standard MobileNet has 4.2 million parameters. Click here for more
Let’s begin step by step :
Step 1: you should install the dependencies first
Install and setup anaconda for Ubuntu:-
Installation:
- In your browser, download the Anaconda installer for Linux.
Open the terminal and run the command
.bash ~/Downloads/Anaconda3–2020.02–Linux–x86_64.sh(your downloaded sh filename)
Note: If you did not download to your Downloads directory, replace ~/Downloads/ with the path to the file you downloaded
- Scroll to the bottom of the license terms and enter “Yes” to agree.
- The installer prompts you to click Enter to accept the default install location, CTRL-C to cancel the installation, or specify an alternate installation directory.
- The installer prompts “Do you wish the installer to initialize Anaconda3 by running conda init?” We recommend “yes”.
- The installer finishes and displays “Thank you for installing Anaconda!”
Setup :
Create environment: conda create –name myenv or conda create -n myenv
Activate env: conda activate myenv
Deactivate env: conda deactivate
Env list : conda env list
Install other dependencies :
|
1 2 3 4 5 |
conda install Python==3.8.5 #(create env with specific python version : conda create -n myenv python==2.e) conda install tensorflow==2.2.0 conda install opencv-python==4.5.1.48 conda install Keras==2.4.3 |
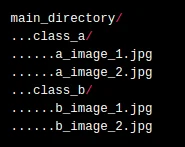
Step 2: Collect the datasets of AC, CPU, and Shoe from google and save them in different-2 folders with a folder named AC, CPU, and Shoe under a single folder named as datasets. like this
Step 3: It’s time for coding :
Import the packages save as model.py
|
1 2 3 4 5 6 7 8 9 10 11 12 13 14 15 16 17 18 19 |
import keras from keras import backend as K from keras.layers.core import Dense, Activation from keras.optimizers import Adam from keras.metrics import categorical_crossentropy from keras.preprocessing.image import ImageDataGenerator from keras.preprocessing import image from keras.models import Model from keras.applications import imagenet_utils from keras.layers import Dense,GlobalAveragePooling2D from keras.applications import MobileNet from keras.applications.mobilenet import preprocess_input import numpy as np from IPython.display import Image from keras.optimizers import Adam import tensorboard from datetime import datetime from packaging import version from tensorflow import keras |
Load the Mobilenet model
|
1 2 3 |
mobile = keras.applications.mobilenet.MobileNet() print(mobile.summary()) print("model loaded") |
Freeze the base layers and let’s add and train the top layer.
|
1 2 3 4 5 |
x = mobile.layers[-6].output output = Dense(units=3, activation='softmax')(x) model = Model(inputs=mobile.input, outputs=output) for layer in model.layers[:-5]: layer.trainable = False #disable the last 5 layers for customise according to our recruitment |
this is the layer that we added above
![]()
Now let’s load the training data into the ImageDataGenerator.
Specify a path, and it automatically sends the data for training in batches,
simplifying the code.flow_from_directory is a function of ImageDataGenerator_to read
the images from a big NumPy array and folders containing images.
Calling flow_from_directory(main_directory, labels='inferred')
will return a tf.data.Dataset that yields batches of images from the subdirectories
'AC','CPU' and 'Shoe' together with labels 0, 1, and 2 (0 correspondings to 'AC', 1 corresponding to 'CPU' and 2 correspondings to 'Shoe').
Here are the most used attributes along with the flow_from_directory() method.
- The directory must be set to the path where your ‘n’ classes of folders are present.
- The target_size is the size of your input images, every image will be resized to this size.
- color_mode: if the image is either black and white or grayscale set “grayscale” or if the image has three color channels, set “RGB”.
- batch_size: No. of images to be yielded from the generator per batch.
- class_mode: Set “binary” if you have only two classes to predict, if not set to“categorical”, in case if you’re developing an Autoencoder system, both input and the output would probably be the same image, for this case set to “input”.
- shuffle: Set True if you want to shuffle the order of the image that is being yielded, else set False.
|
1 2 3 4 5 6 7 8 |
train_datagen=ImageDataGenerator(preprocessing_function=preprocess_input) #included in our dependencies train_generator=train_datagen.flow_from_directory('dataset/dataset_show', #path of dataset folder target_size=(224,224), color_mode='rgb', batch_size=32, class_mode='categorical', shuffle=True) |
If you are training a much larger model and want to pre-trained weights so it is important to use a lower learning rate at this stage.
or your model could over-fit very quickly.
Adam is a replacement optimization algorithm and it is usefull for stochastic gradient descent for training deep learning models.
|
1 |
model.compile(optimizer='Adam',loss='categorical_crossentropy',metrics=['accuracy']) |
Train the model with our datasets
|
1 2 3 4 |
step_size_train=train_generator.n//train_generator.batch_size model.fit_generator(generator=train_generator, steps_per_epoch=step_size_train, epochs=10) |
Save the model and their weights as h5 file
|
1 2 |
model.save_weights("model_weights.h5") model.save('model.h5') |
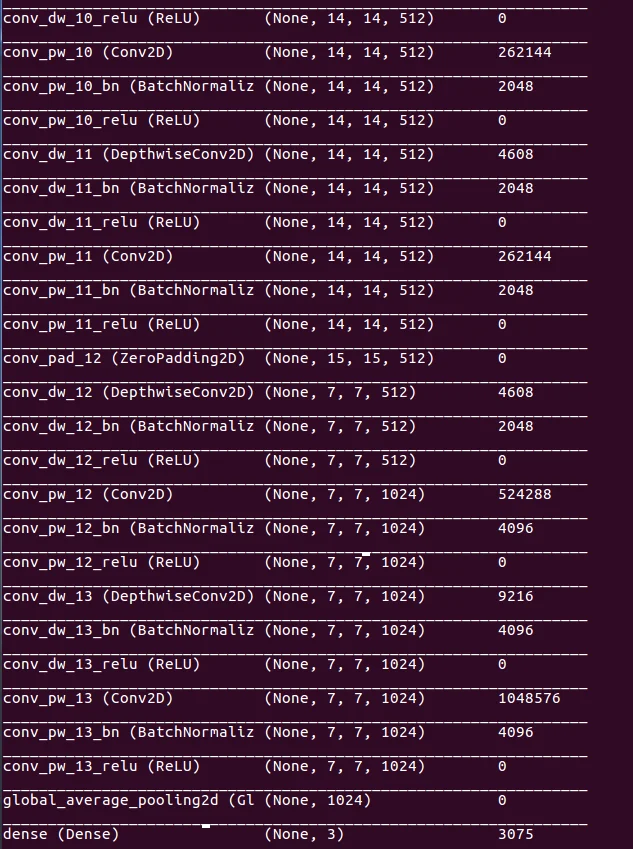
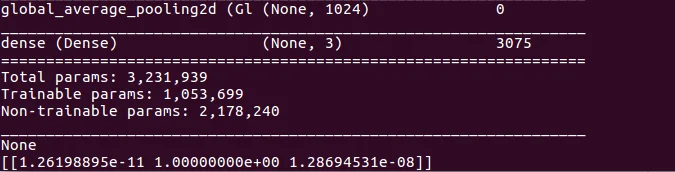
After that, you can also See the model architecture
|
1 |
print(model.summary()) |
Load image for testing on the terminal and print the prediction value.
before the test of the image, we have to pre-process the image according to the image size, which was we use at training time.
|
1 2 3 4 5 6 7 8 9 10 11 12 13 14 15 16 |
def load_image(img_path, show=False): img = image.load_img(img_path, target_size=(224, 224)) # print(img) img_tensor = image.img_to_array(img) # (height, width, channels) img_tensor = np.expand_dims(img_tensor, axis=0) # (1, height, width, channels), add a dimension because the model expects this shape: (batch_size, height, width, channels) # print(img_tensor) img_tensor /= 255. # imshow expects values in the range [0, 1] # print(img_tensor) if show: plt.imshow(img_tensor[0]) plt.axis('off') plt.show() return img_tensor |
|
1 2 3 4 5 6 |
img_path = 'test1.jpg' new_image = load_image(img_path) pred = model.predict(new_image) print(pred) |
Okay so the model saved in the .h5 extension and we need a .json model for browser use so that we have to convert our h5 format model into a JSON formate model.
therefore here is the code to convert the model file format you must run this command on the terminal inside the directory.
|
1 2 3 4 5 |
tensorflowjs_converter \ --input_format=keras \ --output_format=tfjs_layers_model \ model.h5 \ # folder path where .h5 model stored json_model # folder name where .json model will be store |
Step 4: It’s time to run or test the model on the browser
- Git clone https://github.com/tensorflow/tfjs-examples.git (clone this project and follow the README to run this project ) -> goto the mobilenet folder -> goto the dist folder -> copy here the folder where the JSON model was saved
- Note: to avoid the error of the Functional layer we have to replace the “Functional” keyword with “Model” in the model.json file.
- Open the index.js file and replace the MOBILENET_MODEL_PATH value from your folder path where the model is.
- Also, you have to create an imagenet_classes.js file like this

- Change the topk=3 ( because we are using three classes as I mentioned before ) value in index.js
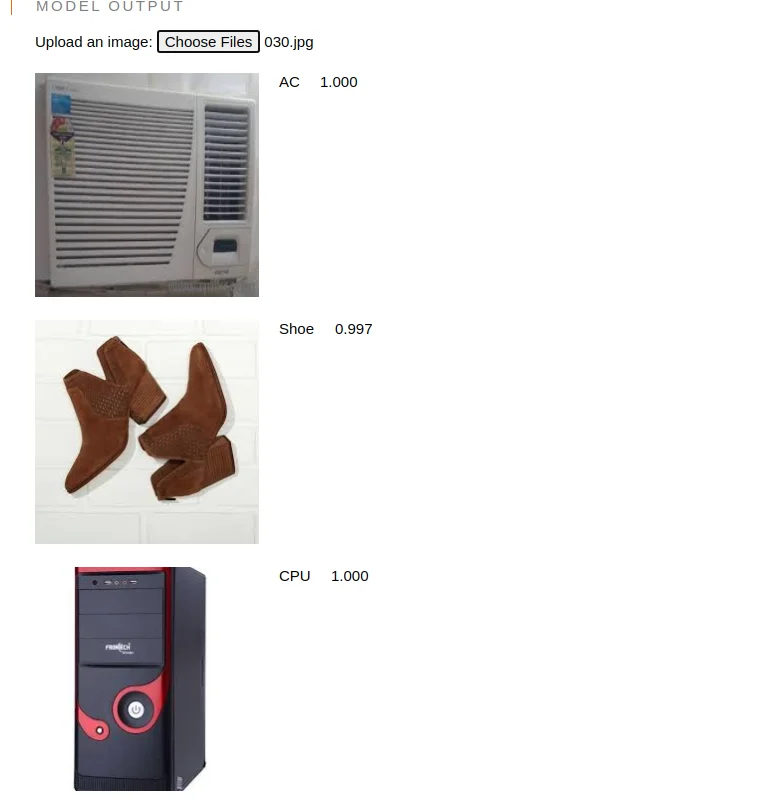
- Now you can run the project by “npm run watch” and browse your image which you wanna test and see the prediction.
Here is my output

I hope this blog will help you to make understanding about transfer learning with mobileNet .
Feel free to comment if any problem or for any suggestions. For more such blogs click here. Thank You
Reference Links :
- https://github.com/tensorflow/tfjs-examples.git
- https://medium.com/analytics-vidhya/image-classification-using-mobilenet-in-the-browser-b69f2f57abf


Be the first to comment.