Introduction
We’ve also included the functionality to set an expiration header.
Amazon S3 (Simple Storage Service) is a cloud storage service offered by AWS (Amazon Web Services).
Note:
- A customer must have an Amazon AWS account to access the Amazon S3 services. From this link, users would be able to register here.
- To understand how to get started with Amazon S3, just click here.
Features
- Support all Bagisto product types.
- Additionally, the Amazon Simple Storage Service (Amazon S3) bucket stores and retrieves all media files for all types of products (such as product images, media in the product description, short description, editing images, and so on).
- Moreover, flexible settings to configure the module settings.
- Store and retrieve the files from Amazon S3 Server.
- Customers can download the files from the Amazon Server irrespective of time and place.
- Now serving of cache images will be from Amazon S3 Server.
- One can save Static files on the Amazon S3 server.
- Set expire header for cache files.
Requirement
Bagisto: v1.3.1.
Installation
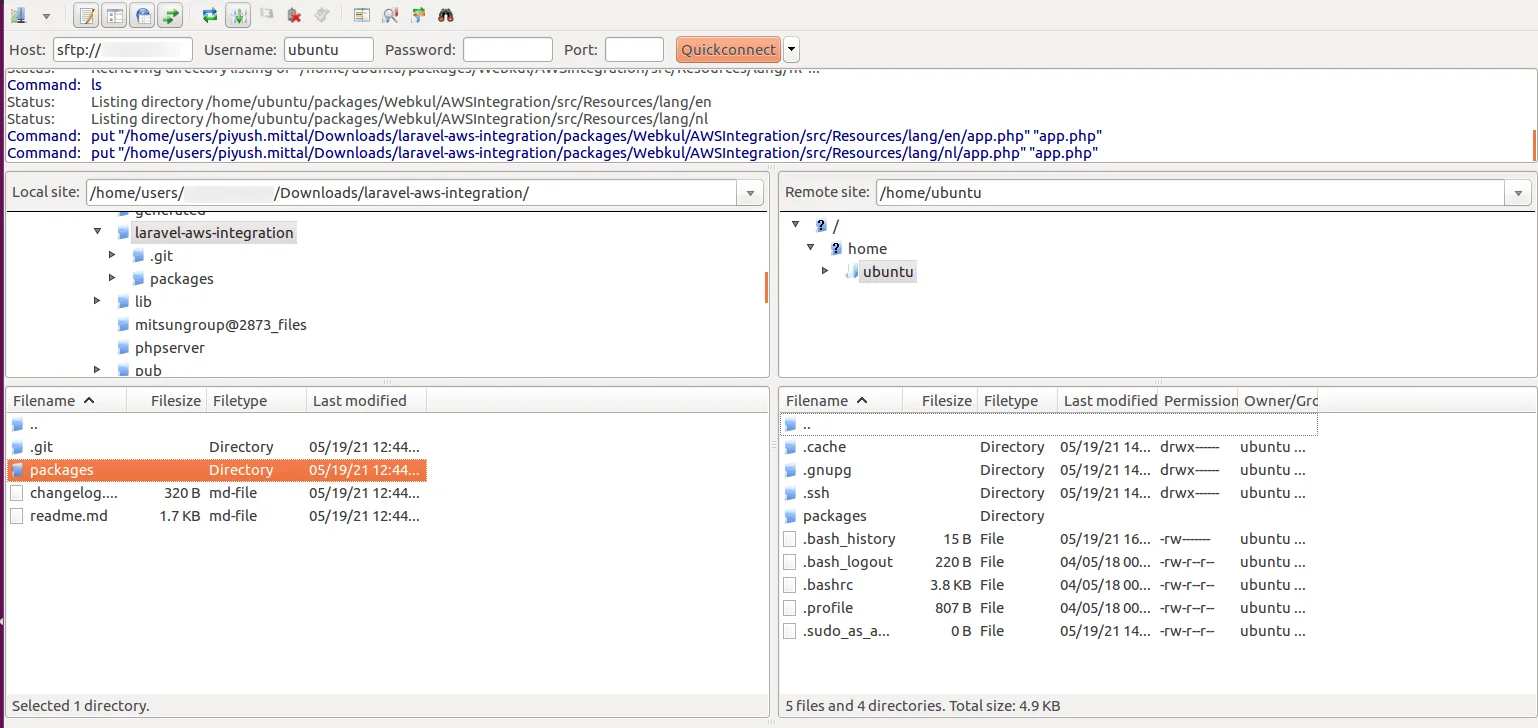
Unzip the respective extension zip and then merge “packages” folders into the project root directory.
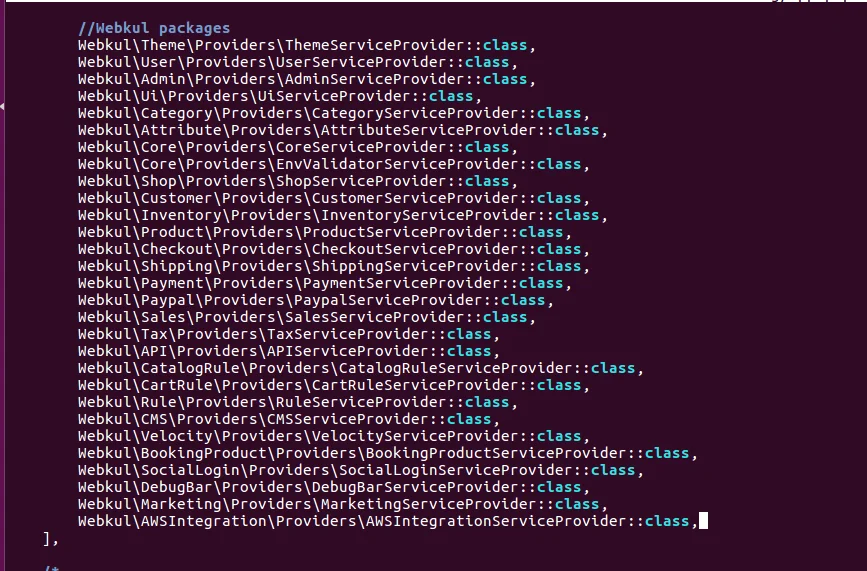
Go to the config/app.php file and add the following line under ‘providers’
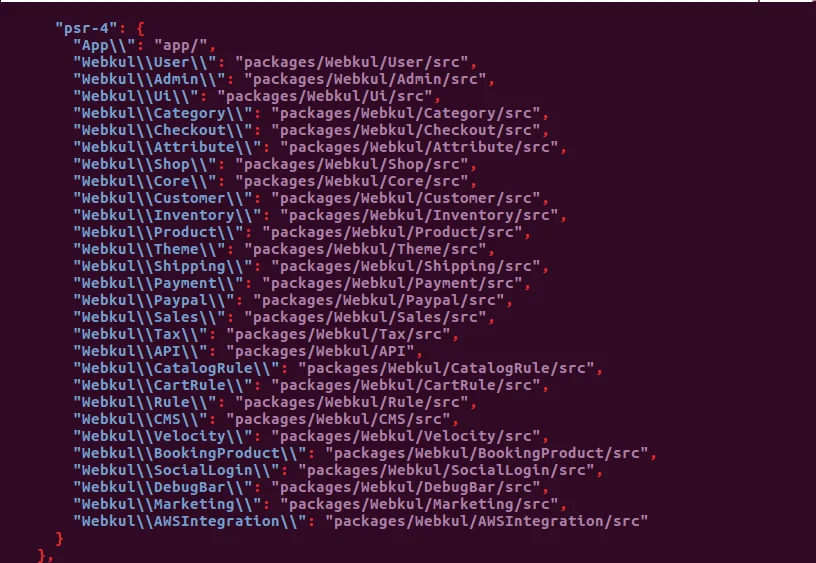
Go to the composer.json file and add the following line under ‘psr-4’
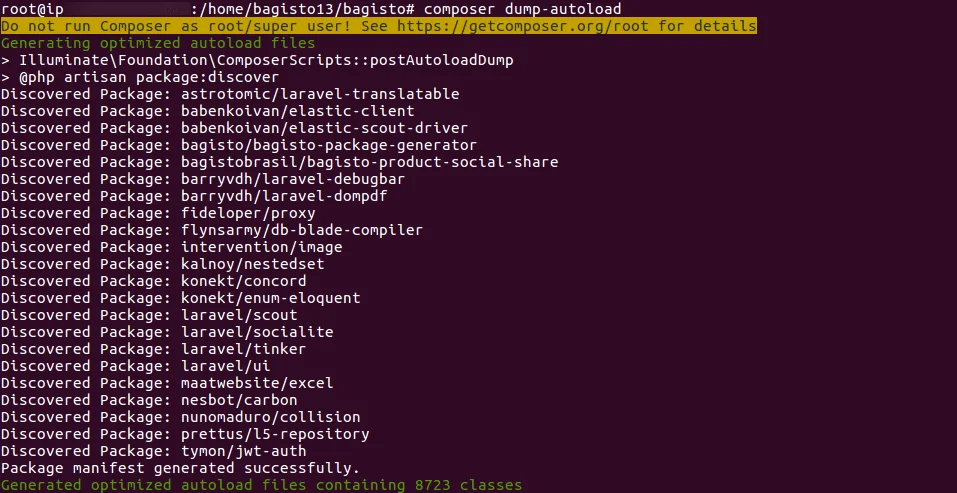
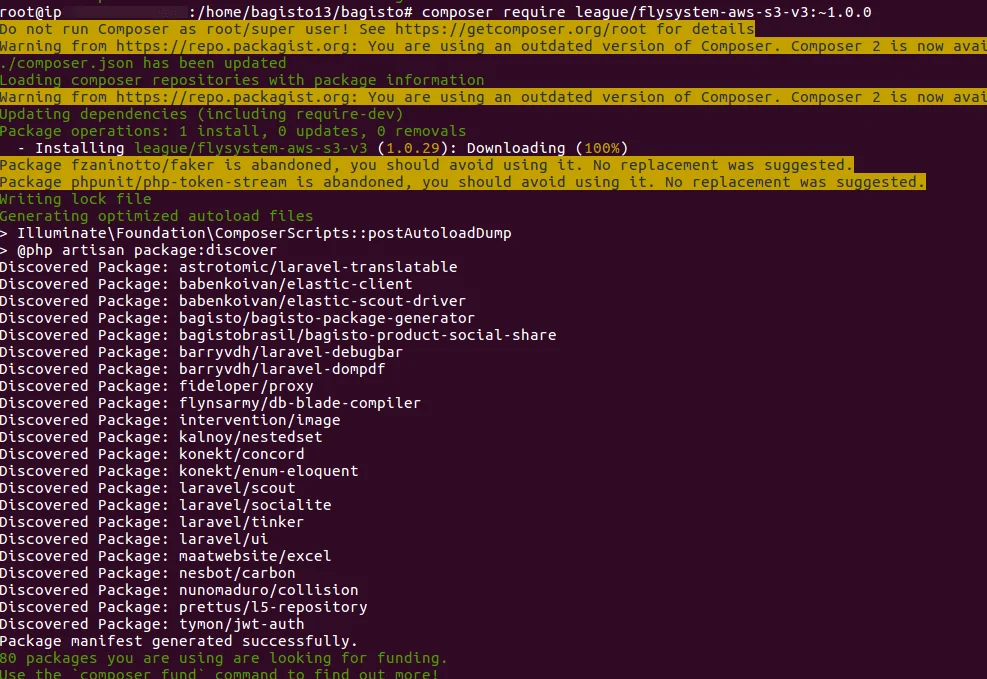
To complete the setup, run the commands mentioned below:
|
1 |
composer dump-autoload |
|
1 |
composer require league/flysystem-aws-s3-v3:~1.0.0 |
|
1 |
php artisan config:cache |

|
1 |
php artisan route:cache |

That’s it, now just execute the project on your specified domain.
Setting Up Amazon S3 Server Credentials
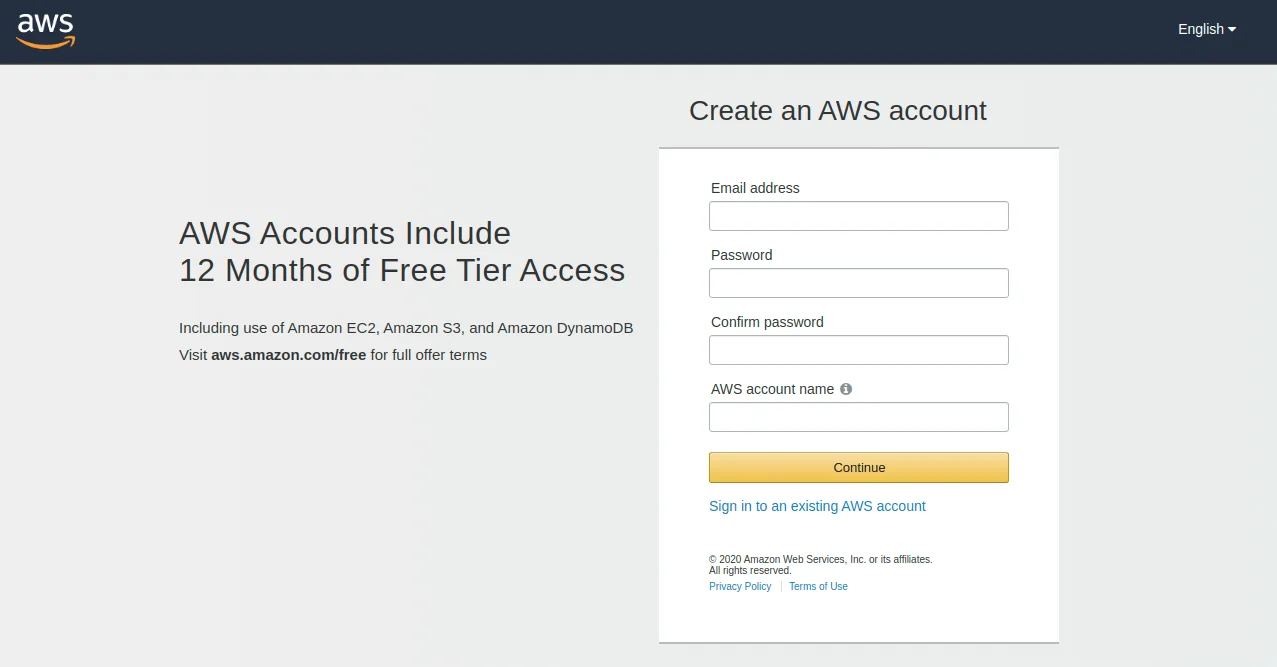
(i) To start with, create a new AWS account by using Sign-up.
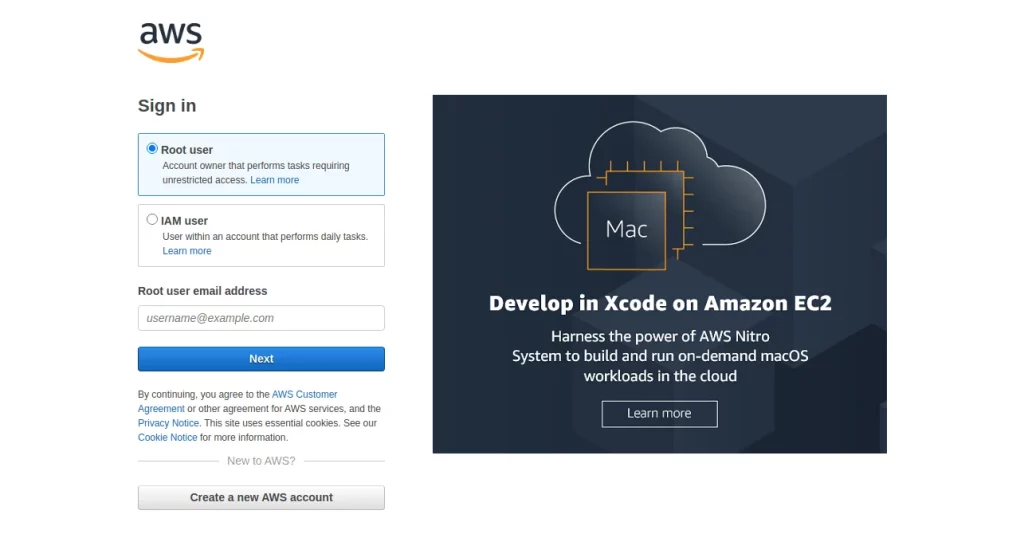
(ii) And then log in to your AWS account by Sign-in.
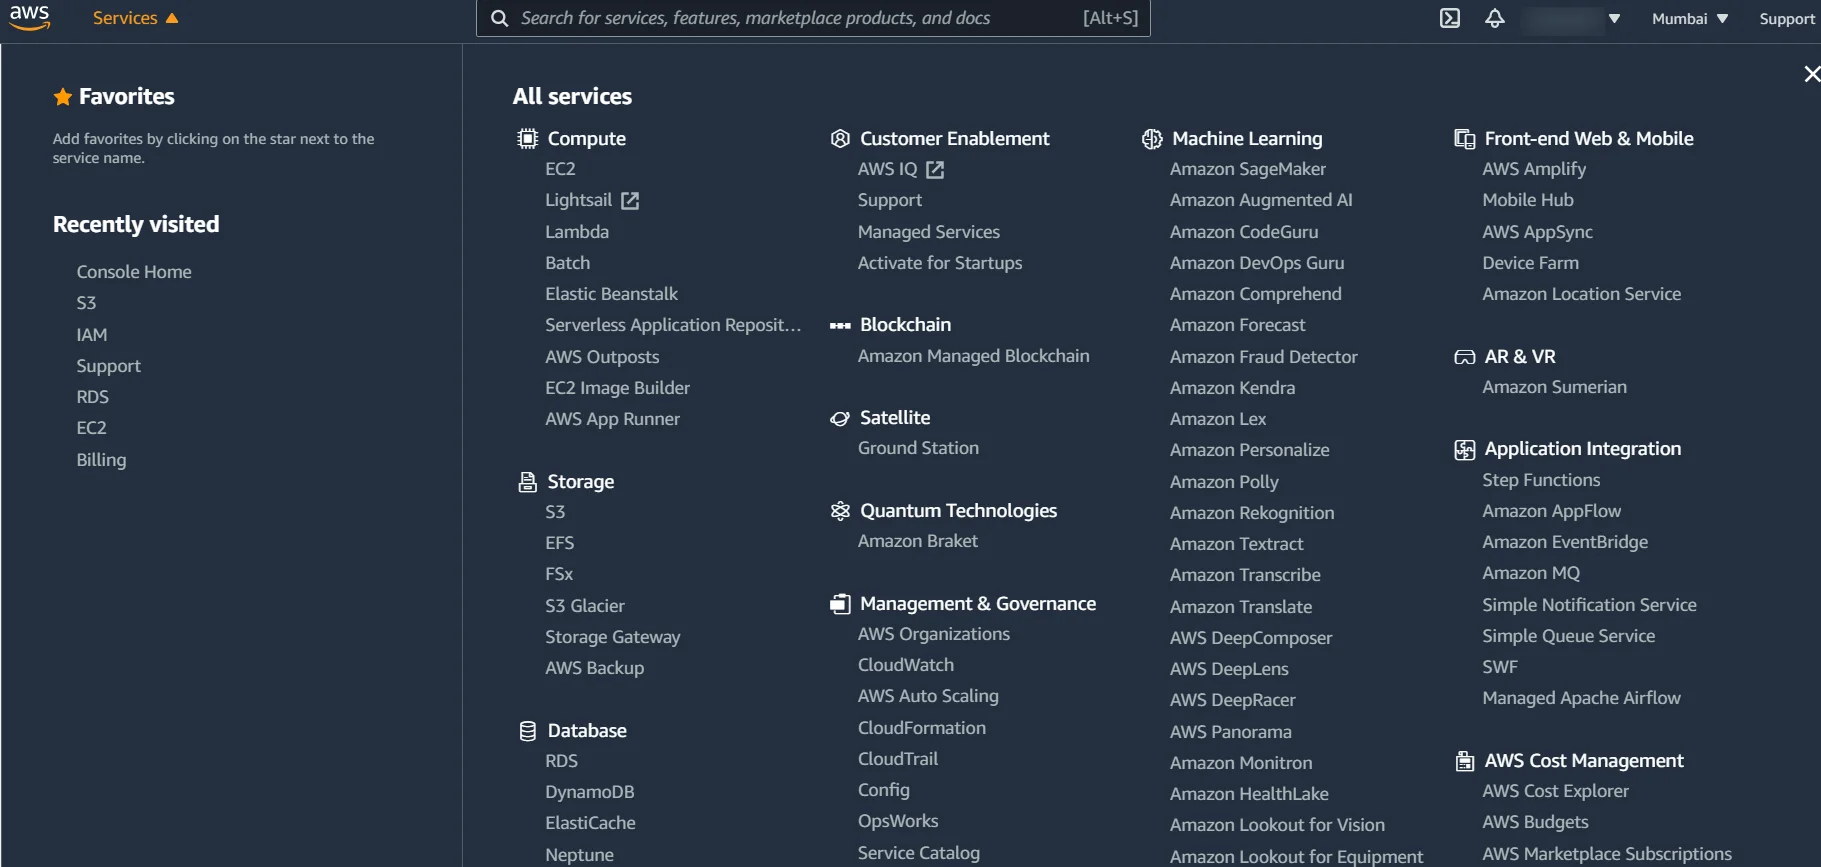
(iii) After your account has been successfully created, select the S3 among the available AWS services or you can search for an S3 service in the search box.
(iv) This will take you to a page where you can view your created buckets or create a new bucket.
To create a new bucket, choose to create a bucket from the drop-down menu.
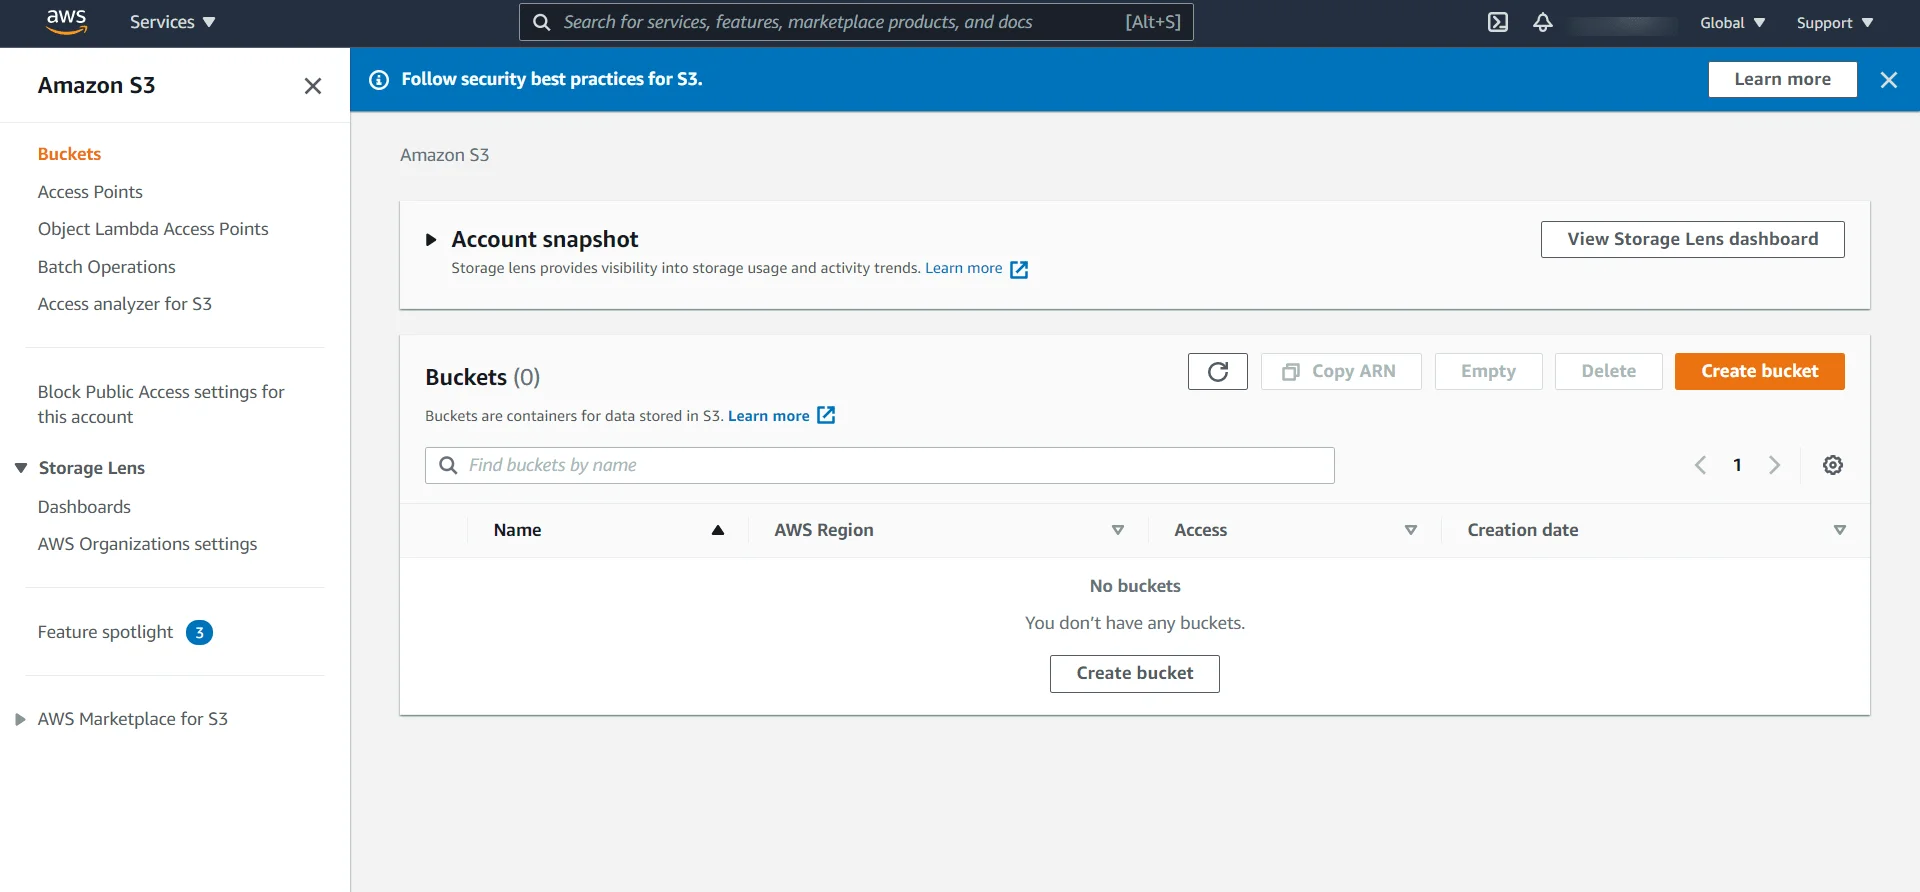
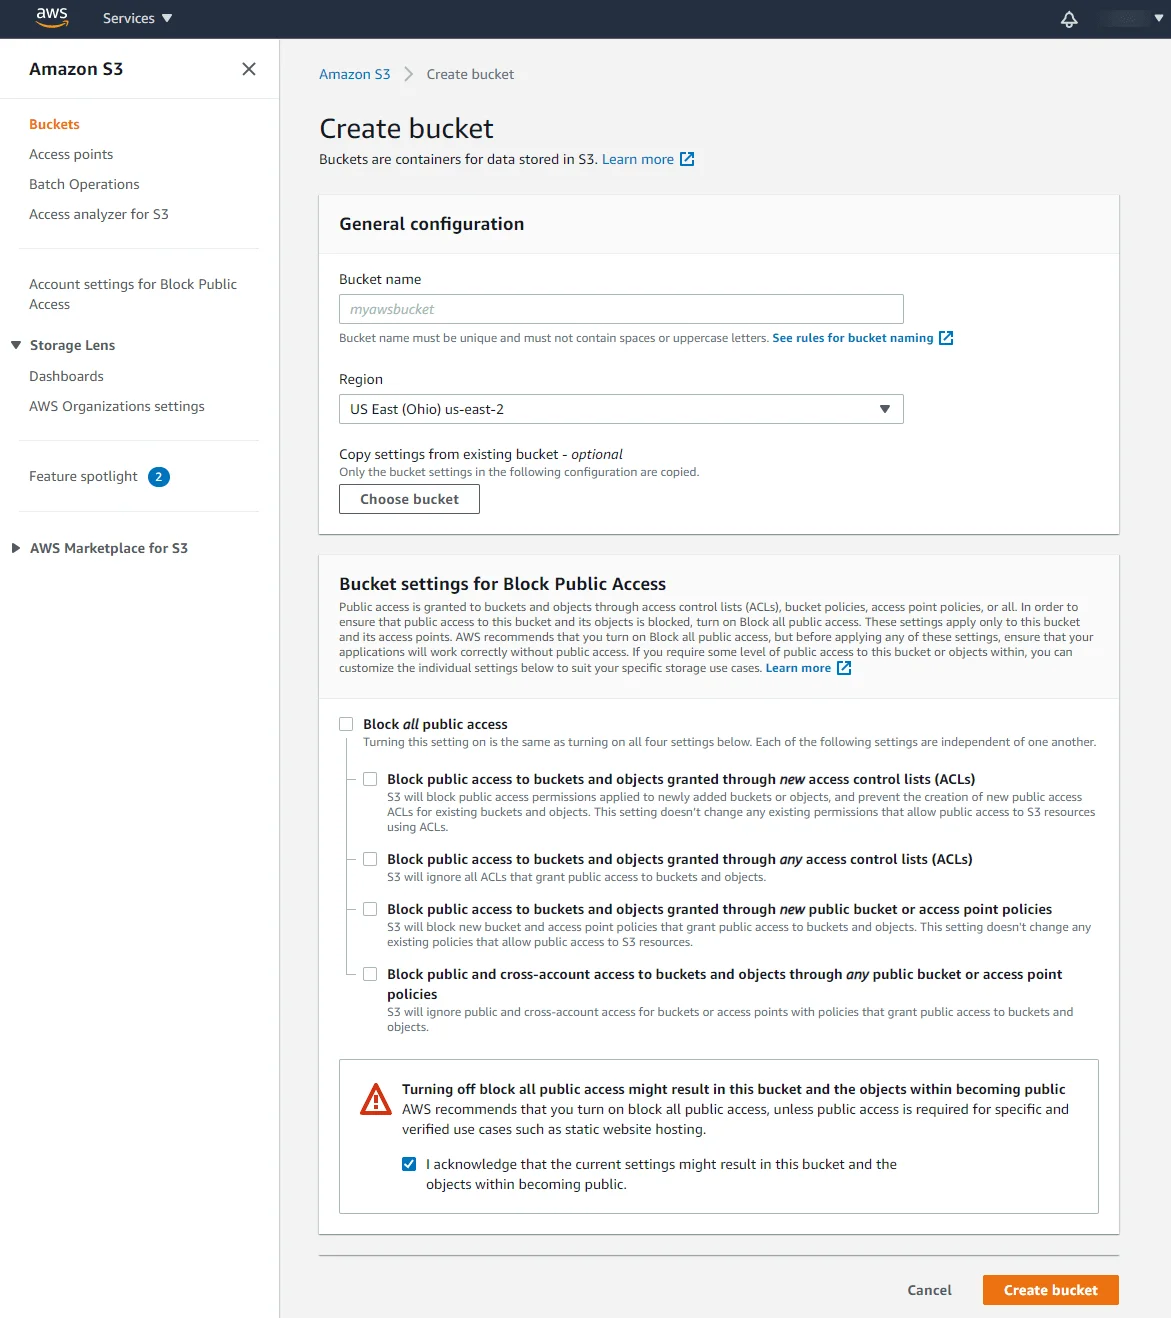
Then, at the bottom, press Create bucket.
Note:- Make sure to uncheck the “Block all public access”.
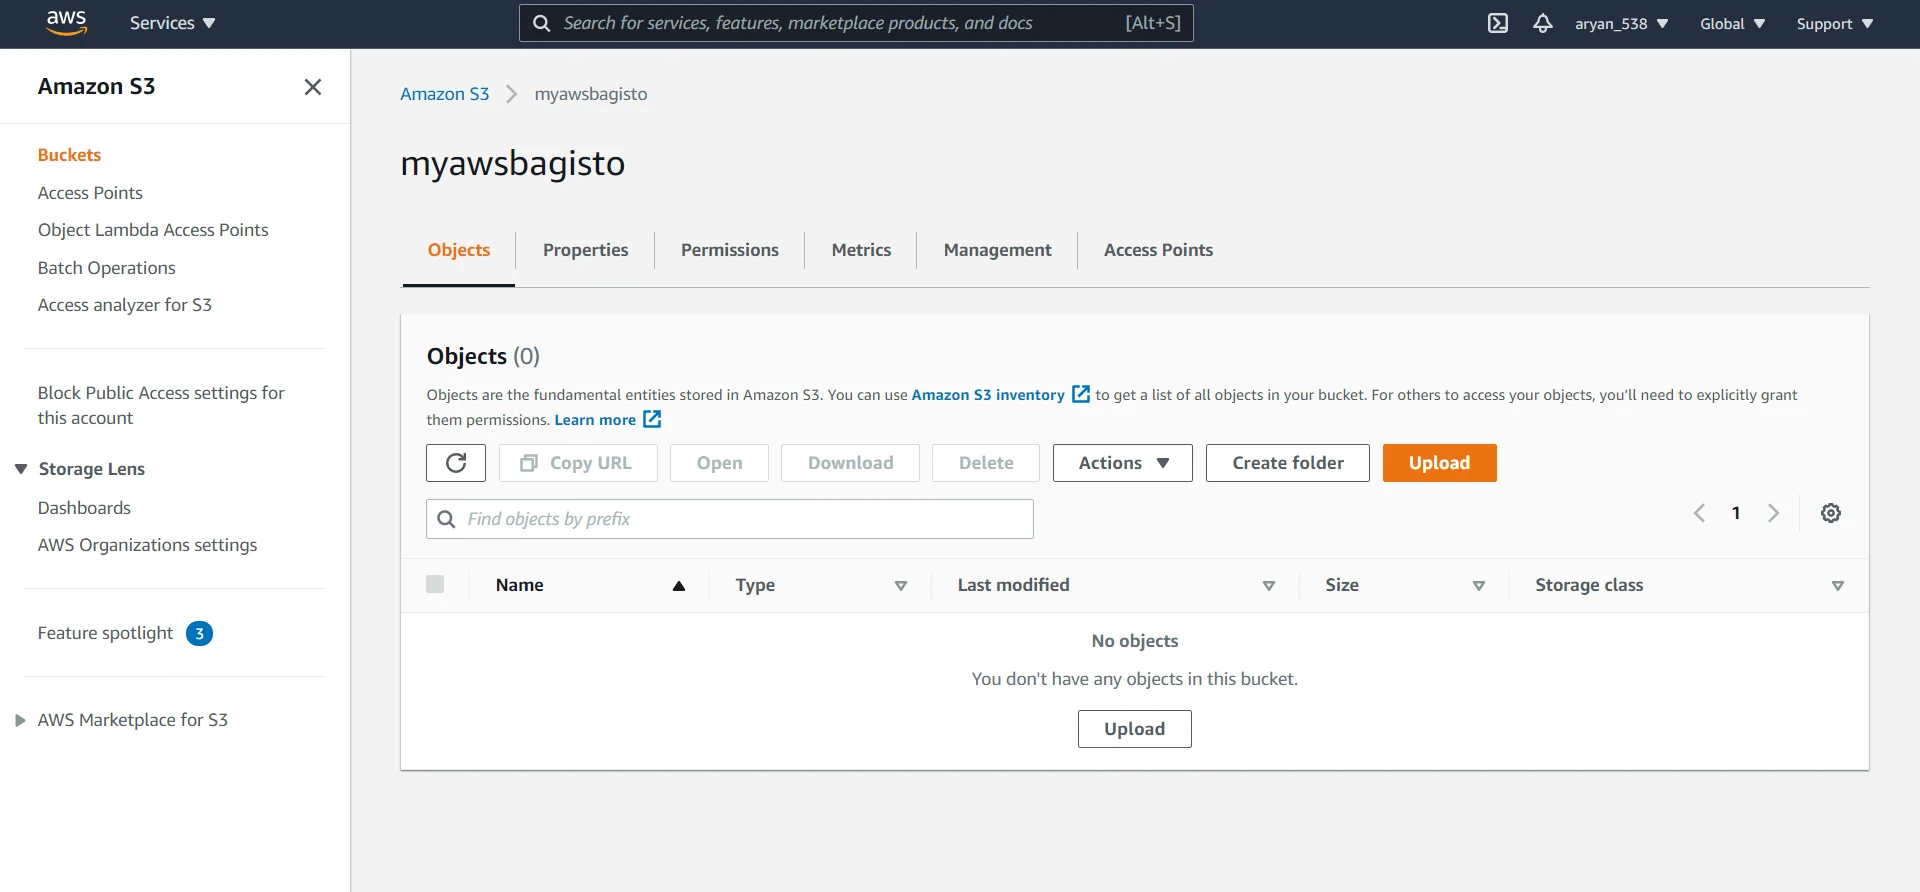
(vi) Here you can upload the files and create a folder to save the data. Also, you can view the saved data.
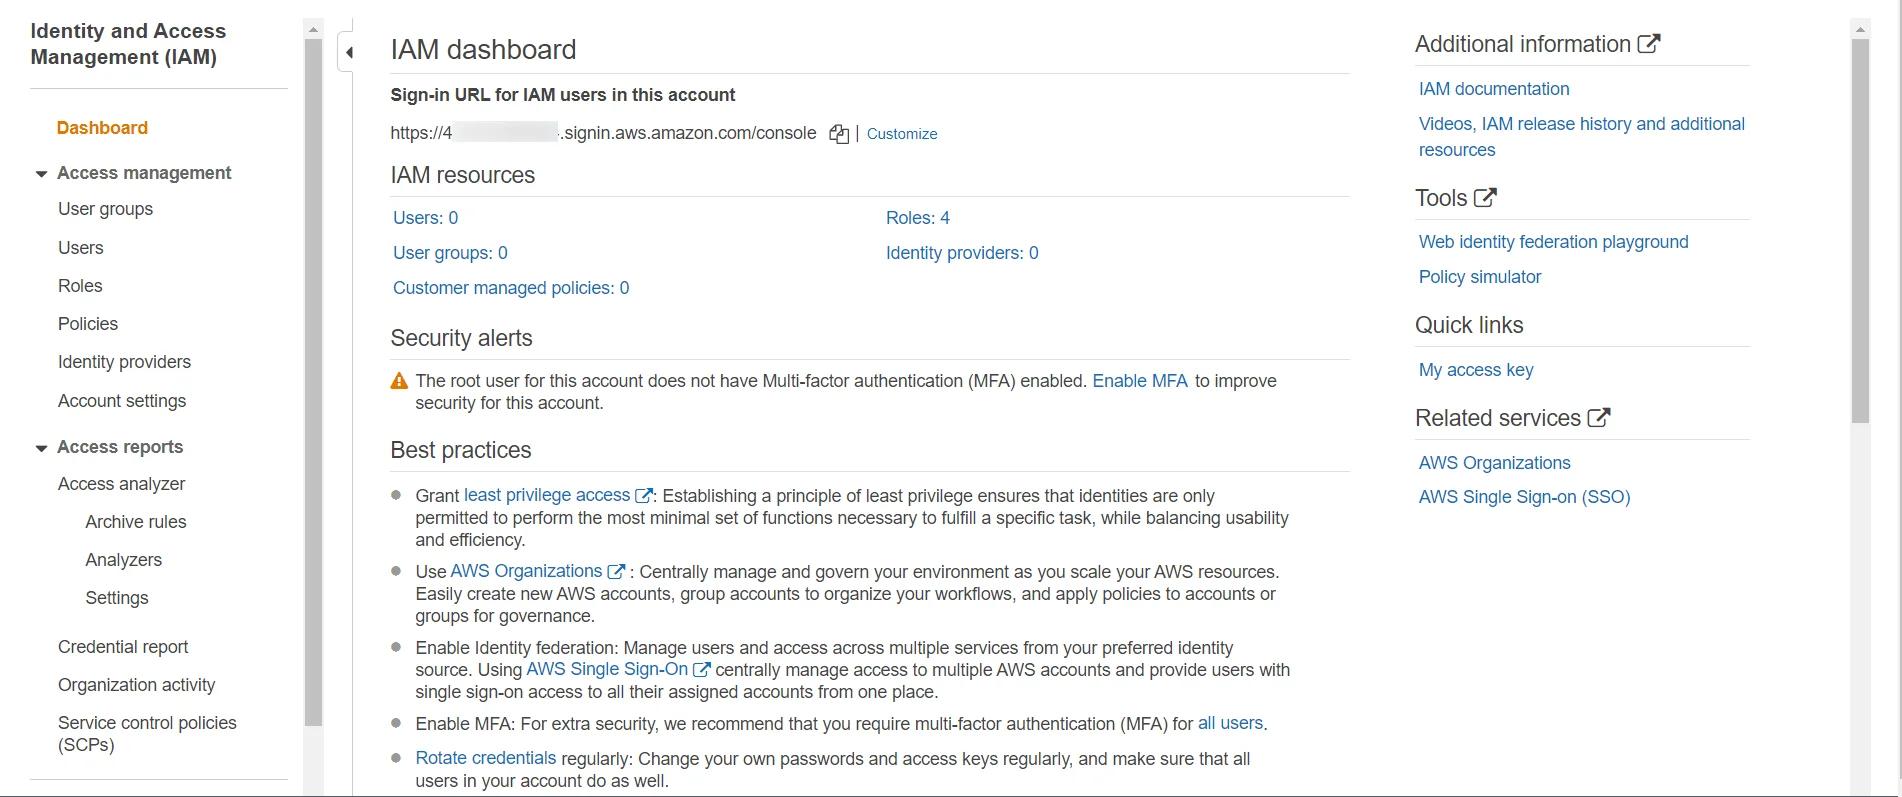
(vii) Click IAM under Security, Identity & Compliance to create an access key ID and a secret access key.

(viii) Click Users in the IAM dashboard to view and delete existing users, as well as add a new one.
- After that, you’ll be taken to a new page with Add, and Delete users options.
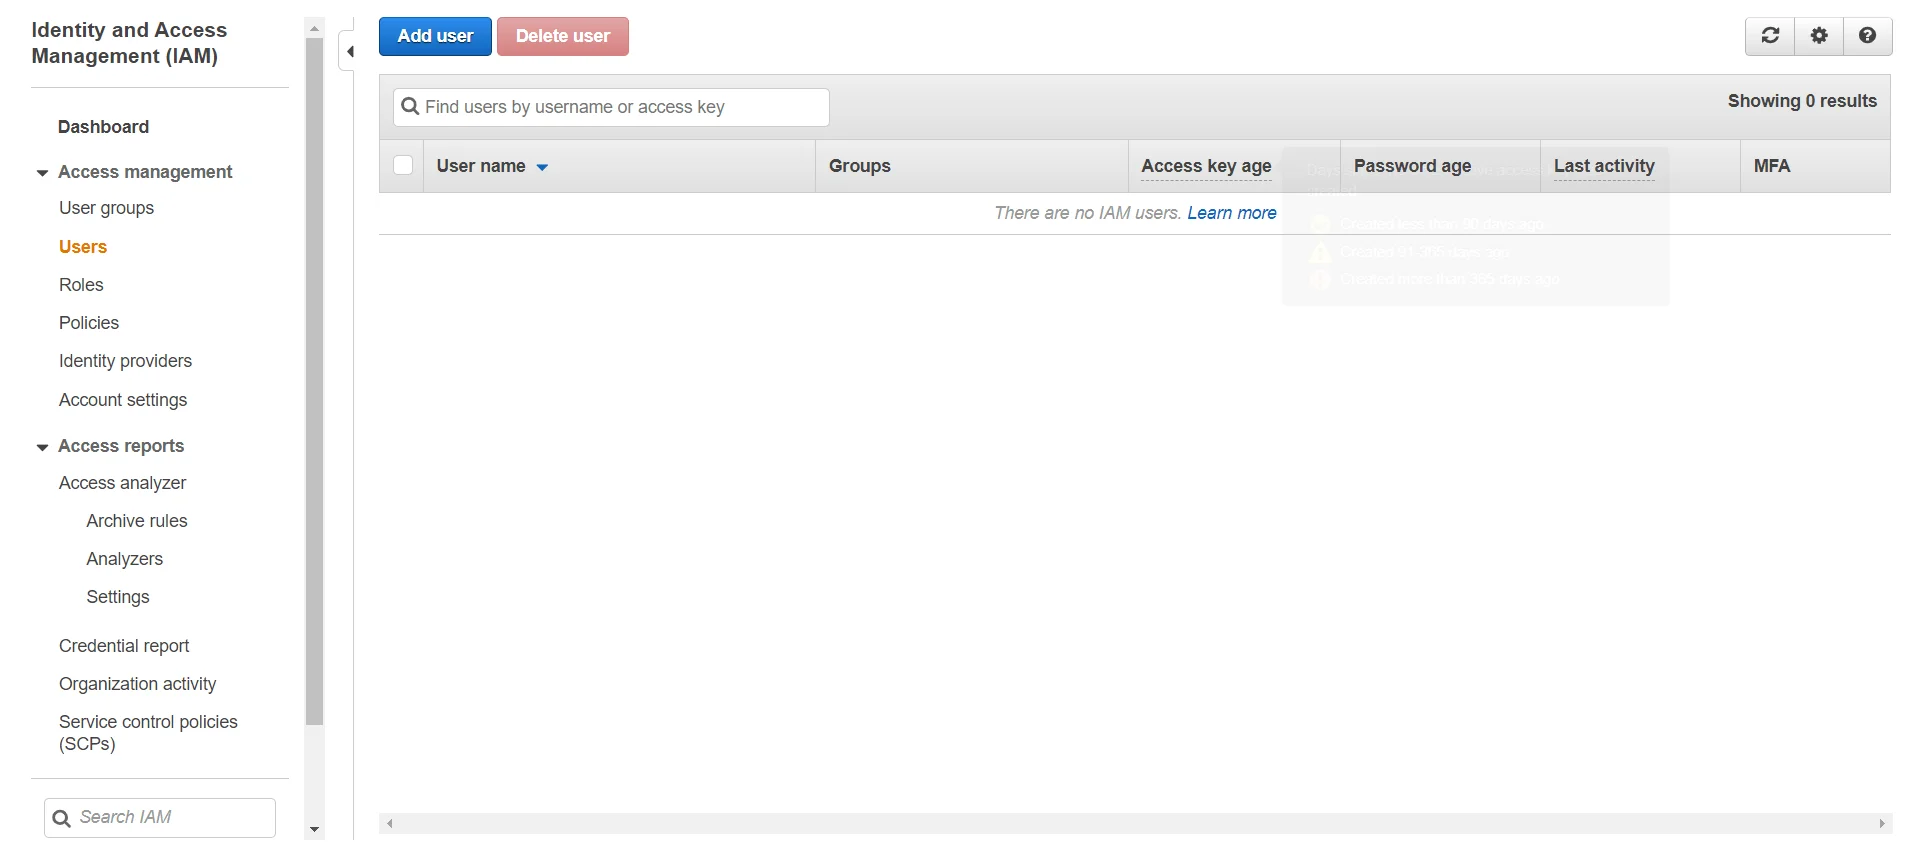
- Enter your IAM Username.
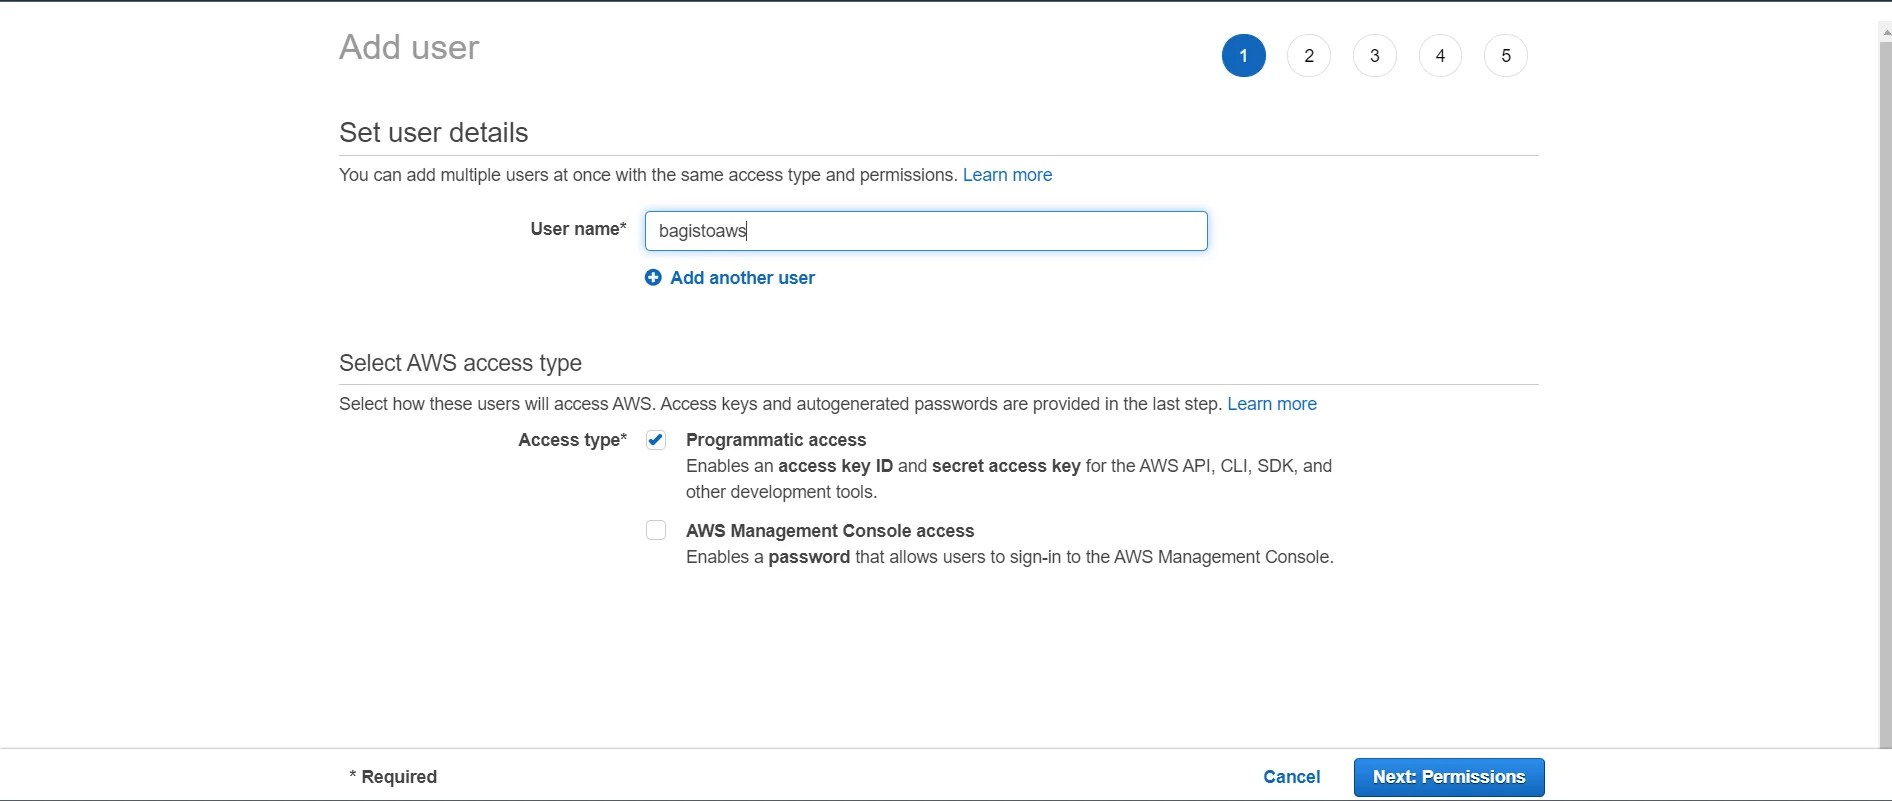
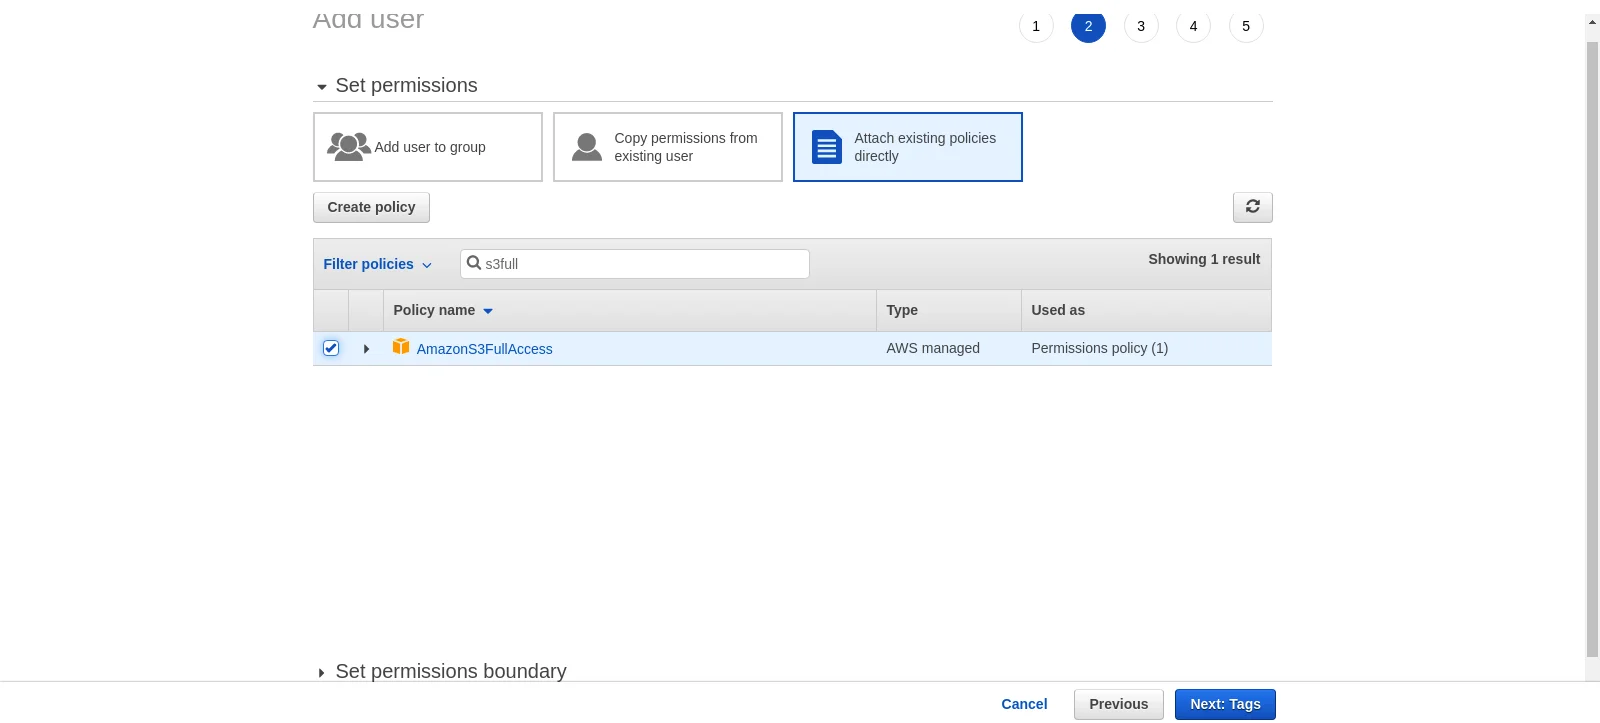
- Click on the next and then attach existing policies directly.
- After that, search for Amazon S3 Full Access, check the box.
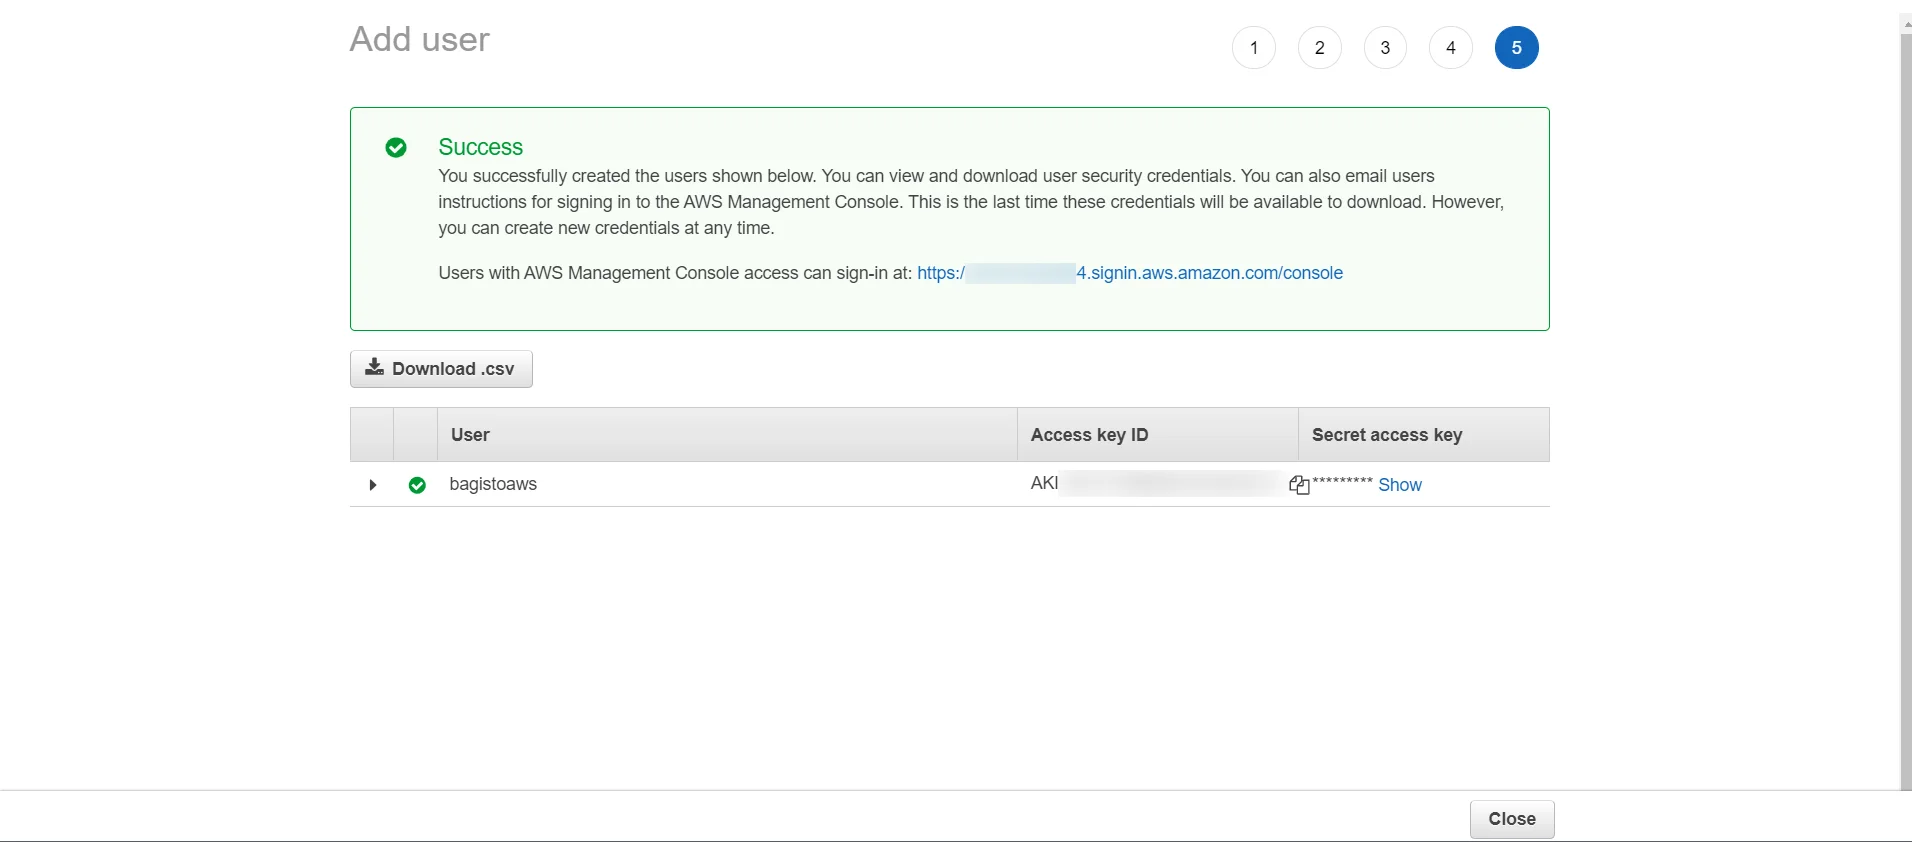
- Press two times next, and then click Create User.

- You’ll see a success message page with your security credentials for the newly developed user.
Note:
- Please be ensure that you have Amazon S3 Full Access to allow Read and Write access to an object in an S3 bucket and additional permissions for console access.
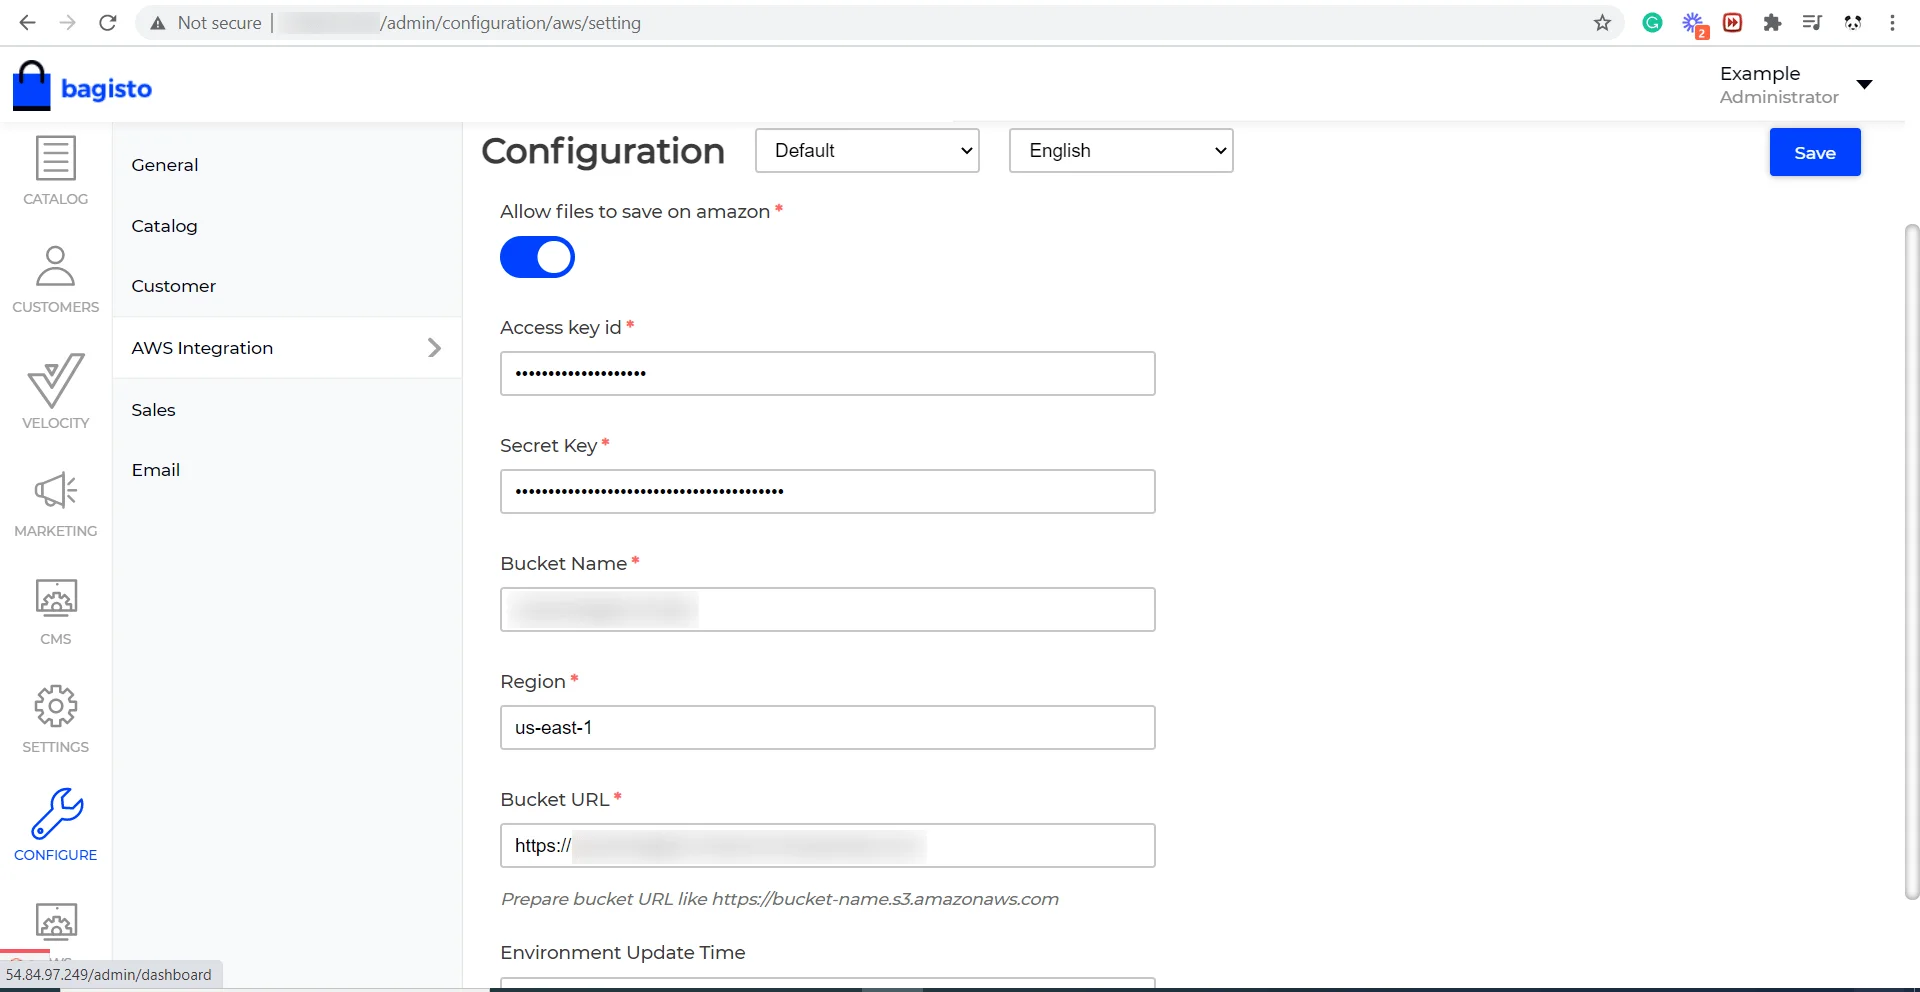
Amazon S3 Extension Configuration
The admin can customize the module settings after installing the extension by going to Configure > AWS Integration as seen below:
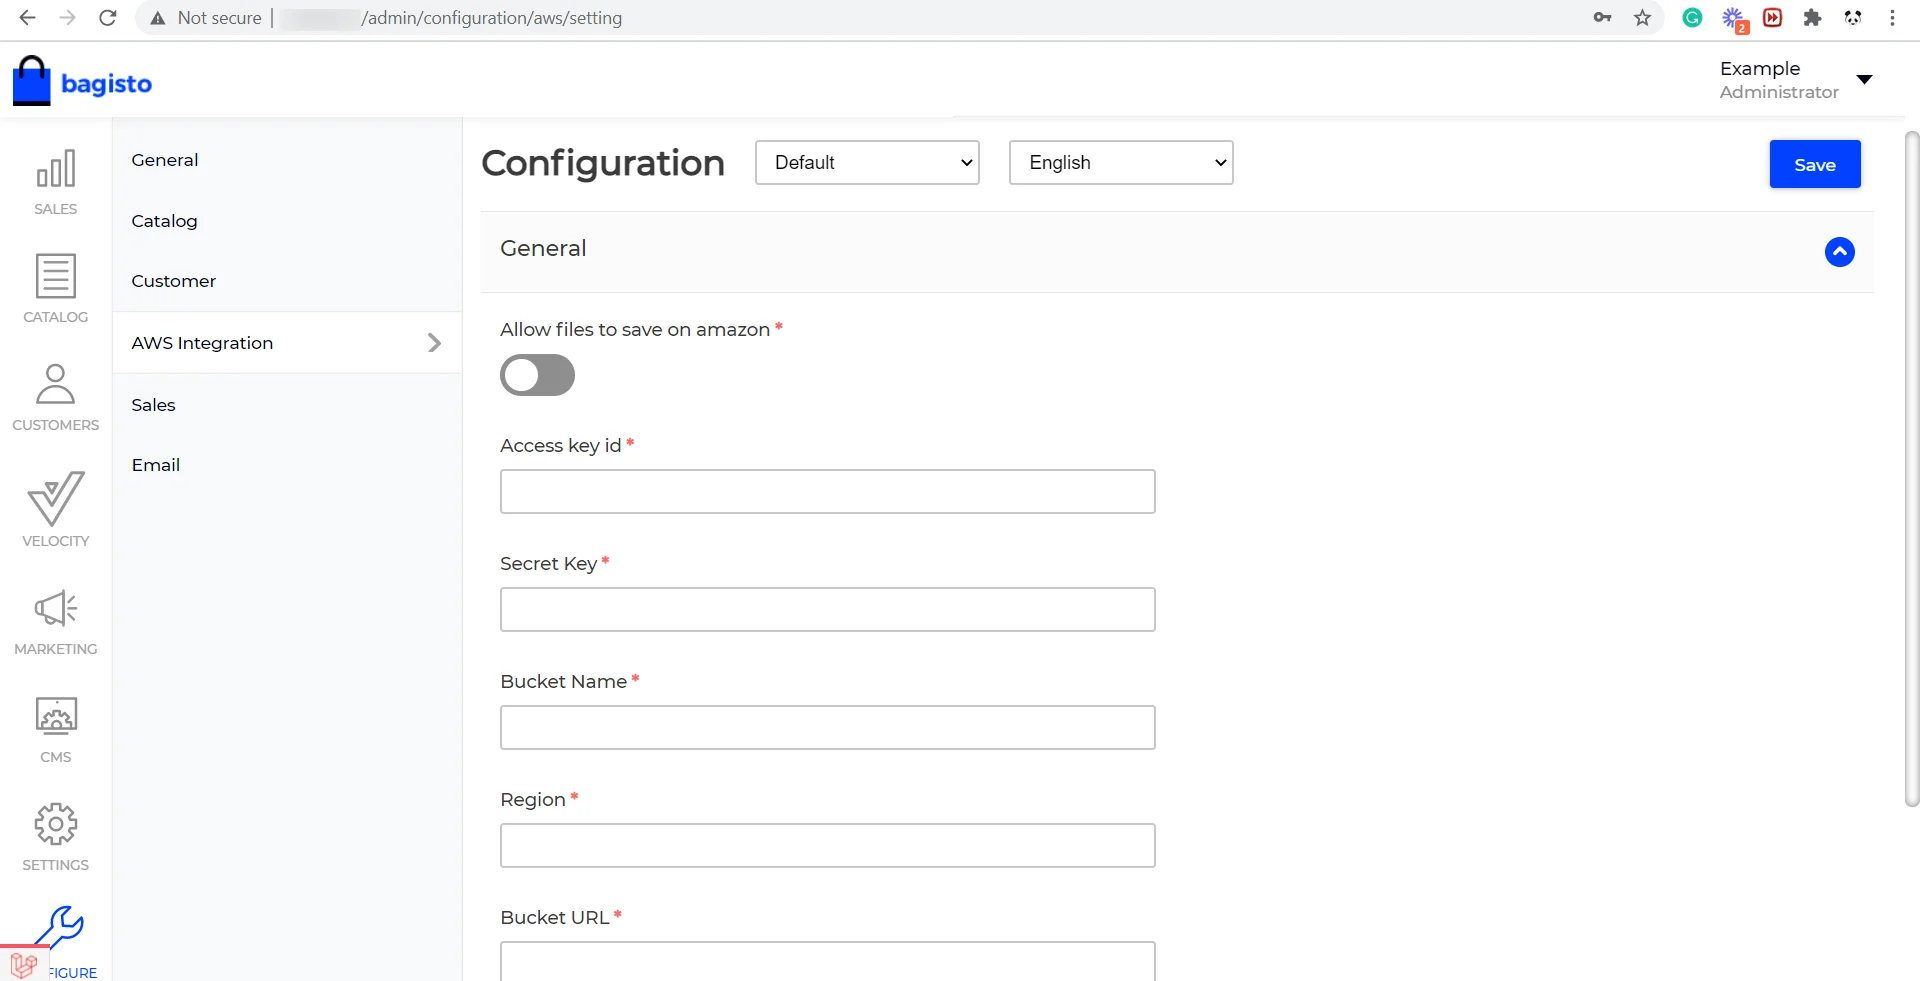
- Allow files to save on Amazon: If you wish to save the file on the Amazon server, Click the icon; otherwise, leave it blank.
- Access Key ID: Enter the access key that you’ll get after creating an IAM User.
- Secret Key: Enter the secret key that you will receive after the creation of the IAM User.
- Bucket Name: Insert the name of the Amazon bucket you have created in the S3 account.
- Region: Select the bucket’s region which you specified when you created the bucket in your S3 account.
- Bucket URL: Bucket can also be accessed by using this URL.
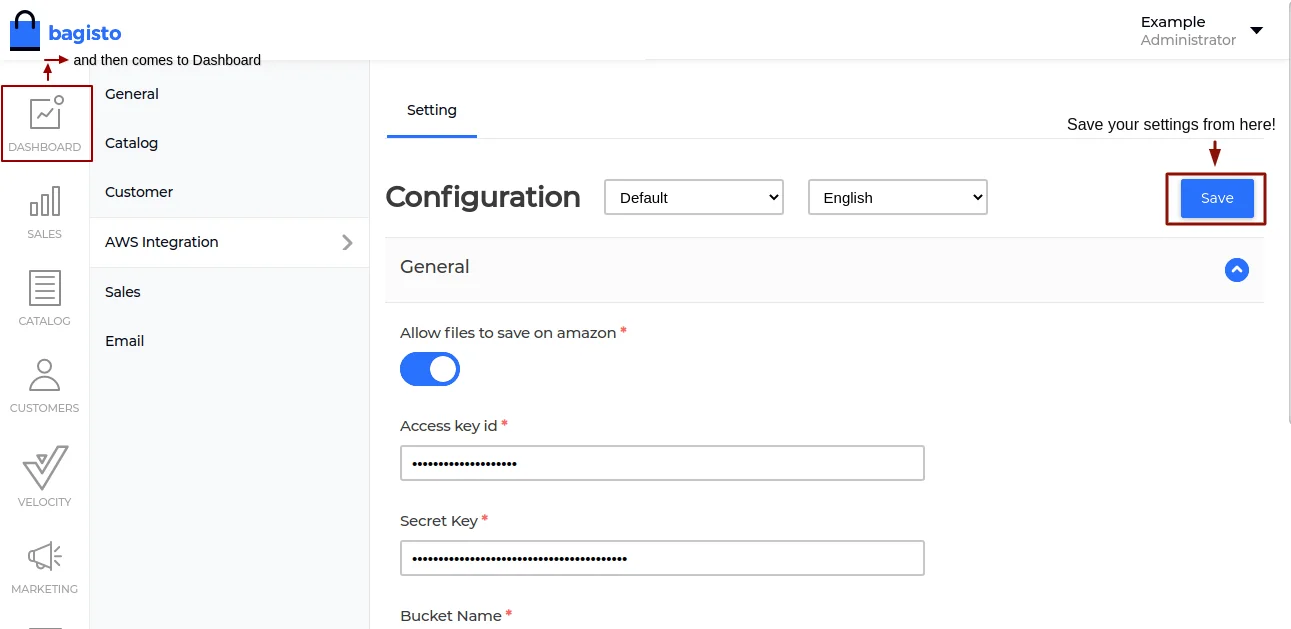
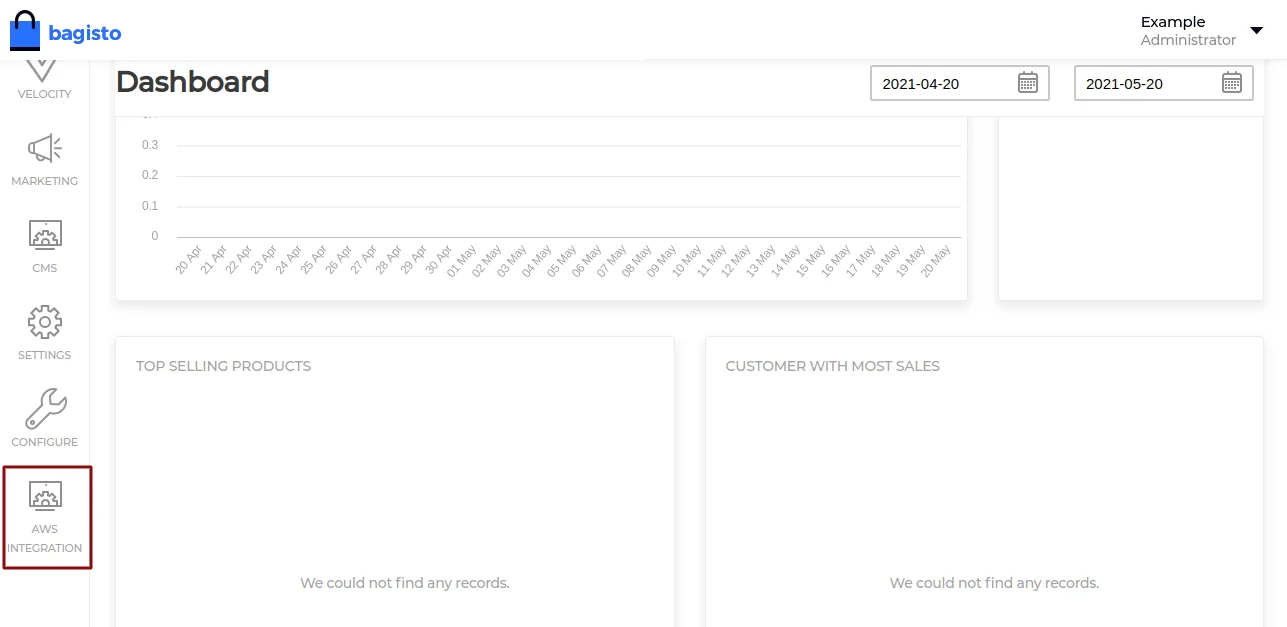
Go to Dashboard after clicking the save button in the right top corner.
Click the AWS integration button in the left bottom corner.
Now, click the Synchronize button and wait a few seconds to see whether the synchronization was successful.
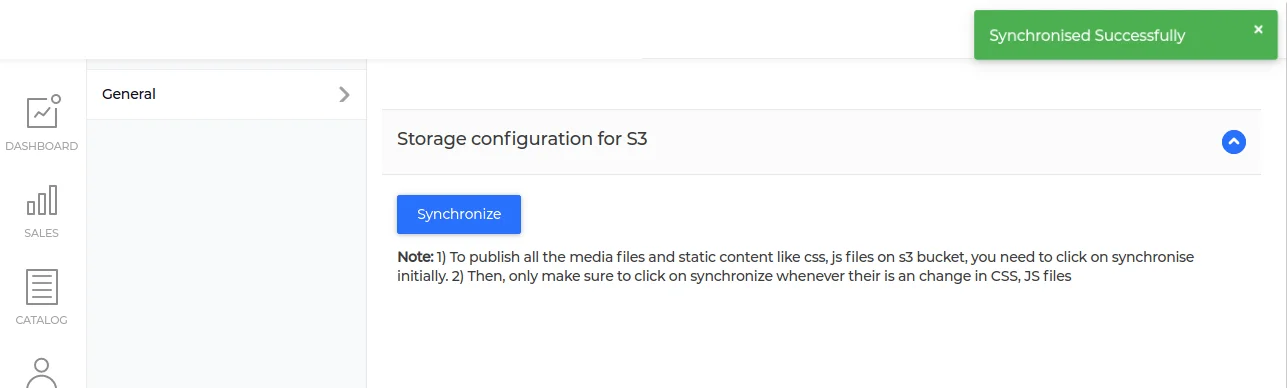
Finally, after successful synchronization, you will receive the following message.

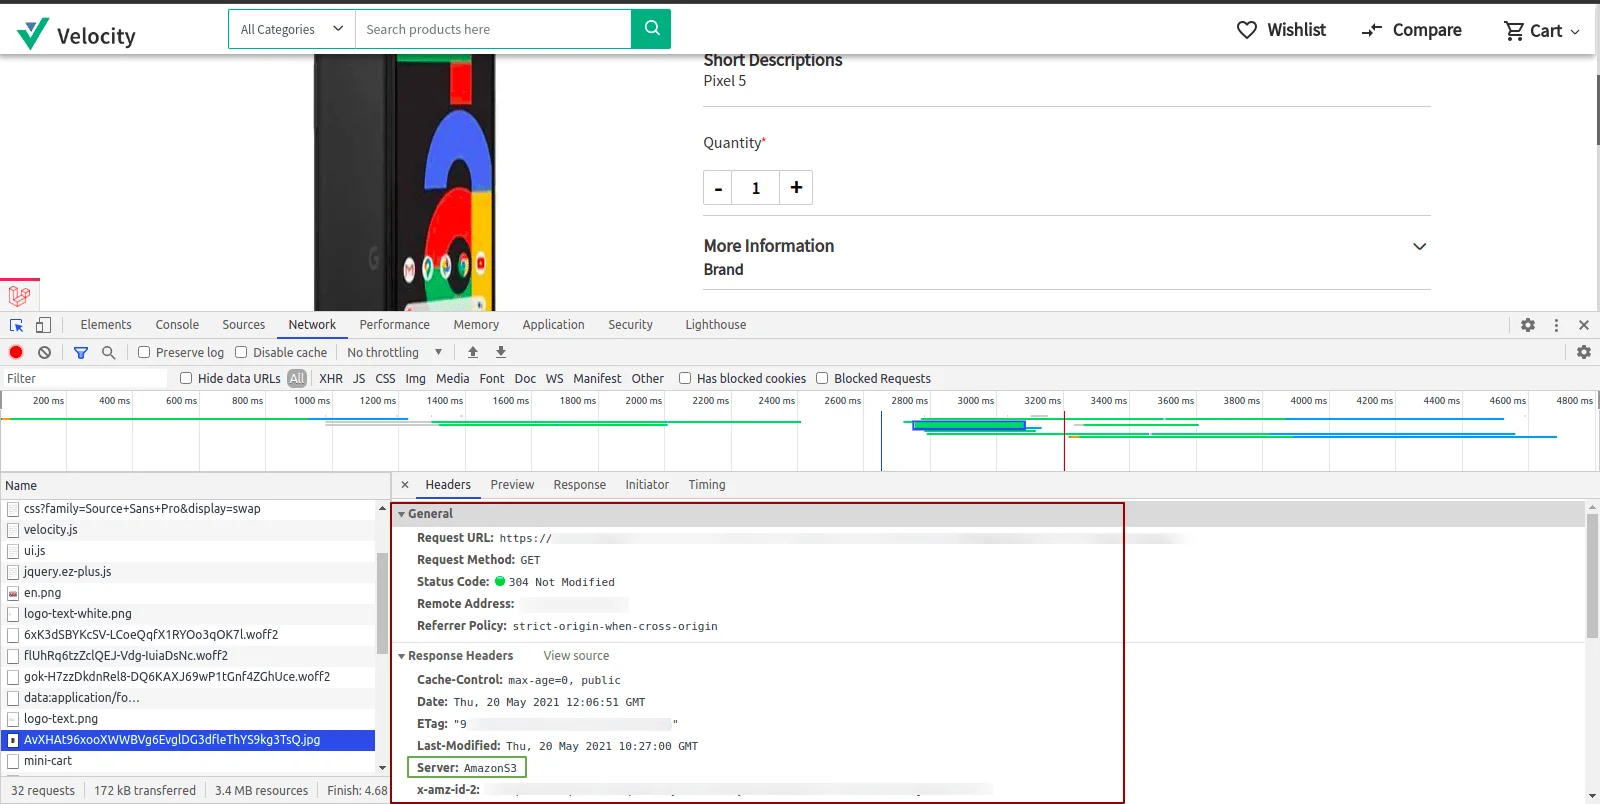
The content is now served from the S3 bucket, as you can see.
So, this is all for the Amazon S3 extension module of Bagisto.
In case of any help, query, or feedback please contact us or raise a ticket.
Thank you for reading this document,
Keep in touch!!


Be the first to comment.