In the previous tutorial, we learned what is transfer learning and mobilenet. how we load and train the pre-trained model with our problem.
In this tutorial, we are going to build an Image Classification model from scratch using Keras in the backend without leveraging pre-trained weights or a pre-made Keras Application model. This implementation is done on dag vs cat. if you are a beginner in ML so you do not need to worry this blog will help you to under about creating a model and train that model. okay, so Let’s start
You should install the dependencies first
Install and setup anaconda for Ubuntu:-
Installation:
- In your browser, download the Anaconda installer for Linux.
- Open the terminal and run the command
.bash ->Downloads/Anaconda3–2020.02–Linux–x86_64.sh(your downloaded sh filename)
Note: If you did not download to your Downloads directory, replace
~/Downloads/with the path to the file you downloaded - Scroll to the bottom of the license terms and enter “Yes” to agree.
- The installer prompts you to click Enter to accept the default install location, CTRL-C to cancel the installation, or specify an alternate installation directory.
- The installer prompts “Do you wish the installer to initialize Anaconda3 by running conda init?” We recommend “yes”.
- The installer finishes and displays “Thank you for installing Anaconda!”
Setup:
Create environment: conda create –name myenv or conda create -n myenv
Activate env: conda activate myenv
Deactivate env: conda deactivate
Env list : conda env list
Install other dependencies :
|
1 2 3 4 5 |
conda install Python==3.8.5 #(create env with specific python version : conda create -n myenv python==2.e) conda install tensorflow==2.2.0 conda install opencv-python==4.5.1.48 conda install Keras==2.4.3 |
You can collect datasets from here:-
You can choose small size datasets because it may be taking too much time to train the model so I am using 500 images of each cat and dog to train my model so that it will take much less time to train the model :
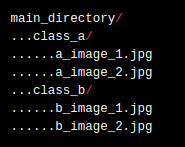
The folder structure must be like this
Import the dependent packages.
|
1 2 3 4 5 6 7 8 9 10 11 12 |
import numpy as np # linear algebra import pandas as pd # data processing, CSV file I/O (e.g. pd.read_csv) import matplotlib.pyplot as plt from sklearn.model_selection import train_test_split import tensorflow as tf from keras.preprocessing.image import ImageDataGenerator from keras.utils import to_categorical from keras.models import Sequential from keras.layers import Conv2D, MaxPooling2D, BatchNormalization, Dropout from keras.layers import Dense, Flatten import cv2 import os |
Initialize the variables
|
1 2 3 4 5 6 7 8 9 10 |
category = ["cat", "dog"] EPOCHS = 50 IMGSIZE = 100 BATCH_SIZE = 32 STOPPING_PATIENCE = 15 VERBOSE = 1 MODEL_NAME = 'cnn_50epochs_imgsize128' OPTIMIZER = 'adam' TRAINING_DIR = 'input/train1' #folder path where training datasets are stored TEST_DIR = 'input/testmy' #folder path where test datasets are stored |
Load the datasets
We are now loading the datasets from the given path and process the images like change the images from color to gray-scale and resize the images after that we will pass through the model :
|
1 2 3 4 5 6 7 8 9 10 11 12 13 14 15 16 17 18 19 20 21 |
for img in os.listdir(TRAINING_DIR): img_path = os.path.join(TRAINING_DIR, img) img_arr = cv2.imread(img_path, cv2.IMREAD_GRAYSCALE) #change the image in gray-scale img_arr = cv2.resize(img_arr, (IMGSIZE, IMGSIZE)) #resize the image in 100 x 100 break def create_train_data(path): X = [] y = [] for img in os.listdir(path): if img == os.listdir(path): continue img_path = os.path.join(path, img) img_arr = cv2.imread(img_path, cv2.IMREAD_GRAYSCALE) img_arr = cv2.resize(img_arr, (IMGSIZE, IMGSIZE)) img_arr = img_arr / 255.0 cat = np.where(img.split('.')[0] == 'dog', 1, 0) X.append(img_arr) y.append(cat) X = np.array(X).reshape(-1, IMGSIZE, IMGSIZE, 1) y = np.array(y) return X, y |
|
1 2 3 4 5 6 7 8 9 |
X, y = create_train_data(TRAINING_DIR) print(f"features shape {X.shape}.\nlabel shape {y.shape}.") y = to_categorical(y, 2) print(f"features shape {X.shape}.\nlabel shape {y.shape}.") X_train , X_test, y_train, y_test = train_test_split(X, y, test_size=1/3) train_datagen = ImageDataGenerator(rescale=1./255, shear_range=0.2, zoom_range=0.2,horizontal_flip=True) train_gen = train_datagen.flow(X_train, y_train, batch_size=BATCH_SIZE) test_datagen = ImageDataGenerator(rescale=1./255) test_gen = train_datagen.flow(X_test, y_test, batch_size=BATCH_SIZE) |
Create the model with different-2 layers.
A Sequential model is appropriate for a plain stack of layers where each layer has exactly one input tensor and one output tensor. we are using to create a Sequential model incrementally via the add() method:
|
1 2 3 4 5 6 7 8 9 10 11 12 13 14 15 16 17 18 19 20 21 22 23 |
model = Sequential() model.add(Conv2D(32, (3, 3), activation='relu', input_shape=X.shape[1:])) model.add(MaxPooling2D(pool_size=(2, 2))) model.add(Dropout(0.5)) model.add(Conv2D(64, (3, 3), activation='relu')) model.add(MaxPooling2D(pool_size=(2, 2))) model.add(Dropout(0.5)) model.add(Conv2D(128, (3, 3), activation='relu')) model.add(MaxPooling2D(pool_size=(2, 2))) model.add(Dropout(0.5)) model.add(Conv2D(256, (3, 3), activation='relu')) model.add(MaxPooling2D(pool_size=(2, 2))) model.add(Dropout(0.5)) model.add(Flatten()) model.add(Dense(256, activation='relu')) model.add(Dropout(0.5)) model.add(Dense(2, activation='sigmoid')) |
Compile the model
Once the model is created, we can config the model with losses and metrics with the model. compile(). we are using adam optimizer here :
|
1 |
model.compile(optimizer='adam', loss='binary_crossentropy', metrics=['accuracy']) |
Train the model
We have created a model now we have to train our model:
|
1 |
history = model.fit(X, y, epochs=EPOCHS, batch_size=BATCH_SIZE, validation_split=1/3) |
Save the model
Training is done therefore, we can save the model and their weights for further use :
|
1 2 |
model.save_weights("model_weights.h5") model.save('model.h5') |
See the model architecture.
When building a new Sequential architecture, it’s useful to incrementally stack layers withadd() and frequently print model summaries. For instance, this enables you to monitor how a stack of Conv2D and MaxPooling2D layers are downsampling image feature maps:
|
1 |
print(model.summary()) |
Once you have a model train your model, evaluate it, and run and we trained our model so it’s time to evaluate the model :
|
1 2 |
train_acc = model.evaluate(X_train, y_train, batch_size=BATCH_SIZE) test_acc = model.evaluate(X_test, y_test, batch_size=BATCH_SIZE) |
Load the images for testing.
Before the test, the image it needs to pre-process the image according to model requirement like it should be grey-scale image and size must be 100×100 therefore, we are defining a function to load and pre-process the image
|
1 2 3 4 5 6 7 8 9 10 11 12 13 14 15 16 17 18 19 20 21 |
# for testing im_test = [] c = 0 print(os.listdir(TEST_DIR)) for img in os.listdir(TEST_DIR): print(img) c = c + 1 img_path = os.path.join(TEST_DIR, img) img_arr = cv2.imread(img_path, cv2.IMREAD_GRAYSCALE) print(img_arr) img_arr = cv2.resize(img_arr, (IMGSIZE, IMGSIZE)) print(img_arr) img_arr = img_arr / 255.0 print(img_arr) im_test.append(img_arr) print(im_test) im_test = np.array(im_test).reshape(-1, IMGSIZE, IMGSIZE, 1) im_pred = model.predict(im_test) print(im_pred) |
Predict the result.
We are going to print the prediction result.
|
1 2 3 |
for i in range(len(im_pred)): print(im_pred[i].max()) print(category[im_pred[i].argmax()]) |
Congratulations you build an image classification model in Keras from scratch.
Conversion of the model in JSON format
Okay so the model saved in the .h5 extension and we need a .json model for browser use so that we have to convert our h5 format model into a JSON formate model. therefore here is the code to convert the model file format you must run this command on the terminal inside the project directory.
|
1 2 3 4 5 |
$ tensorflowjs_converter \ --input_format=keras \ --output_format=tfjs_layers_model \ model.h5 \ json_model |
I Hope This Blog Will Help You To Make an Understanding to build a model and train that model from scratch. Feel Free To Comment If Any Problem Or For Any Suggestions. for more blogs like this please check out here. Thank You
Reference
- https://www.kaggle.com/elcaiseri/keras-cnn-dog-or-cat-classification/notebook
- https://www.anaconda.com/download/#linux


Be the first to comment.