If you want to accept payments all over the world, and you need a reliable solution to handle them all, Cybersource Global Payment Gateway is the answer. In a single integration, you can accept payments online and in-store across the world, and in over 50 currencies.
Building a Cybersource Payment Gateway Extension in Bagisto Step-by-Step Tutorial.
Cybersource Global Payment Gateway is the solution that enables you to take credit and debit card payments online around the world. It processes each transaction securely from start to finish, and all in just a few seconds.
1) Module Setup
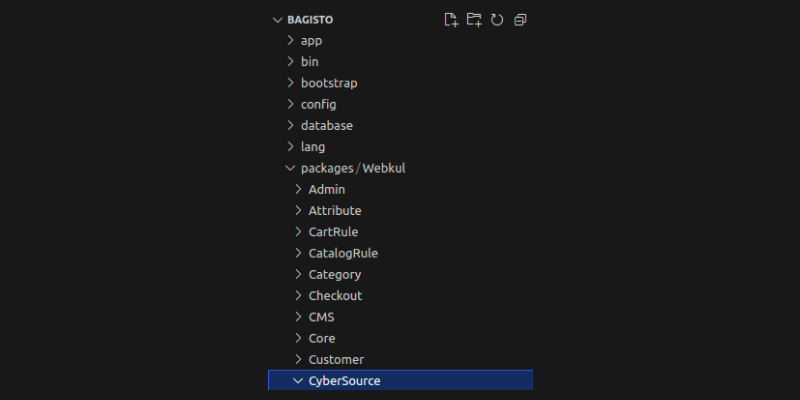
So in the installation of Bagisto, you will get the directory name Webkul which contains the packages for Bagisto. Create a directory named CyberSource & src inside the Webkul folder at the root of the Bagisto installation. packages directory is the container of all namespaces of packages. A namespace or vendor name is a group of entities or classes that are separated from classes of other namespaces with the same name so they don’t conflict. Every extension or package that we will develop should be kept in the same namespace to avoid conflict between classes with the same name.
Now add the below code inside the “autoload psr-4” in the composer.json file as shown below.
|
1 |
"Webkul\\CyberSource\\": "packages/Webkul/CyberSource/src" |
Now register in the provider array with the array merge function in the config/app.php file which is presented in the root directory of Bagisto.
|
1 |
Webkul\CyberSource\Providers\CyberSourceServiceProvider::class, |
In the config/bagisto-vite.php file, add the following line under the ‘viters’ section:
|
1 2 3 4 5 |
'cyber_source' => [ 'hot_file' => 'cyber-source-vite.hot', 'build_directory' => 'themes/cyber-source/build', 'package_assets_directory' => 'src/Resources/assets', ], |
Go to app/Http/Middleware/VerifyCsrfToken.php file and add the following line under ‘$except’ variables.
|
1 2 3 |
protected $except = [ 'checkout/cyber-source/*', ]; |
2) Providers
In the src folder, create a folder named Providers. Inside that folder, create a file named CyberSourceServiceProvider.php. Make sure to create the file name according to your module name. Now the structure will look like this.

CyberSourceServiceProvider.php
|
1 2 3 4 5 6 7 8 9 10 11 12 13 14 15 16 17 18 19 20 21 22 23 24 25 26 27 28 29 |
<?php namespace Webkul\CyberSource\Providers; use Illuminate\Support\ServiceProvider; use Illuminate\Routing\Router; class CyberSourceServiceProvider extends ServiceProvider { /** * Bootstrap services. * * @return void */ public function boot(Router $router) { } /** * Register services. * * @return void */ public function register() { } } |
Run the below command to register the package in the root directory of Bagisto.
|
1 |
composer dump-autoload |
3) Custom Configuration
To create a custom configuration for your application, you just need to create a system.php file in the Config folder of your package.
Inside the file, you can include the code below.
system.php
|
1 2 3 4 5 6 7 8 9 10 11 12 13 14 15 16 17 18 19 20 21 22 23 24 25 26 27 28 29 30 31 32 33 34 35 36 37 38 39 40 41 42 43 44 45 46 47 48 49 50 51 52 53 54 55 56 57 58 59 60 61 62 63 64 65 66 67 68 69 70 71 |
<?php return [ [ 'key' => 'sales.payment_methods.cyber_source', 'name' => 'cyber_source::app.admin.system.cyber-source-payment', 'info' => 'cyber_source::app.admin.system.cyber-source-payment-info', 'sort' => 4, 'fields' => [ [ 'name' => 'title', 'title' => 'cyber_source::app.admin.system.title', 'type' => 'text', 'depends' => 'active:1', 'validation' => 'required_if:active,1', 'channel_based' => true, 'locale_based' => true, ], [ 'name' => 'description', 'title' => 'cyber_source::app.admin.system.description', 'type' => 'textarea', 'channel_based' => true, 'locale_based' => true, ], [ 'name' => 'image', 'title' => 'cyber_source::app.admin.system.logo', 'type' => 'image', 'info' => 'cyber_source::app.admin.system.logo-information', 'channel_based' => false, 'locale_based' => false, 'validation' => 'mimes:bmp,jpeg,jpg,png,webp', ], [ 'name' => 'active', 'title' => 'cyber_source::app.admin.system.status', 'type' => 'boolean', 'channel_based' => true, 'locale_based' => false, ], [ 'name' => 'sandbox', 'title' => 'cyber_source::app.admin.system.sandbox', 'type' => 'boolean', 'channel_based' => true, 'locale_based' => false, ], [ 'name' => 'profile_id', 'title' => 'cyber_source::app.admin.system.profile-id', 'type' => 'text', 'depends' => 'active:1', 'validation' => 'required_if:active,true', 'channel_based' => false, 'locale_based' => false, ], [ 'name' => 'access_key', 'title' => 'cyber_source::app.admin.system.access-key', 'type' => 'text', 'depends' => 'active:1', 'validation' => 'required_if:active,true', 'channel_based' => false, 'locale_based' => false, ], [ 'name' => 'secret_key', 'title' => 'cyber_source::app.admin.system.secret-key', 'type' => 'text', 'depends' => 'active:1', 'validation' => 'required_if:active,true', 'channel_based' => false, 'locale_based' => false, ], ], ], ]; |
Now create a paymentmethods.php file in the Config folder of your package.
Inside the file, you can include the code below.
paymentmethods.php
|
1 2 3 4 5 6 7 8 9 10 11 12 |
<?php return [ 'cyber_source' => [ 'code' => 'cyber_source', 'title' => 'CyberSource Payments', 'description' => 'CyberSource Payments', 'class' => 'Webkul\CyberSource\Payment\CyberSource', 'debug' => true, 'active' => false, ], ]; |
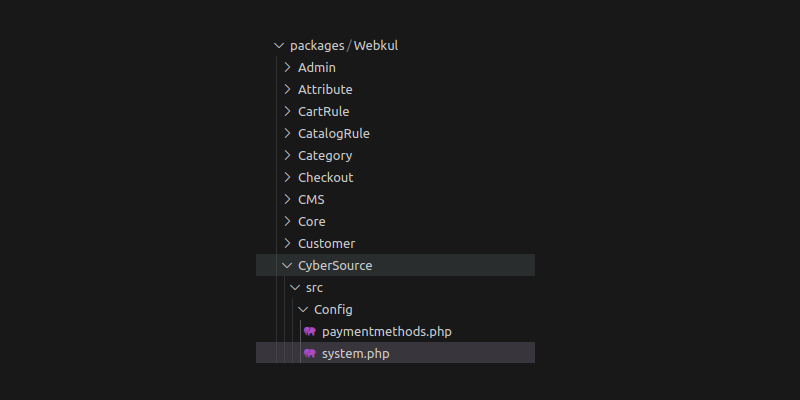
So now after this, the structure will look like this as shown in the below image.
Load Configuration from Package
Now we need to merge these custom config also, in the respective service provider.
|
1 2 3 4 5 6 7 8 9 10 11 12 13 14 15 16 17 18 19 20 21 22 23 |
/** * Register services. * * @return void */ public function register() { $this->registerConfig(); } /** * Merge the CyberSource connect's configuration with the admin panel */ public function registerConfig() { $this->mergeConfigFrom( dirname(__DIR__) . '/Config/system.php', 'core' ); $this->mergeConfigFrom( dirname(__DIR__) . '/Config/paymentmethods.php', 'payment_methods' ); } |
4) Routes
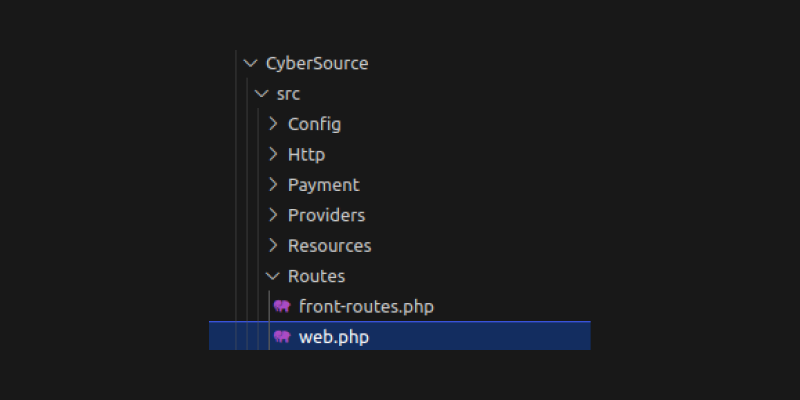
Create a Routes folder inside packages /Webkul/CyberSource/src/ and create 2 files named front-routes.php and web.php. To learn in detail about Routes, you can visit the Laravel documentation here.
front-routes.php
|
1 2 3 4 5 6 7 8 9 10 11 12 13 14 |
<?php use Illuminate\Support\Facades\Route; use Webkul\CyberSource\Http\Controllers\CyberSourceController; Route::group(['middleware' => ['web', 'theme', 'locale', 'currency'], 'prefix' => 'checkout/cyber-source'], function () { Route::controller(CyberSourceController::class)->group(function () { Route::get('redirect', 'redirect')->name('cyber_source.redirect'); Route::post('response', 'processPayment'); Route::post('cancel', 'cancelPayment'); }); }); |
web.php
|
1 2 3 4 5 6 |
<?php /** * Store front routes. */ require 'front-routes.php'; |
Now add the below code inside the boot method of the respective service provider to register the routes.
|
1 2 3 |
$this->loadRoutesFrom(__DIR__ . '/../Routes/web.php'); $this->loadMigrationsFrom(__DIR__ . '/../Database/Migrations'); |
So now after this, the structure will look like this as shown in the below image.
5) Controllers
To learn in detail about Controllers, you can visit the Laravel documentation here
Create an Http folder in the packages/Webkul/CyberSource/src path. Inside the Http folder, create another folder named Controllers. Inside the Controllers folder, we need to create two files named Controller.php and CyberSourceController.php. The directory structure will look like this.

Controller.php
|
1 2 3 4 5 6 7 8 9 10 11 12 |
<?php namespace Webkul\CyberSource\Http\Controllers; use Illuminate\Foundation\Bus\DispatchesJobs; use Illuminate\Foundation\Validation\ValidatesRequests; use Illuminate\Routing\Controller as BaseController; class Controller extends BaseController { use DispatchesJobs, ValidatesRequests; } |
CyberSourceController.php
|
1 2 3 4 5 6 7 8 9 10 11 12 13 14 15 16 17 18 19 20 21 22 23 24 25 26 27 28 29 30 31 32 33 34 35 36 37 38 39 40 41 42 43 44 45 46 47 48 49 50 51 52 53 54 55 56 57 58 59 60 61 62 63 64 65 66 67 68 69 70 71 72 73 74 75 76 77 78 79 80 81 82 83 84 85 86 87 88 89 90 91 92 93 94 95 96 97 98 99 100 101 102 103 104 105 106 107 108 109 110 111 112 113 114 115 116 117 118 119 120 121 122 123 124 125 126 127 128 129 130 131 132 133 134 135 136 137 138 139 140 141 142 143 144 145 146 147 148 149 150 151 152 153 154 155 156 157 158 159 160 161 162 163 164 165 166 167 168 169 170 171 172 173 174 175 176 177 178 179 |
<?php namespace Webkul\CyberSource\Http\Controllers; use Webkul\Checkout\Facades\Cart; use Webkul\Sales\Repositories\OrderRepository; use Webkul\Sales\Repositories\InvoiceRepository; class CyberSourceController extends Controller { /** * Create a new controller instance. * * @return void */ public function __construct( protected OrderRepository $orderRepository, protected InvoiceRepository $invoiceRepository ) { } /* * To Get Signature * * @param array $params * @return string */ public function sign($params) { return $this->signData($this->buildDataToSign($params), core()->getConfigData('sales.payment_methods.cyber_source.secret_key')); } /* * To Get Signature * * @param string $data * @param string $secretKey * @return string */ public function signData($data, $secretKey) { return base64_encode(hash_hmac('sha256', $data, $secretKey, true)); } /* * To Prepare Data for Signature * * @param array $params * @return string */ public function buildDataToSign($params) { $signedFieldNames = explode(",", $params["signed_field_names"]); foreach ($signedFieldNames as $field) { $dataToSign[] = $field . "=" . $params[$field]; } return implode(",", $dataToSign); } /** * Redirects to the payment server. * * @return \Illuminate\View\View */ public function redirect() { $cart = Cart::getCart(); $uniqueId = uniqid(); if ((bool) core()->getConfigData('sales.payment_methods.cyber_source.sandbox')) { // For Sandbox Mode $cyberSourceUrl = "https://testsecureacceptance.cybersource.com/pay"; } else { // For Production Mode $cyberSourceUrl = "https://secureacceptance.cybersource.com/pay"; } // shipping rate $shippingRate = $cart?->selected_shipping_rate->price ?? 0; // discount amount $discountAmount = $cart->discount_amount; // total amount $amount = ($cart->sub_total + $cart->tax_total + $shippingRate) - $discountAmount; $params = [ "access_key" => core()->getConfigData('sales.payment_methods.cyber_source.access_key'), "profile_id" => core()->getConfigData('sales.payment_methods.cyber_source.profile_id'), "transaction_uuid" => $uniqueId, "signed_field_names" => 'partner_solution_id,access_key,profile_id,transaction_uuid,signed_field_names,unsigned_field_names,signed_date_time,locale,transaction_type,reference_number,amount,currency,bill_to_address_line1,bill_to_address_city,bill_to_address_state,bill_to_address_country,bill_to_address_postal_code,bill_to_email,bill_to_surname,bill_to_forename', "unsigned_field_names" => '', "signed_date_time" => gmdate("Y-m-d\TH:i:s\Z"), "locale" => 'en', "partner_solution_id" => 'IGT4AWTG', "transaction_type" => 'authorization', "reference_number" => $uniqueId, "amount" => $amount, "currency" => $cart->cart_currency_code, "bill_to_address_line1" => $cart->billing_address->address, "bill_to_address_city" => $cart->billing_address->city, "bill_to_address_state" => $cart->billing_address->state, "bill_to_address_country" => $cart->billing_address->country, 'bill_to_address_postal_code' => $cart->billing_address->postcode, "bill_to_email" => $cart->billing_address->email, "bill_to_surname" => $cart->billing_address->last_name, "bill_to_forename" => $cart->billing_address->first_name, ]; $params['signature'] = $this->sign($params); return view('cyber_source::cyber-source-redirect', compact('params', 'cyberSourceUrl')); } /* * To Check Status of Payment * * @return \Illuminate\Http\Response */ public function processPayment() { try { if (request()->reason_code == 100) { $order = $this->orderRepository->create(Cart::prepareDataForOrder()); $this->orderRepository->update(['status' => 'processing'], $order->id); if ($order->canInvoice()) { $this->invoiceRepository->create($this->prepareInvoiceData($order)); } Cart::deActivateCart(); session()->flash('order', $order); return redirect()->route('shop.checkout.onepage.success'); } } catch (\Exception $e) { } session()->flash('error', trans('cyber_source::app.admin.transaction.error')); return redirect()->route('shop.checkout.onepage.index'); } /** * Prepare order's invoice data for creation. * * @param \Webkul\Sales\Models\Order $order * @return array */ protected function prepareInvoiceData($order) { $invoiceData = ["order_id" => $order->id]; foreach ($order->items as $item) { $invoiceData['invoice']['items'][$item->id] = $item->qty_to_invoice; } return $invoiceData; } /** * To Cancel Payment * * @return \Illuminate\Http\Response */ public function cancelPayment() { session()->flash('success', trans('cyber_source::app.admin.transaction.error')); return redirect()->route('shop.checkout.onepage.index'); } } |
6) Payment
Now create a Payment folder and create a file CyberSource.php inside this.
Inside the file, you can include the code below.
|
1 2 3 4 5 6 7 8 9 10 11 12 13 14 15 16 17 18 19 20 21 22 23 24 25 26 27 28 29 30 31 32 33 34 35 36 37 38 |
<?php namespace Webkul\CyberSource\Payment; use Illuminate\Support\Facades\Storage; use Webkul\Payment\Payment\Payment; class CyberSource extends Payment { /** * Payment method code * * @var string */ protected $code = 'cyber_source'; /** * Return paypal redirect url. * * @return string */ public function getRedirectUrl() { return route('cyber_source.redirect'); } /** * Returns payment method image * * @return array */ public function getImage() { $url = $this->getConfigData('image'); return $url ? Storage::url($url) : bagisto_asset('images/cyber-source.png', 'cyber_source'); } } |
7) Views
Create a Resources folder in the packages/Webkul/CyberSource/src path. Inside the Resources folder, create another folder named views. Now inside the views folder, we need to create a file by the name of cyber-source-redirect.blade.php.
cyber-source-redirect.blade.php :-
|
1 2 3 4 5 6 7 8 9 10 11 12 13 14 15 16 17 18 19 20 21 22 23 24 25 26 27 28 29 30 31 32 33 |
<html> <head> <title>Secure Acceptance - Payment Form</title> </head> <body> <h1> @lang('cyber_source::app.shop.payment.alert-msg') </h1> <form action="{{ $cyberSourceUrl }}" id="paymentForm" method="POST" > <input value="@lang('cyber_source::app.shop.payment.redirect-msg')" type="submit" /> @foreach ($params as $name => $value) <input type="hidden" name="{{ $name }}" value="{{ $value }}" /> @endforeach </form> <script type="text/javascript"> document.getElementById("paymentForm").submit(); </script> </body> </html> |
So now after this, the structure will look like this as shown in the below image.
Load Views From Package
Now we need to register our views in the service provider’s boot method. Open the file packages/Webkul/CyberSource/src/Providers/CyberSourceServiceProvider.php and update it as follows.
|
1 |
$this->loadViewsFrom(__DIR__ . '/../Resources/views', 'cyber_source'); |
8) Localization
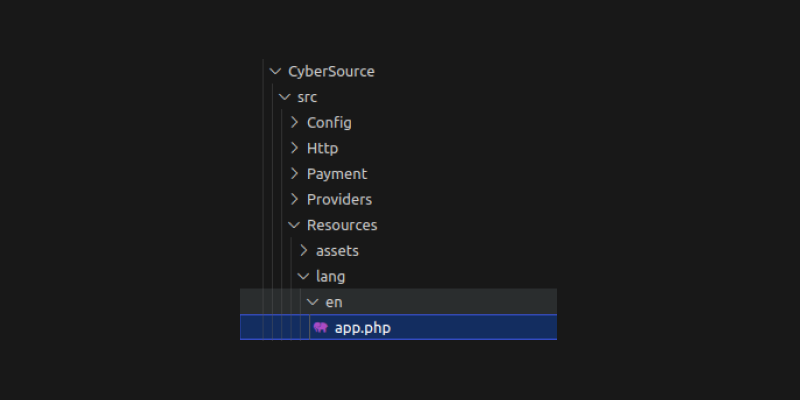
So, let’s create a language file for our package. Create a lang folder in the packages/Webkul/CyberSource/src/Resources path. Inside the lang folder, you create different folders for language translations. For example, you create a folder for English (‘en’), Hindi (‘hi’), etc. For now, let’s create a folder named en (representing the language code). Inside the en folder, create a file named app.php for language translations.
app.php
|
1 2 3 4 5 6 7 8 9 10 11 12 13 14 15 16 17 18 19 20 21 22 23 24 25 26 27 28 29 30 31 32 33 34 |
<?php return [ 'admin' => [ 'system' => [ 'enable' => 'Enable', 'title' => 'Title', 'description' => 'Description', 'sandbox' => 'Sandbox', 'cyber-source-payment' => 'CyberSource Payment', 'debug' => 'Debug', 'profile-id' => 'Profile Id', 'secret-key' => 'Secret Key', 'access-key' => 'Access Key', 'status' => 'Status', 'logo' => 'Logo', 'logo-information' => 'Image resolution should be like 55px X 45px', 'cyber-source-payment-info' => 'Cybersource Payment Gateway is an advanced and feature-rich module that will integrate your store with the Cybersource payment gateway.', ], 'transaction' => [ 'error' => 'Something went wrong! Please try again.', 'cancel' => 'Transaction Cancelled', ], ], 'shop' => [ 'payment' => [ 'alert-msg' => 'Please do not refresh this page...', 'redirect-msg' => 'Click here if you are not redirected within 10 seconds...', 'title' => 'Secure Acceptance - Payment Form', ], ], ]; |
Load Translations From Package
Now register the language file in the service provider in the boot method.
|
1 |
$this->loadTranslationsFrom(__DIR__ . '/../Resources/lang', 'cyber_source'); |
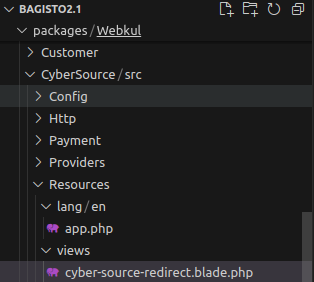
Now the structure and file will look like this.
9) Frontend
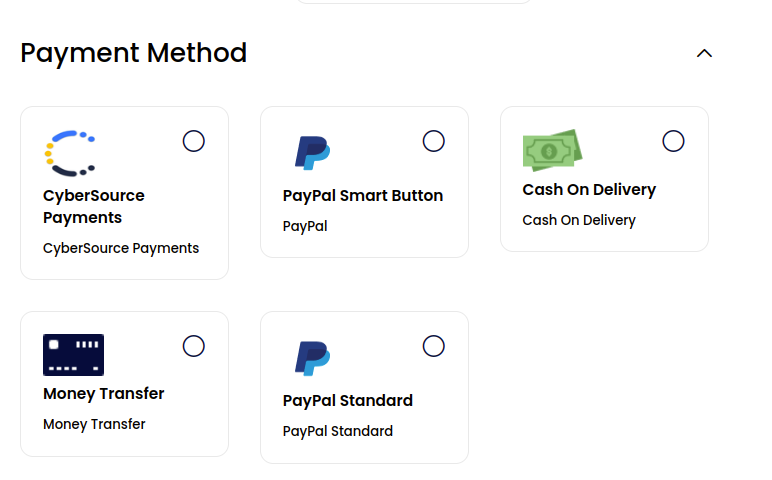
So you can select a new payment method and proceed with placing an order.
Thanks for reading this blog. I hope you’ll get an idea of how to create a custom stock notification package. Please share your reviews on this, which will support me to write more.
You can directly get the code from the GitHub CyberSource Payment Gateway repository
Additionally, you can also Hire Laravel Developers to help you with your project requirements and ensure the successful implementation of your ideas.


Be the first to comment.