In this article, we will specifically see how to install Bagisto on shared hosting. Installing Bagisto on shared hosting may appear to be a daunting task,
By following the appropriate steps and having basic hosting support, you can effectively implement Bagisto with shared hosting environment.
If you are using dedicated hosting, you may refer to this guide here.
If you are looking to install Bagisto and need a valid hosting provider, you may check our hosting partners here.
How to install Bagisto on shared hosting?
You may access to Bagisto Softaculous script from here.
- Once you are on the control panel of the web server (Cpanel or Plesk), you need to find the Softaculous application.
- Usually, Cpanel comes with an Installed Softaculous application. If you using Plesk, you may check this guide to install the application from here.Below I am using Cpanel as an example:
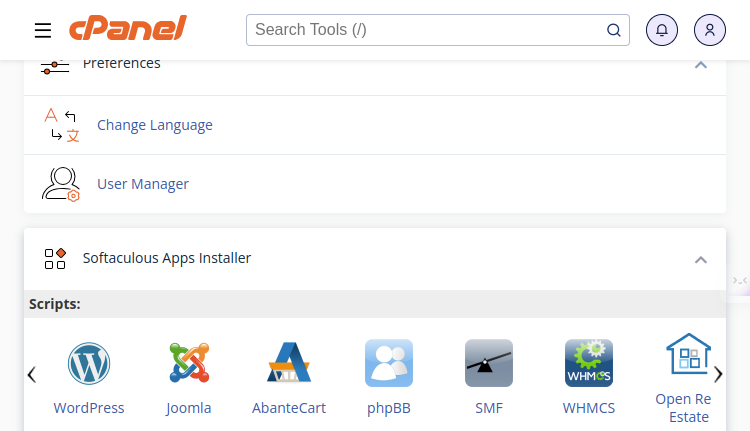
- Once you have got the Softaculous application, click on any application listed to open the Softaculous panel.
Below, let’s click on WordPress. You will get something like the below: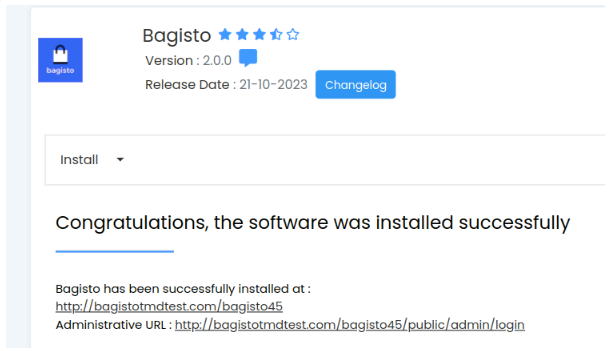
- Next, in the search panel, search for Bagisto.
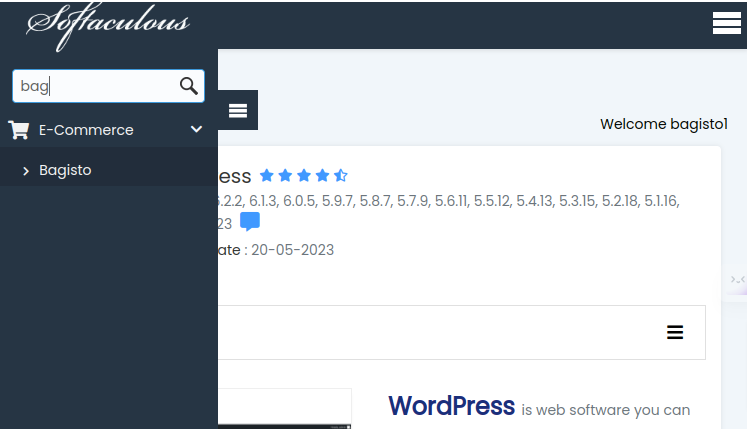
- Once you have got Bagisto as an option, click on that to open the Bagisto Softaculous page.
- On the page, you will get the Install option. From there you will get the option to either Quick Install or Custom Install.
You may choose any option based on the custom configuration you are looking to do.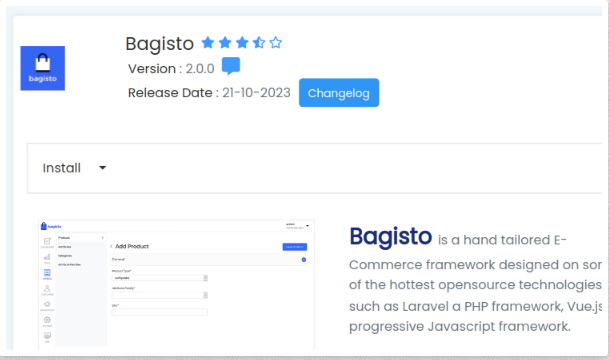
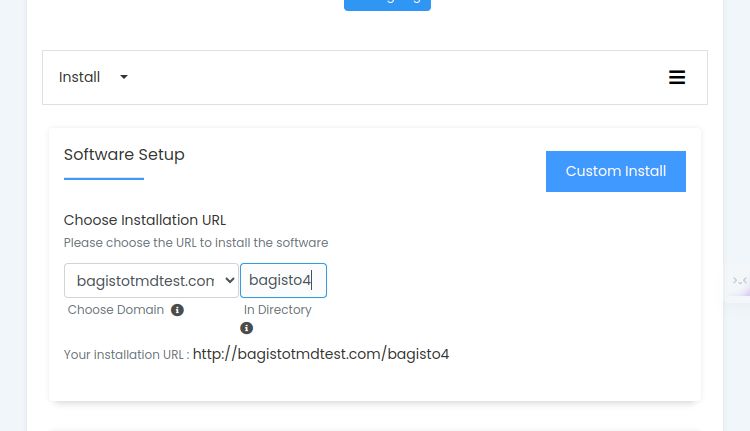
- Let’s go ahead and choose the Custom Install option. First, you need to define the directory where you want the application to be installed.
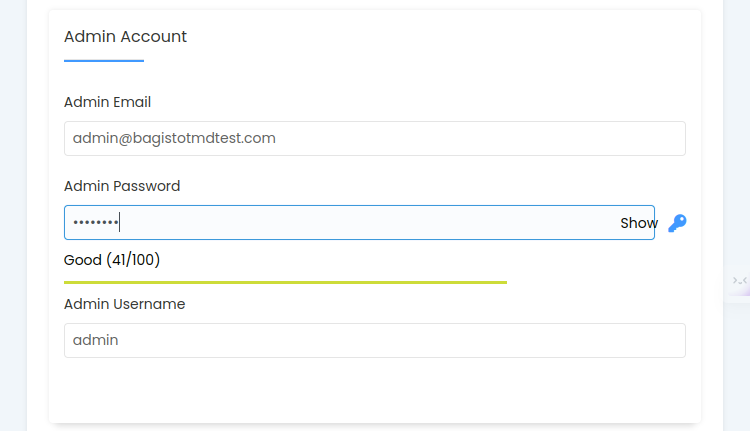
- Going downwards, in the next step you will be asked to set admin credentials like admin email, password, and username.
- Once you are done, next all you need to do is click the Install button to start with the installation.
You may also provide an email ID to get details regarding your Bagisto setup once the installation has been completed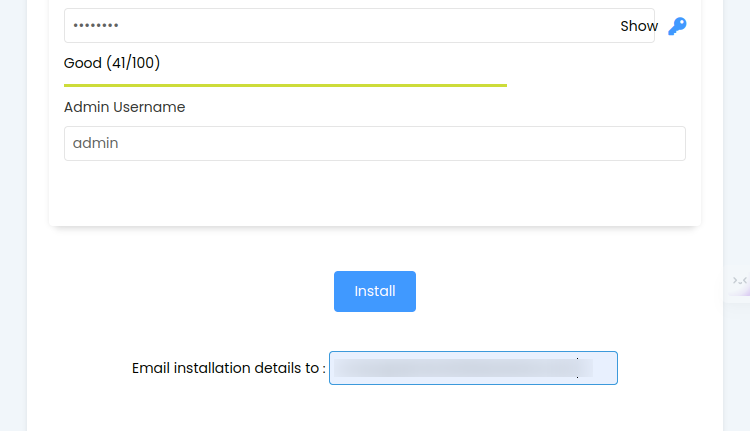
- Upon clicking Install, the installation process will start right away and it will take hardly a minute to get the installation done.
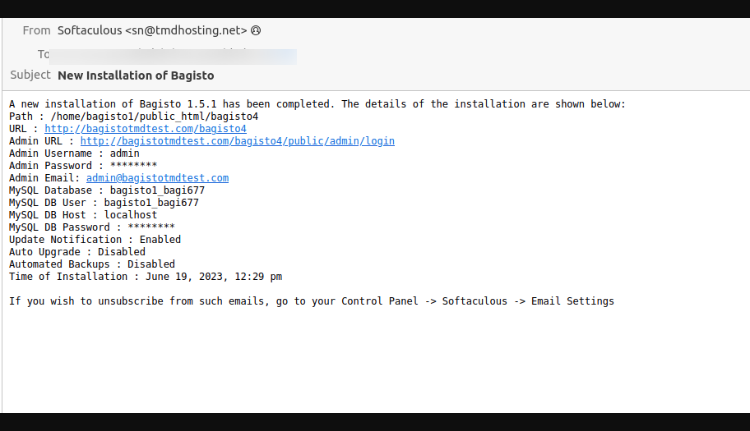
- At last, once the installation is completed, you will get to find some basic details regarding the installation in the next window and on your email.
- Upon clicking on the URL, you will find the Bagisto storefront. Voila

Important Notes:
Use boxes like:
👉 Suggestion: Keep the installation directory empty for the primary domain.
👉 Reminder: Utilize a robust password.
Conclusion
Setting up Bagisto on shared hosting is both fast and uncomplicated with the aid of tools such as Softaculous.
By following a few easy steps, you can establish your store and commence operating your eCommerce Stores effectively
So you have seen, how easy it is to install Bagisto on shared hosting. If you have any queries or feedback, do let us know in the comments below.
Below you can also go through the video of installing Bagisto on shared hosting.


3 comments
Did you installed using Softaculous app? If yes, once you have installed, you might got the admin login details as well.
Also please try to check this thread: https://forums.bagisto.com/topic/2285/500-internal-server-error