Creating a custom datagrid in Bagisto is a great way to manage and show backend data effectively.
A special setup allows you to meet unique store requirements while keeping the admin interface tidy.
Regular backend tables usually don’t have the flexibility to manage complicated database joins or specific business rules.
This can make it hard to handle large amounts of data and lead to a frustrating experience for store admins.
Therefore, this guide provides a modern workflow to build a high-performance grid from scratch.
Steps to Create a Custom Datagrid in Bagisto
Let’s explore the steps involved in building a custom Datagrid in Bagisto.
Step 1: Set Up the Directory
First, ensure your custom package (e.g.,bagisto\TestPackage)is set up.
Then, create a Datagrid folder inside the package’s src directory to hold all grid logic.
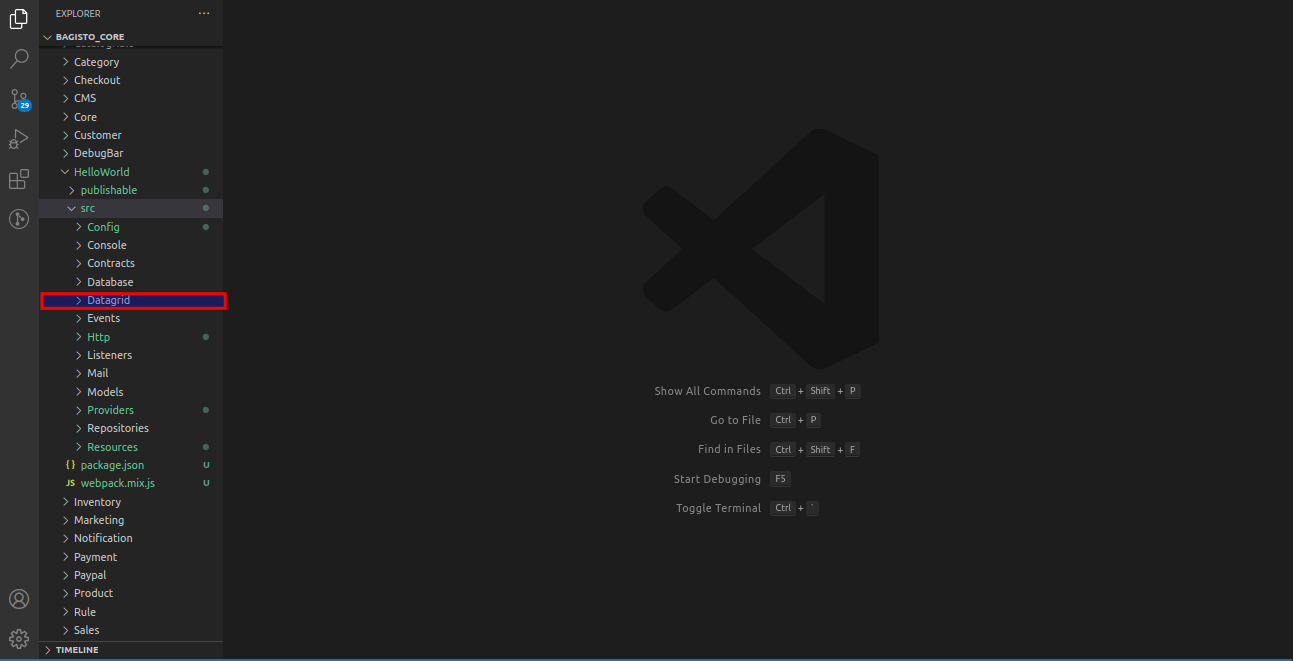
Step 2: Create the Datagrid Class
Next, create HelloWorldDatagrid.php in the Datagrid folder.
Extend the core DataGrid abstract class, making sure the class name matches the file name.
|
1 2 3 4 5 6 7 8 9 10 |
<?php namespace Webkul\HelloWorld\Datagrid; use Webkul\Ui\DataGrid\DataGrid; class HelloWorldDataGrid extends DataGrid { } |
Step 3: Configure the Query Builder
In Webkul\Ui\DataGrid\DataGrid abstract class, two main methods are used: prepareQueryBuilder() and addColumns().
Let’s use a customer database table as an example to fetch our records.
This method pulls the exact data you need from your database and prepares the records for the datagrid.
|
1 2 3 4 5 6 7 8 9 10 11 12 13 14 15 16 17 18 19 20 21 22 23 24 25 26 27 28 29 30 31 32 33 34 35 36 37 38 39 40 41 42 43 44 45 |
<?php namespace Webkul\HelloWorld\Datagrid; use Illuminate\Support\Facades\DB; use Webkul\Ui\DataGrid\DataGrid; class HelloWorldDataGrid extends DataGrid { /** * Index. * * @var string */ protected $index = 'customer_id'; /** * Sort order. * * @var string */ protected $sortOrder = 'desc'; public function prepareQueryBuilder() { $queryBuilder = DB::table('customers') ->leftJoin('customer_groups', 'customers.customer_group_id', '=', 'customer_groups.id') ->addSelect( 'customers.id as customer_id', 'customers.email', 'customers.phone', 'customers.gender', ) ->addSelect( DB::raw('CONCAT(' . DB::getTablePrefix() . 'customers.first_name, " ", ' . DB::getTablePrefix() . 'customers.last_name) as full_name') ); $this->addFilter('customer_id', 'customers.id'); $this->addFilter('full_name', DB::raw('CONCAT(' . DB::getTablePrefix() . 'customers.first_name, " ", ' . DB::getTablePrefix() . 'customers.last_name)')); $this->addFilter('phone', 'customers.phone'); $this->addFilter('gender', 'customers.gender'); $this->setQueryBuilder($queryBuilder); } } |
Understanding the Methods:
1. prepareQueryBuilder() – This method is used to fetch data from the database or collections based on a database query.
When the records are retrieved, the $this->setQueryBuilder($queryBuilder) method is called.
Inside the prepareQueryBuilder(), we use the following function to retrieve the data:
2. setQueryBuilder($queryBuilder) – This method is defined in Webkul\Ui\DataGrid\DataGrid.
This method is used to set the $queryBuilder.
3. addFilter() –This lets you set up search filters so users can easily find specific rows based on their needs.
Step 4: Add Columns to the Datagrid
Now, we need to tell the datagrid which columns to display.
We do this using the addColumns() function, passing our settings as key-value pairs.
|
1 2 3 4 5 6 7 8 9 10 11 12 13 14 15 16 17 18 19 20 21 22 23 24 25 26 27 28 29 30 31 32 33 34 35 36 37 38 39 40 41 42 43 44 45 46 47 48 49 50 51 52 53 54 55 56 57 58 59 60 61 |
public function addColumns() { $this->addColumn([ 'index' => 'customer_id', 'label' => trans('admin::app.datagrid.id'), 'type' => 'number', 'searchable' => false, 'sortable' => true, 'filterable' => true, ]); $this->addColumn([ 'index' => 'full_name', 'label' => trans('admin::app.datagrid.name'), 'type' => 'string', 'searchable' => true, 'sortable' => true, 'filterable' => true, ]); $this->addColumn([ 'index' => 'email', 'label' => trans('admin::app.datagrid.email'), 'type' => 'string', 'searchable' => true, 'sortable' => true, 'filterable' => true, ]); $this->addColumn([ 'index' => 'phone', 'label' => trans('admin::app.datagrid.phone'), 'type' => 'number', 'searchable' => true, 'sortable' => true, 'filterable' => false, 'closure' => function ($row) { if (! $row->phone) { return '-'; } return $row->phone; }, ]); $this->addColumn([ 'index' => 'gender', 'label' => trans('admin::app.datagrid.gender'), 'type' => 'string', 'searchable' => false, 'sortable' => true, 'filterable' => false, 'closure' => function ($row) { if (! $row->gender) { return '-'; } return $row->gender; }, ]); } |
Essential Keys Used in the Datagrid
Step 5: Render the Grid in Your Blade File
To show the datagrid on the frontend, you need to call the datagrid-plus Vue component inside your Blade view file.
|
1 2 3 4 5 6 7 8 9 10 11 12 13 14 15 16 17 18 19 20 21 22 23 24 |
@extends('admin::layouts.master') @section('page_title') Package HelloWorld @stop @section('content-wrapper') <div class="content full-page dashboard"> <div class="page-header"> <div class="page-title"> <h1>Package HelloWorld</h1> </div> <div class="page-action"> </div> </div> <div class="page-content"> <datagrid-plus src="{{ route('admin.helloworld.index') }}"></datagrid-plus> </div> </div> @stop |
Step 6: Define the Route
Your Blade file needs a valid route to fetch the grid data.
Open your package’s routing file and set up a new endpoint protected by the admin middleware.
This ensures that only authorized users can access the datagrid.
|
1 2 3 4 5 6 7 8 9 10 11 12 13 14 15 |
<?php use Illuminate\Support\Facades\Route; use Webkul\HelloWorld\Http\Controllers\Admin\HelloWorldController; Route::group([ 'prefix' => 'admin/helloworld', 'middleware' => ['web', 'admin'] ], function () { Route::get('', [HelloWorldController::class,'index'])->defaults('_config', [ 'view' => 'helloworld::admin.index', ])->name('admin.helloworld.index'); }); |
Step 7: Create the Controller
Finally, create the controller that handles the request.
Then, it returns the JSON datagrid response if called via AJAX; otherwise, it loads the Blade view for standard page visits.
|
1 2 3 4 5 6 7 8 9 10 11 12 13 14 15 16 17 18 19 20 21 22 23 24 25 26 27 28 29 30 31 32 33 34 35 36 37 38 39 40 41 42 43 44 45 |
namespace Webkul\HelloWorld\Http\Controllers\Admin; use Illuminate\Routing\Controller; use Illuminate\Foundation\Bus\DispatchesJobs; use Illuminate\Foundation\Validation\ValidatesRequests; use Illuminate\Foundation\Auth\Access\AuthorizesRequests; use Webkul\HelloWorld\Datagrid\HelloWorldDataGrid; class HelloWorldController extends Controller { use AuthorizesRequests, DispatchesJobs, ValidatesRequests; /** * Contains route related configuration * * @var array */ protected $_config; /** * Create a new controller instance. * * @return void */ public function __construct() { $this->middleware('admin'); $this->_config = request('_config'); } /** * Display a listing of the resource. * * @return \Illuminate\View\View */ public function index() { if (request()->ajax()) { return app(HelloWorldDataGrid::class)->toJson(); } return view($this->_config['view']); } } |
Adding Actions and Mass Actions
|
1 2 3 4 5 6 7 8 9 10 11 12 13 14 15 16 17 18 19 20 21 22 23 24 25 26 27 28 29 30 31 32 33 34 35 36 37 38 39 40 41 42 43 44 45 46 47 |
/** * Prepare actions. * * @return void */ public function prepareActions() { $this->addAction([ 'method' => 'GET', 'route' => 'admin.customer.edit', 'icon' => 'icon pencil-lg-icon', 'title' => trans('admin::app.customers.customers.edit-help-title'), ]); $this->addAction([ 'method' => 'POST', 'route' => 'admin.customer.delete', 'icon' => 'icon trash-icon', 'title' => trans('admin::app.customers.customers.delete-help-title'), ]); } /** * Prepare mass actions. * * @return void */ public function prepareMassActions() { $this->addMassAction([ 'type' => 'delete', 'label' => trans('admin::app.datagrid.delete'), 'action' => route('admin.customer.mass_delete'), 'method' => 'POST', ]); $this->addMassAction([ 'type' => 'update', 'label' => trans('admin::app.datagrid.update-status'), 'action' => route('admin.customer.mass_update'), 'method' => 'POST', 'options' => [ trans('admin::app.datagrid.active') => 1, trans('admin::app.datagrid.inactive') => 0, ], ]); } |
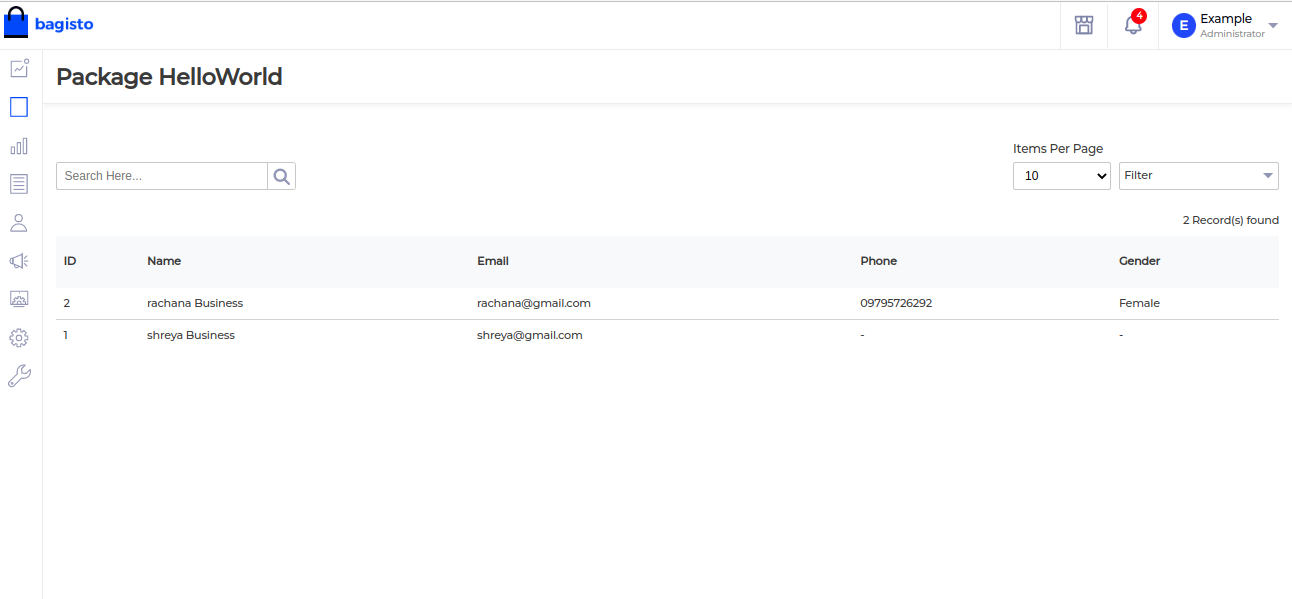
Final datagrid looks like this.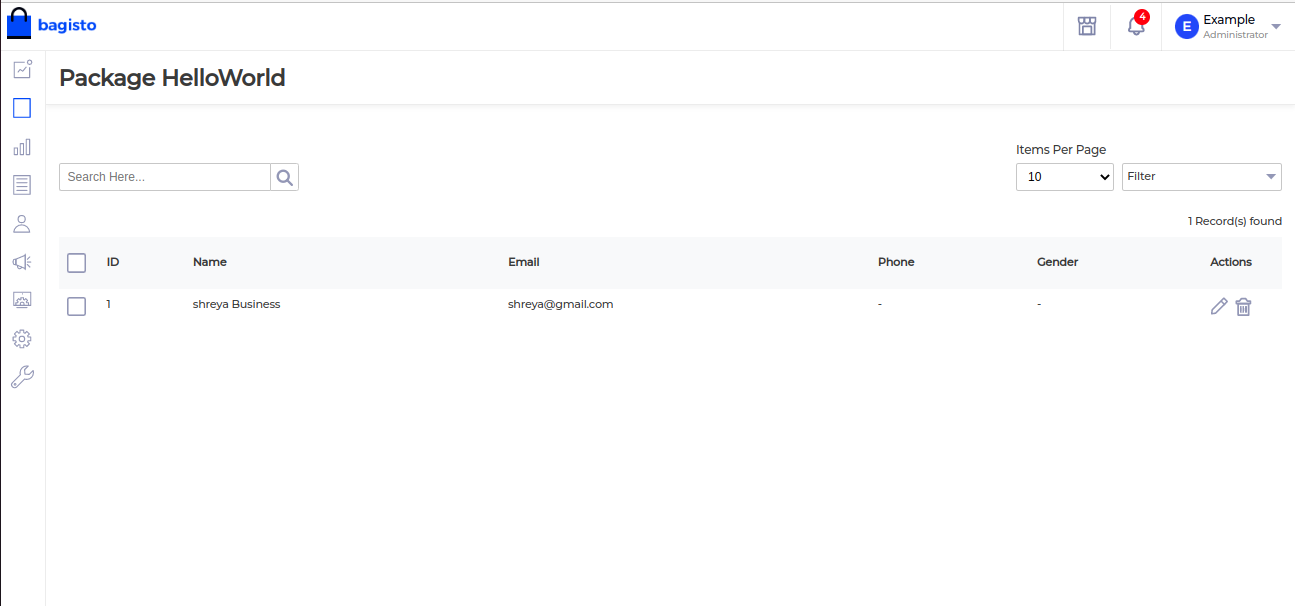
Note: I explored this while contributing to the Laravel-based project Bagisto.


I’m installing with composer according to the instructions here, but I’m getting an error.
error: Class “Webkul\Ui\DataGrid\DataGrid” not found (View: C:\laragon\www\bagistomasterdortgen\vendor\bagisto\bagisto-bulk-upload\src\Resources\views\admin\bulk-upload\data- flow-profile\index.blade.php)