Stock Notification allows users to get notified when an out-of-stock product gets back in stock and is available for purchase.
The users just have to provide their email ID and they will receive a mail when the product gets back in stock. The admin can choose whether the users get notified automatically or manually.
I will guide you through the process of creating a Stock Notification Package in Bagisto.
Building a Stock Notification Package in Bagisto Step-by-Step Tutorial
The stock Notification module allows customers to subscribe to the email alerts for the out-of-stock products. An automated or manual email will be sent to the customers who have opted for the out-of-stock notification.
1) Module Setup
So in the installation of Bagisto, you will get the directory name Webkul which contains the packages for Bagisto. Create a directory named Notify & src inside the Webkul folder at the root of the Bagisto installation. packages directory is the container of all namespaces of packages. A namespace or vendor name is a group of entities or classes that are separated from classes of other namespaces with the same name so they don’t conflict. Every extension or package that we will develop should be kept in the same namespace to avoid conflict between classes with the same name.

Now add the below code inside the “autoload psr-4” in the composer.json file as shown below.
|
1 |
"Webkul\\Notify\\": "packages/Webkul/Notify/src" |
Now register in the provider array with the array merge function in the config/app.php file which is presented in the root directory of Bagisto.
|
1 |
Webkul\Notify\Providers\NotifyServiceProvider::class, |
2) Providers
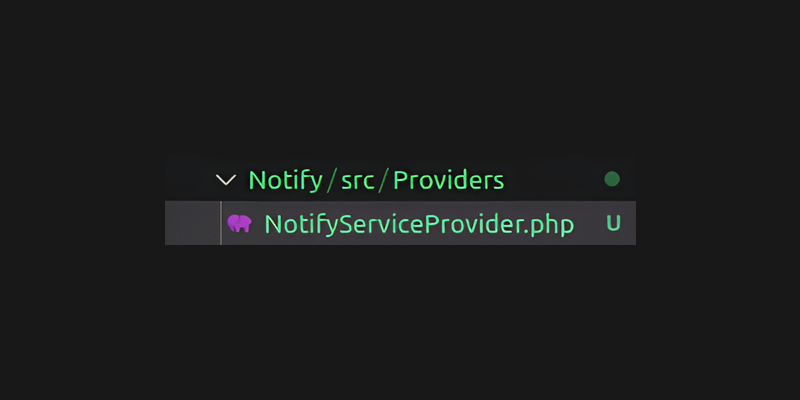
In the src folder, create a folder named Providers. Inside that folder, create a file named NotifyServiceProvider.php. Make sure to create the file name according to your module name. Now the structure will look like this.
Run the below command to register the package in the root directory of Bagisto.
|
1 |
composer dump-autoload |
3) Migrations
Create migrations to create a table inside the database and the directory structure will look like this-
|
1 |
packages / Webkul / Notify/ src / Database / Migrations |
So hit the below command in the terminal inside the root directory of Bagisto to create a new table by the name of notify in the database.
|
1 |
php artisan make:migration create_notify_table --path=packages/Webkul/Notify/src/Database/Migrations |

Loading Migrations From Package
Now add the below code inside the NotifyServiceProvider.php file in the boot method.
|
1 |
$this->loadMigrationsFrom(__DIR__ .’/../Database/Migrations’); |
Creating Table From Migrations
Run the given command in the root directory of Bagisto to create the notify table in your database.
|
1 |
php artisan migrate |
4) Models
Now, create a folder named Contracts inside Webkul/Notify/src and create an interface file named Notify.php. As shown in the below image.
|
1 2 3 4 5 6 7 |
<?php namespace Webkul\Notify\Contracts; interface Notify { } |
Now, create a Models folder inside packages/Webkul/Notify/src/. Inside the models folder, create a model proxy file named NotifyProxy.php. As shown in the below image.
|
1 2 3 4 5 6 7 8 9 |
<?php namespace Webkul\Notify\Models; use Konekt\Concord\Proxies\ModelProxy; class NotifyProxy extends ModelProxy { } |
Now, we need to create a provider
By the name of ModuleServiceProvider.php inside Webkul/Notify/src/Providers. And change the namespaces and the models class name accordingly.
|
1 2 3 4 5 6 7 8 9 10 11 12 |
<?php namespace Webkul\Notify\Providers; use Konekt\Concord\BaseModuleServiceProvider; class ModuleServiceProvider extends BaseModuleServiceProvider { protected $models = [ \Webkul\Notify\Models\Notify::class, ]; } |
Finally, register the Module Service Provider
Create ModuleServiceProvider.php file in the config/concord.php file and this file is presented in the root directory of Bagisto.
|
1 |
\Webkul\Notify\Providers\ModuleServiceProvider::class, |
5) Repository
Create a Repository folder inside Webkul/Notify/src/ and create a file named NotifyRepository.php. In the repository class, create the model() method that returns the path of your contract class.
|
1 2 3 4 5 6 7 8 9 10 11 12 13 14 15 16 17 18 |
<?php namespace Webkul\Notify\Repository; use Webkul\Core\Eloquent\Repository; class NotifyRepository extends Repository { /** * Specify the Model class name * * @return string */ function model(): string { return 'Webkul\Notify\Contracts\Notify'; } } |
6) Routes
Create a Routes folder inside packages /Webkul/Notify/src/ and create 2 files named admin-routes.php and shop-routes.php. To learn in detail about Routes, you can visit the Laravel documentation here.
Admin-
|
1 2 3 4 5 6 7 8 9 10 11 12 |
<?php use Illuminate\Support\Facades\Route; use Webkul\Notify\Http\Controllers\Admin\NotifyController; Route::group(['middleware' => ['web', 'admin'], 'prefix' => config('app.admin_url')], function () { Route::get('/notify', [NotifyController::class, 'index'])->name('notify.admin.index'); Route::post('/notify/store', [NotifyController::class, 'store'])->name('notify.admin.store'); Route::post('/notify/update-stock-status', [NotifyController::class, 'updateStockStatus'])->name('notify.admin.updateStockStatus'); }); |
Shop-
|
1 2 3 4 5 6 7 8 9 10 |
<?php use Illuminate\Support\Facades\Route; use Webkul\Notify\Http\Controllers\Shop\NotifyController; Route::group(['middleware' => ['theme', 'locale', 'currency']], function () { Route::controller(NotifyController::class)->prefix('nofity')->group(function () { Route::post('/create', 'store')->name('shop.notify.store'); }); }); |
Loading Routes
Now, we need to register our routes in the service provider’s boot method, which is located in NotifyServiceProvider.php
|
1 2 3 |
$this->loadRoutesFrom(__DIR__ . '/../Routes/admin-routes.php'); $this->loadRoutesFrom(__DIR__ . '/../Routes/shop-routes.php'); |
7) Controllers
To learn in detail about Controllers, you can visit the Laravel documentation here
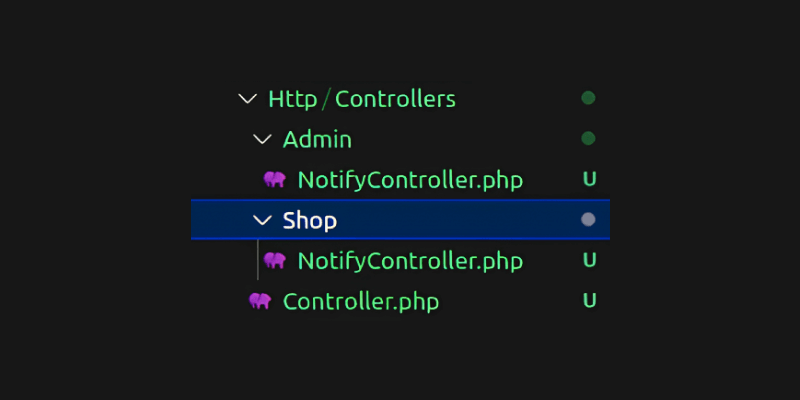
Create an Http folder in the packages/Webkul/Notify/src path. Inside the Http folder, create another folder named Controllers. Inside the Controllers folder, we need to create one file named Controller.php and two folders, namely Admin and Shop for the backend and frontend respectively.
Inside both the Admin and Shop folders, create a NotifyController.php file. The updated directory structure will look like this.
Admin Controller File –
|
1 2 3 4 5 6 7 8 9 10 11 12 13 14 15 16 17 18 19 20 21 22 23 24 25 26 27 28 29 30 31 32 33 34 35 36 37 38 39 40 41 42 43 44 45 46 47 48 49 50 51 52 53 54 55 56 57 58 59 60 61 62 63 64 65 66 67 68 69 70 71 72 73 74 75 76 77 78 79 80 |
<?php namespace Webkul\Notify\Http\Controllers\Admin; use Illuminate\Http\Request; use Illuminate\Support\Facades\Mail; use Webkul\Customer\Repositories\CustomerRepository; use Webkul\Notify\DataGrids\NotifyDataGrid; use Webkul\Notify\Http\Controllers\Controller; use Webkul\Notify\Repository\NotifyRepository; use Webkul\Notify\Mail\ProductBackInStockNotification; use Webkul\Product\Repositories\ProductRepository; class NotifyController extends Controller { /** * Create a controller instance. * * @param \Webkul\Notify\Repository\NotifyRepository $notifyRepository * @param \Webkul\Customer\Repositories\CustomerRepository $customerRepository * @param \Webkul\Product\Repositories\ProductRepository $productRepository * @return void */ public function __construct( protected NotifyRepository $notifyRepository, protected CustomerRepository $customerRepository, protected ProductRepository $productRepository ) { } /** * Index. * * @return \Illuminate\View\View */ public function index() { if (request()->ajax()) { return app(NotifyDataGrid::class)->toJson(); } return view('notify::admin.index'); } /** * Store. * * @param \Illuminate\Http\Request $request * @return \Illuminate\View\View */ public function store(Request $request) { return redirect()->route('notify.admin.index'); } /** * Store. * * @param \Illuminate\Http\Request $request * @return \Illuminate\View\View */ public function updateStockStatus(Request $request) { $notificationId = $request->notificationId; try { $data = $this->notifyRepository->find($notificationId); $customer = $this->customerRepository->find($data->customer_id); $product = $this->productRepository->find($data->product_id); Mail::queue(new ProductBackInStockNotification($product, $customer)); return response()->json(['message' => 'Stock status updated successfully.']); } catch (\Exception $e) { return response()->json(['message' => $e->getMessage()]); } } } |
Shop Controller File –
|
1 2 3 4 5 6 7 8 9 10 11 12 13 14 15 16 17 18 19 20 21 22 23 24 25 26 27 28 29 30 31 32 33 |
<?php namespace Webkul\Notify\Http\Controllers\Shop; use Illuminate\Http\Request; use Webkul\Notify\Http\Controllers\Controller; use Webkul\Notify\Repository\NotifyRepository; class NotifyController extends Controller { /** * Create a controller instance. * * @param \Webkul\Notify\Repository\NotifyRepository $NotifyRepository * @return void */ public function __construct(protected NotifyRepository $notifyRepository) { } /** * Store. * * @return \Illuminate\View\View */ public function store(Request $request) { $this->notifyRepository->create([ 'product_id' => $request->product_id, 'customer_id' => $request->customer_id, ]); } } |
Controller.php
|
1 2 3 4 5 6 7 8 9 10 11 12 13 |
<?php namespace Webkul\Notify\Http\Controllers; use Illuminate\Foundation\Bus\DispatchesJobs; use Illuminate\Routing\Controller as BaseController; use Illuminate\Foundation\Validation\ValidatesRequests; use Illuminate\Foundation\Auth\Access\AuthorizesRequests; class Controller extends BaseController { use AuthorizesRequests, DispatchesJobs, ValidatesRequests; } |
8) Views
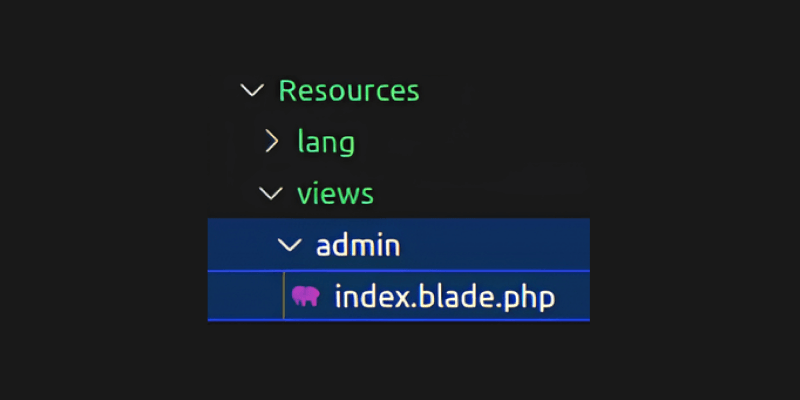
Create a Resources folder in the packages/Webkul/Notify/src path. Inside the Resources folder, create another folder named views. Now inside the views folder, we need to create one more folder ie admin. Now create one file by the name of index.blade.php inside the admin folder. The structure will look something like this.
index.blade.php
|
1 2 3 4 5 6 7 8 9 10 11 12 13 14 15 16 17 18 19 20 21 22 23 24 |
<x-admin::layouts> <x-admin::datagrid :src="route('notify.admin.index')"> </x-admin::datagrid> <script src="https://code.jquery.com/jquery-3.6.4.min.js"></script> <script> function sendQuickMail(notificationId) { $.ajax({ type: 'POST', url: '{{ route("notify.admin.updateStockStatus") }}', data: { notificationId: notificationId, _token: '{{ csrf_token() }}' }, success: function(response) { alert(response.message); }, error: function(error) { console.error('Error sending notification:', error); } }); } </script> </x-admin::layouts> |
Load Views From Package
Now we need to register our views in the service provider’s boot method. Open the file packages/Webkul/Notify/src/Providers/NotifyServiceProvider.php and update it as follows.
|
1 |
$this->loadViewsFrom(__DIR__ . '/../Resources/views', 'notify'); |
9) Localization
So, let’s create a language file for our package. Create a lang folder in the packages/Webkul/Notify/src/Resources path. Inside the lang folder, you create different folders for language translations. For example, you create a folder for English (‘en’), Hindi (‘hi’), etc. For now, let’s create a folder named en (representing the language code). Inside the en folder, create a file named app.php for language translations. The structure and file will look like this.

app.php
|
1 2 3 4 5 6 7 8 9 10 11 |
<?php return [ 'admin' => [ 'id' => 'ID', 'product_name' => 'Product Name', 'customer_name' => 'Customer Name', 'add_date' => 'Add Date', 'send_notification' => 'Send Notification', ] ]; |
Load Translations From Package
Now register the language file in the service provider in the boot method.
|
1 |
$this->loadTranslationsFrom(__DIR__ . '/../Resources/lang', 'notify'); |
10) Admin menu
To ensure that the admin menu includes the necessary configurations, follow the steps which are given below.
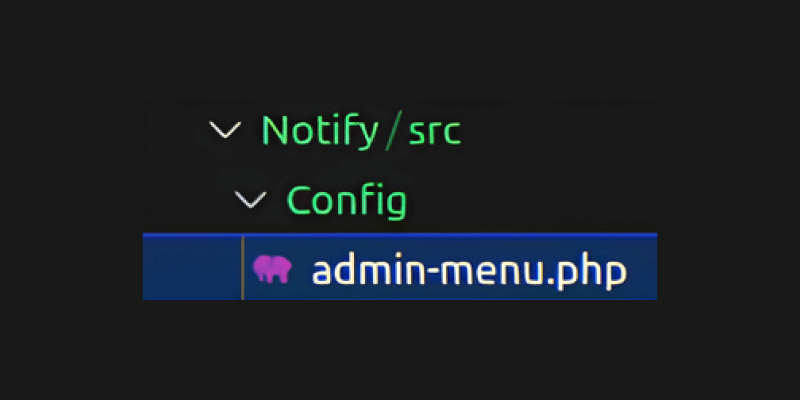
- In your package’s source directory, which is typically located at packages/Webkul/Notify/src, Create a new folder named Config.
- Inside the newly created Config folder, create a file named admin-menu.php.
The structure and file will look like this.
admin-menu.php
|
1 2 3 4 5 6 7 8 9 10 11 |
<?php return [ [ 'key' => 'notifys', 'name' => 'Notify-Me', 'route' => 'notify.admin.index', 'sort' => 2, 'icon' => 'notify', ], ]; |
3. Inside merge the admin-menu.php configuration with the core menu file, use the mergeConfigFrom() method in the register() method of your package’s service provider. Here’s an example.
|
1 2 3 |
$this->mergeConfigFrom( dirname(__DIR__) . '/Config/admin-menu.php', 'menu.admin' ); |
Now run the below command to clear the cache in the root directory of Bagisto.
|
1 |
php artisan optimize:clear |
11) Data Grid
A DataGrid is a concept of displaying your database records in a tabular format. It is a powerful tool that helps you present large amounts of data in an organized way. At Bagisto, we have implemented this feature, which allows you to use it to display data in tabular format or write code from scratch to display data. In addition to the basic functionality of DataGrid, We have also implemented additional features such as sorting, filtering, and mass action.
- Create a folder called DataGrids inside the src folder of your package. Within the DataGrids folder, create a file name NotifyDataGrid.php

NotifyDataGrid.php
|
1 2 3 4 5 6 7 8 9 10 11 12 13 14 15 16 17 18 19 20 21 22 23 24 25 26 27 28 29 30 31 32 33 34 35 36 37 38 39 40 41 42 43 44 45 46 47 48 49 50 51 52 53 54 55 56 57 58 59 60 61 62 63 64 65 66 67 68 69 70 71 72 73 74 75 76 77 78 79 80 81 82 83 84 85 86 87 88 89 90 91 92 93 94 95 96 97 98 99 100 |
<?php namespace Webkul\Notify\DataGrids; use Illuminate\Support\Facades\DB; use Webkul\DataGrid\DataGrid; class NotifyDataGrid extends DataGrid { /** * Primary column. * * @var string */ protected $primaryColumn = 'id'; /** * Prepare query builder. * * @return \Illuminate\Database\Query\Builder */ public function prepareQueryBuilder() { $tablePrefix = DB::getTablePrefix(); $queryBuilder = DB::table('notify') ->join('product_flat', 'product_flat.product_id', 'notify.product_id') ->join('customers', 'customers.id', 'notify.customer_id') ->select( 'notify.id', 'notify.product_id', 'notify.customer_id', 'notify.created_at', 'notify.send_notification', 'product_flat.name as product_name', DB::raw('CONCAT(' . $tablePrefix . 'customers.first_name, " ", ' . $tablePrefix . 'customers.last_name) as customer_name') ); return $queryBuilder; } /** * Prepare columns. * * @return void */ public function prepareColumns() { $this->addColumn([ 'index' => 'id', 'label' => trans('notify::app.admin.id'), 'type' => 'number', 'searchable' => false, 'sortable' => true, 'filterable' => true, ]); $this->addColumn([ 'index' => 'product_name', 'label' => trans('notify::app.admin.product_name'), 'type' => 'string', 'searchable' => true, 'sortable' => true, 'filterable' => false, ]); $this->addColumn([ 'index' => 'customer_name', 'label' => trans('notify::app.admin.customer_name'), 'type' => 'string', 'searchable' => true, 'sortable' => true, 'filterable' => false, ]); $this->addColumn([ 'index' => 'created_at', 'label' => trans('notify::app.admin.add_date'), 'type' => 'date', 'searchable' => true, 'sortable' => true, 'filterable' => false, ]); $this->addColumn([ 'index' => 'send_notification', 'label' => trans('notify::app.admin.send_notification'), 'type' => 'string', 'searchable' => true, 'sortable' => true, 'filterable' => false, 'closure' => function ($value) { return '<a href="" class="secondary-button" data-product-id="' . $value->id . '" onclick="sendQuickMail(' . $value->id . ')">' . trans('notify::app.admin.send_notification') . '</a>'; }, ]); } }<span style="font-weight: 400;"> </span> |
Now to make more changes and get the data into that DataGrid firstly you have to apply some of the changes in the
packages/Webkul/Shop/src/Http/Controllers/ProductsCategoriesProxyController.php file to get the quantity into the product variable as shown below.
|
1 2 3 4 |
$productCollection = $this->productRepository->with('inventories')->findOrFail($product->id); $quantity = $productCollection->inventories->pluck('qty')->sum(); $productCollection ['quantity'] = $quantity; $product = $productCollection; |
So add one more change in the blade file which is coming and handling the logical part of the product detail page from frontend ie packages/Webkul/Shop/src/Resources/views/products/view.blade.php and apply this below code in the @pushOnce(‘scripts’).
|
1 2 3 4 5 6 7 8 9 10 11 12 13 14 15 16 17 18 19 20 21 22 23 24 25 |
<script src="https://code.jquery.com/jquery-3.6.4.min.js"></script> <script> function sendMail(productId, customerId) { if (customerId == null) { alert('Please Login First'); }else{ $.ajax({ type: 'POST', url: '{{ route("shop.notify.store") }}', data: { product_id: productId, customer_id: customerId, _token: '{{ csrf_token() }}' }, success: function(response) { alert('We Will Notify You When Product Is Back In Stock'); }, error: function(error) { console.error('Error sending notification:', error); } }); } } </script> |
So create a button of Notify Me in the same file below the Add To Cart button and apply a condition because if the quantity is more than 0 it will show the Add To Cart button and if the quantity is 0 it will show the Notify Me button. As shown below. And apply the condition as well.
|
1 2 3 4 5 6 7 8 9 10 11 12 13 14 15 16 17 18 19 20 21 22 23 24 25 26 27 28 29 30 31 32 33 34 35 36 37 38 39 40 41 42 43 44 45 46 47 48 49 50 51 52 53 54 55 56 57 58 59 60 61 62 63 64 65 66 67 |
@php $customer = auth()->guard('customer')->user(); @endphp @if ($product->quantity) <div class="flex gap-[15px] max-w-[470px] mt-[30px] max-h-[100px]"> {!! view_render_event('bagisto.shop.products.view.quantity.before', ['product' => $product]) !!} @if ($product->getTypeInstance()->showQuantityBox()) <x-shop::quantity-changer name="quantity" value="1" class="gap-x-[16px] py-[15px] px-[26px] rounded-[12px]" > </x-shop::quantity-changer> @endif {!! view_render_event('bagisto.shop.products.view.quantity.after', ['product' => $product]) !!} <!-- Add To Cart Button --> {!! view_render_event('bagisto.shop.products.view.add_to_cart.before', ['product' => $product]) !!} <button type="submit" class="secondary-button w-full max-w-full" {{ ! $product->isSaleable(1) ? 'disabled' : '' }} > @lang('shop::app.products.view.add-to-cart') </button> {!! view_render_event('bagisto.shop.products.view.add_to_cart.after', ['product' => $product]) !!} </div> @else <!-- Notify Me Button --> <form id="notifyMeForm"> @csrf <br><br> <p class="row">Click Notify Button To Get Notification When Product Back In Stock</p> <br> <input type="hidden" name="product_id" id="product_id" value="{{ $product->id }}"> <input type="hidden" name="product_name" id="product_name" value="{{ $product->name }}"> </form> <div class="flex gap-[15px]"> <a href="javascript:void(0);" class="primary-button block w-86 max-w-[374px] py-[16px] px-[43px] m-0 ml-[0px] mx-auto rounded-[18px] text-[16px] text-center" data-product-id="{{ $product->id }}" onclick="sendMail({{ $product->id}}, {{ $customer?->id}})" > Notify </a> </div> @endif |
12) Mail Sent To Customers
So send an Email directly to the customers after clicking on the button Send Notification from the DataGrid. But you just need to create 2 folders and create a respective file for that.
|
1 |
packages/Webkul/Notify/src/Mail/ProductBackInStockNotification.php |
|
1 |
packages/Webkul/Notify/src/Listeners/ProductUpdateAfterListener.php |
The directory structures of both the files will look like this.
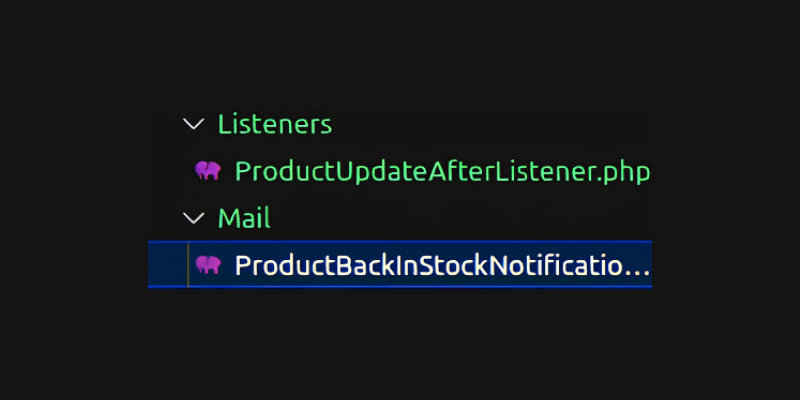
ProductBackInStockNotification.php
|
1 2 3 4 5 6 7 8 9 10 11 12 13 14 15 16 17 18 19 20 21 22 23 24 25 26 27 28 29 30 31 32 33 34 35 36 |
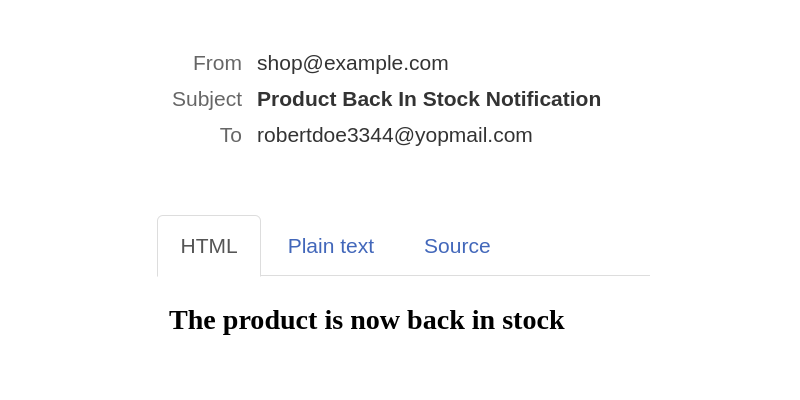
<?php namespace Webkul\Notify\Mail; use Illuminate\Bus\Queueable; use Illuminate\Mail\Mailable; use Illuminate\Queue\SerializesModels; use Illuminate\Contracts\Queue\ShouldQueue; class ProductBackInStockNotification extends Mailable implements ShouldQueue { use Queueable, SerializesModels; /** * Create a new mailable instance. * * @param \Webkul\Notify\Contracts\Product $product * @return void */ public function __construct(public $product, public $customer) { } /** * Build the message. * * @return \Illuminate\View\View */ public function build() { return $this->from(core()->getSenderEmailDetails()['email'], core()->getSenderEmailDetails()['name']) ->to($this->customer->email) ->subject('Product Back In Stock Notification') ->html('<h3>The product is now back in stock</h3>'); } } |
ProductUpdateAfterListener.php
|
1 2 3 4 5 6 7 8 9 10 11 12 13 14 15 16 17 18 19 20 21 22 23 24 25 26 27 28 29 30 31 32 33 34 35 36 37 38 39 40 41 42 43 44 45 46 47 48 49 50 |
<?php namespace Webkul\Notify\Listeners; use Illuminate\Support\Facades\Log; use Webkul\Notify\Repository\NotifyRepository; use Illuminate\Support\Facades\Mail; use Webkul\Customer\Repositories\CustomerRepository; use Webkul\Notify\Mail\ProductBackInStockNotification; use Webkul\Product\Repositories\ProductRepository; class ProductUpdateAfterListener { /** * Create a controller instance. * * @param \Webkul\Notify\Repository\NotifyRepository $notifyRepository * @param \Webkul\Customer\Repositories\CustomerRepository $customerRepository * @param \Webkul\Product\Repositories\ProductRepository $productRepository * @return void */ public function __construct( protected NotifyRepository $notifyRepository, protected CustomerRepository $customerRepository, protected ProductRepository $productRepository ) { } /** * Handle the event. * * @param mixed $product * @return void */ public function handle($product) { try { $datas = $this->notifyRepository->findByField('product_id', $product->id); foreach ($datas as $data) { $customer = $this->customerRepository->find($data->customer_id); Mail::queue(new ProductBackInStockNotification($product, $customer)); } } catch (\Exception $e) { Log::error('Error: ' . $e->getMessage()); } } } |
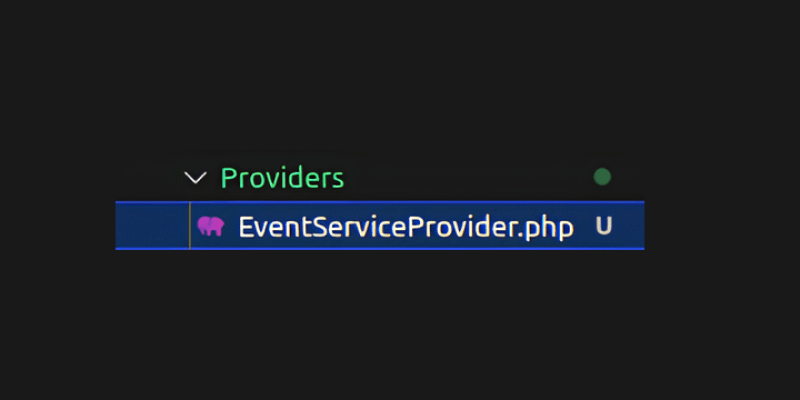
Now Create a new file packages/Webkul/Notify/src/providers/EventServiceProvider.php to send the event and mail to the bundled of customers after updating a product. The directory structure and file will look like this.
|
1 2 3 4 5 6 7 8 9 10 11 12 13 14 |
<?php namespace Webkul\Notify\Providers; use Illuminate\Foundation\Support\Providers\EventServiceProvider as ServiceProvider; class EventServiceProvider extends ServiceProvider { protected $listen = [ 'catalog.product.update.after' => [ 'Webkul\Notify\Listeners\ProductUpdateAfterListener', ], ]; } |
So register these events inside the NotifyServiceProvider.php
|
1 2 3 |
$this->app->register(ModuleServiceProvider::class); $this->app->register(EventServiceProvider::class); |
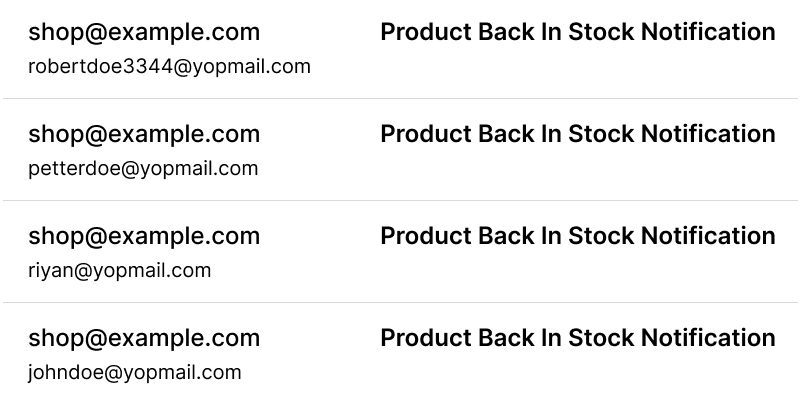
And the last step is to replace your SMTP credentials in the ENV file which is presented in the root directory. Check the response after clicking the button of Send Notification from the DataGrid. The DatGrid looks like this.
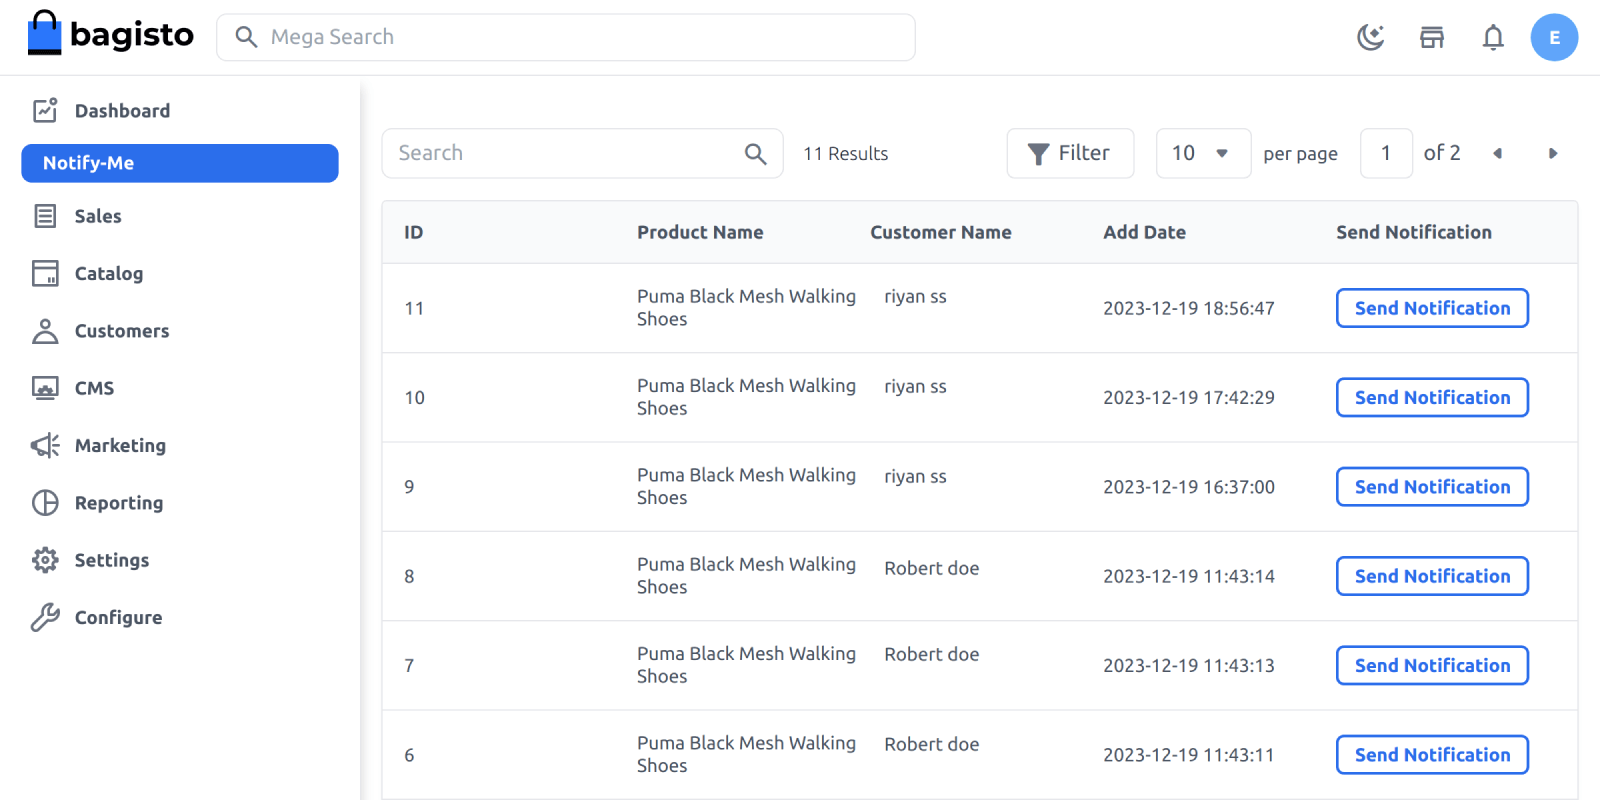
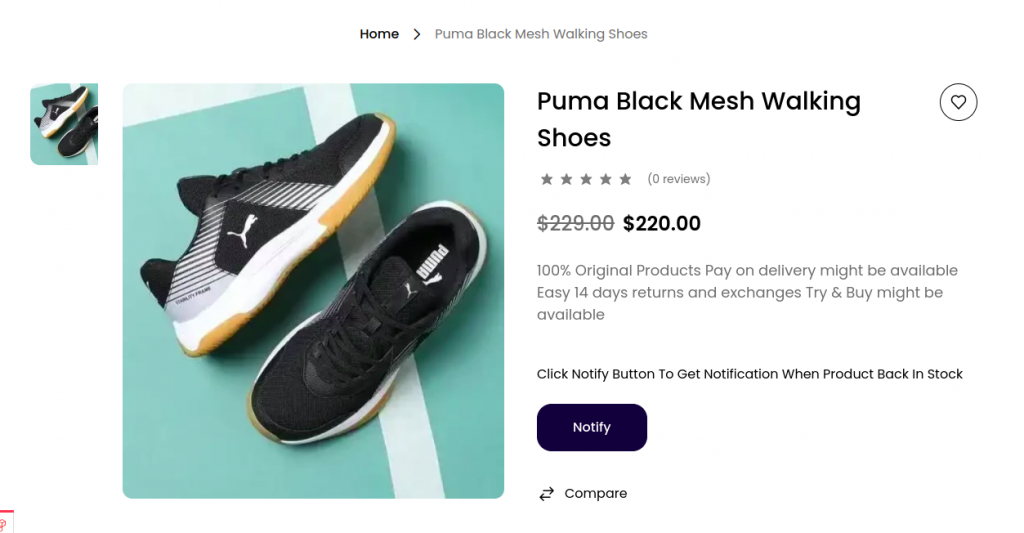
So this is our Product Detail Page looks like the product quantity will get Zero.
So Mail is received by the Customer After Hitting the button Send Notification for a particular customer. But after Updating the product mail is sent directly to all the customers which is been presented in the DataGrid.
Thanks for reading this blog. I hope you’ll get an idea of how to create a custom stock notification package. Please share your reviews on this, which will support me to write more.
You can directly get the code from the GitHub Stock Notification repository
Additionally, you can also Hire Laravel Developers to help you with your project requirements and ensure the successful implementation of your ideas.


Be the first to comment.