Today, In this blog we are going to learn about Social Login. With the help of this feature, the website visitor can easily sign up on your Bagisto store using social networks such as Github, Facebook, Twitter, Google, and LinkedIn. In this blog, we will learn about “Social Login for Bagisto“.
Also, the admin can manage settings for social networks on the back end such as App ID, secret key, etc.
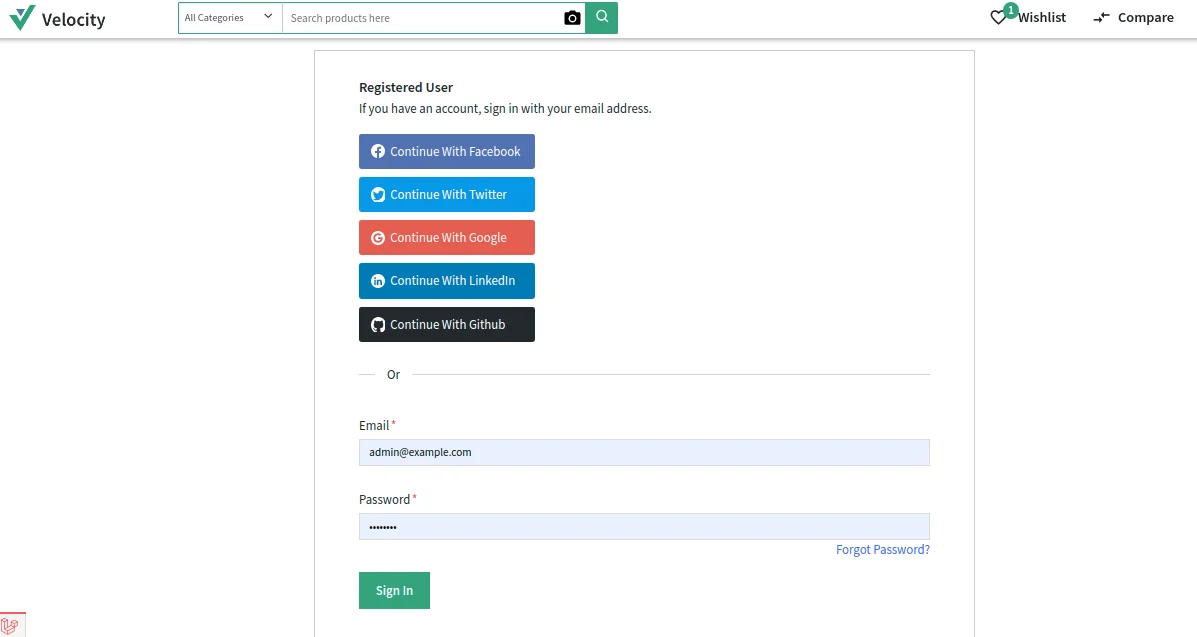
Admin Configuration of Social Login for Bagisto
To successfully use this feature the admin should navigate to configure>>customer>>social login then admin has to enable all the toggle buttons as shown in the below image.
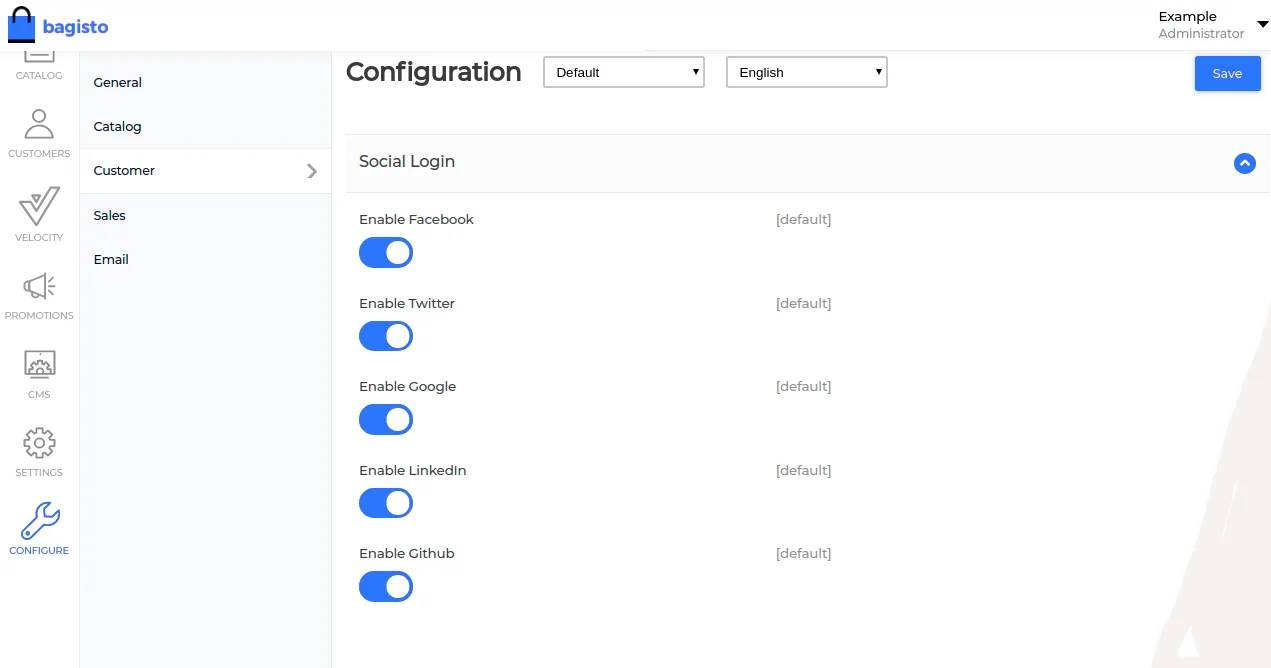
Social Sign-up On Customer’s End
After configuration settings, Customers can find various social networks at the login page and also sign up into their site using social networks like Github, Facebook, Twitter, Google, LinkedIn. There is no need to fill various fields for sign up.
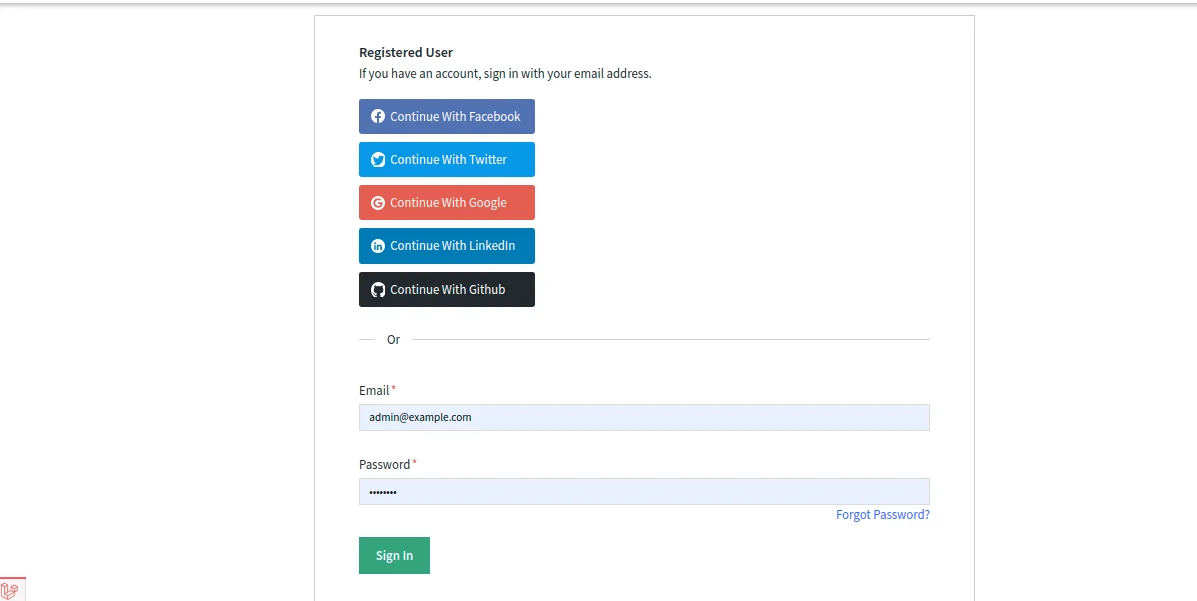
GitHub API Credentials
After clicking on the GitHub login button below page will be open.
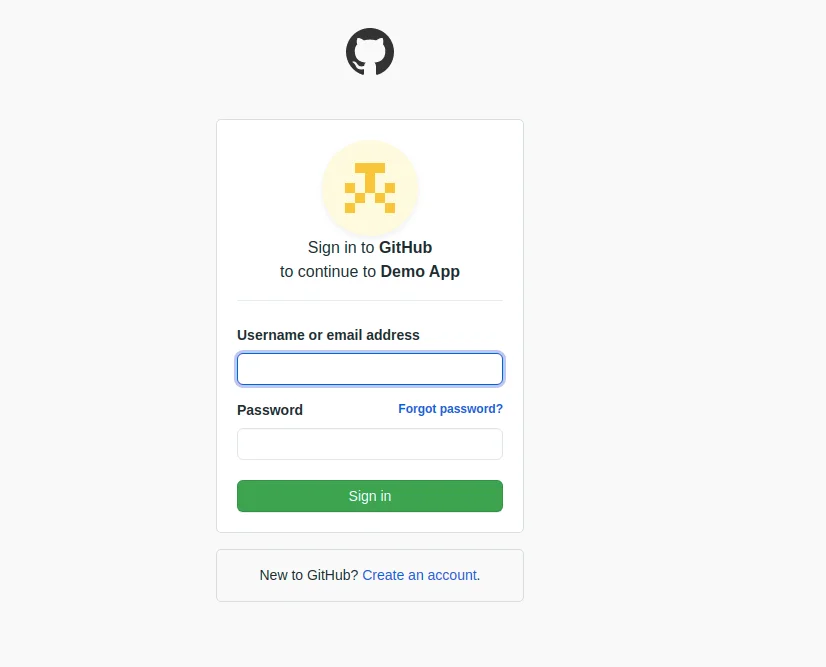
How To Set-Up Application For Github
You can create a GitHub application using this link https://github.com/
Steps to create an Application:
1.Go to the Settings :
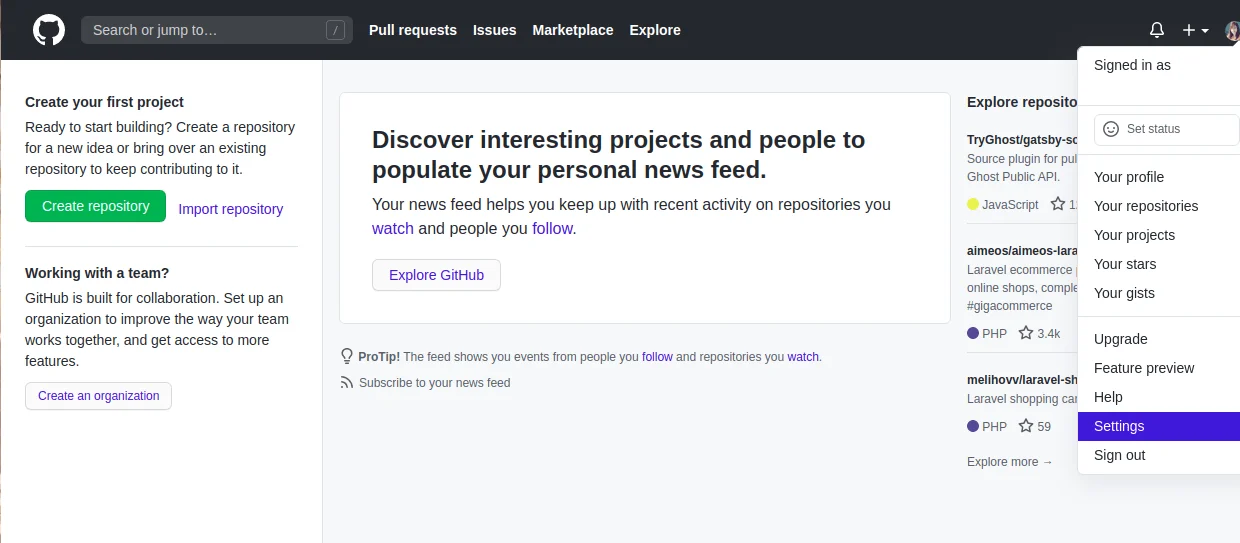
2. After that go to the Developer setting>>OAuth App :

3.Register a new OAuth application :
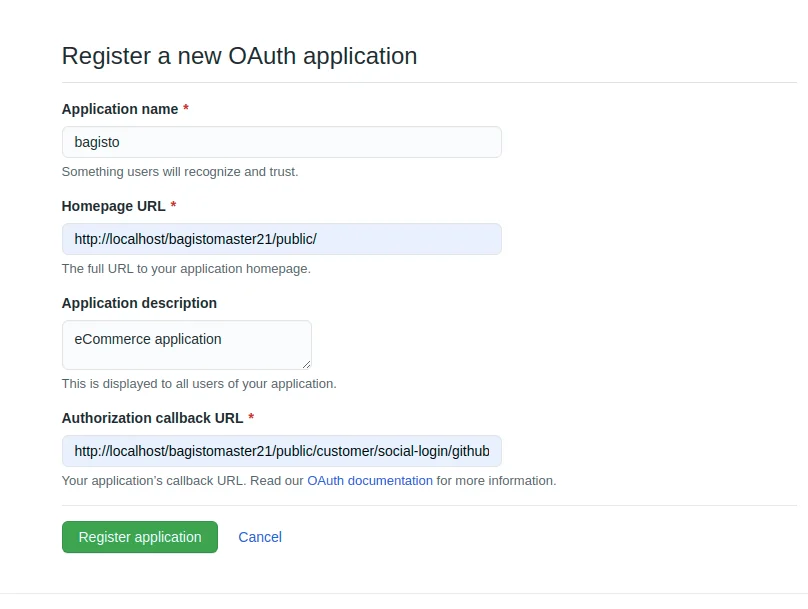
Note** You will find the Authorization callback URL into the .env file
4.After that, once you click on the Register Application, your new OAuth Application will be registered as shown in the below image:
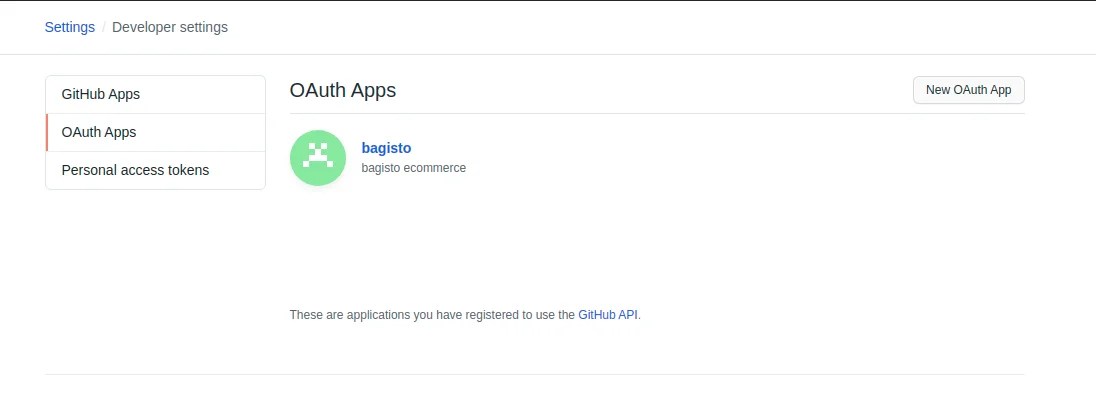
5.Now you have to click on the “bagisto” to get the secret keys.
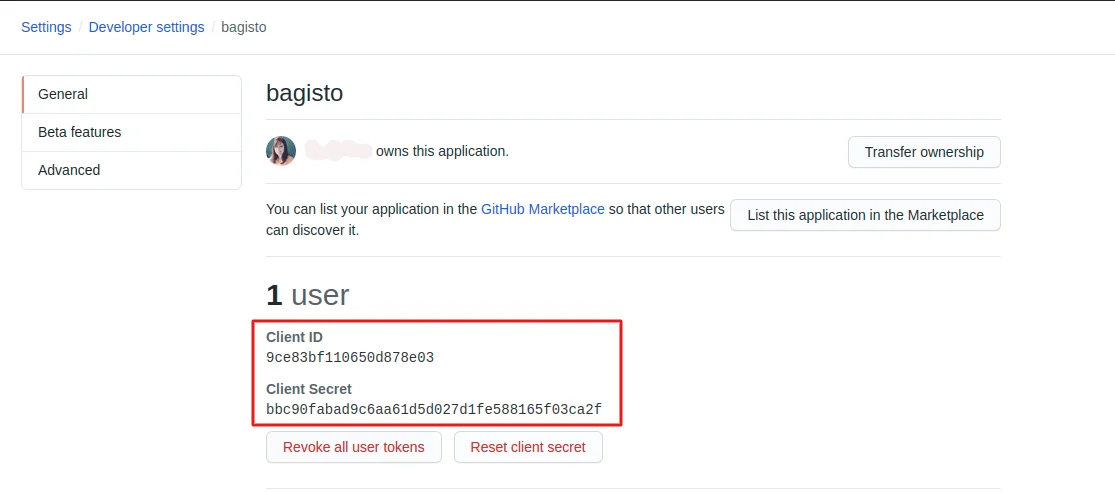
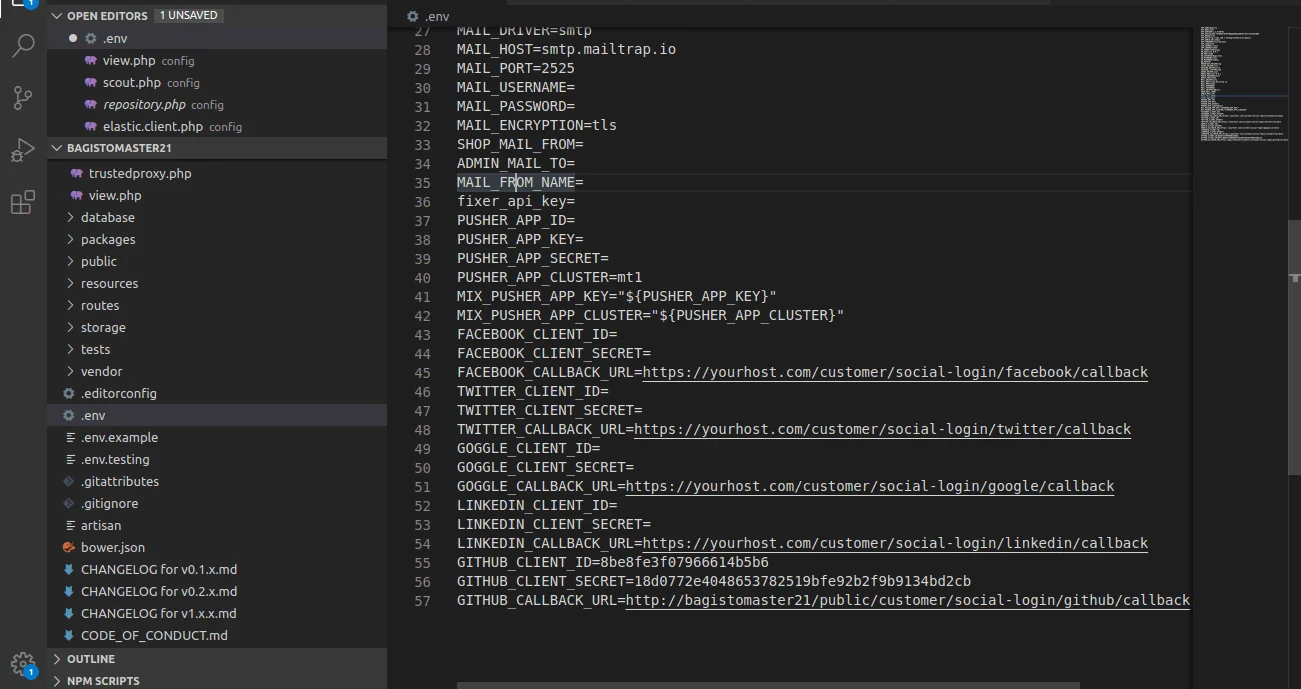
6.Here you will find the Client ID and Client Secret which you have to update in your .env file as shown in the below snapshot. And you will have to update your callback URL according to your URL instead of the yourhost as shown in the snapshot and the remaining part will be same after yourhost.
LinkedIn API Credentials
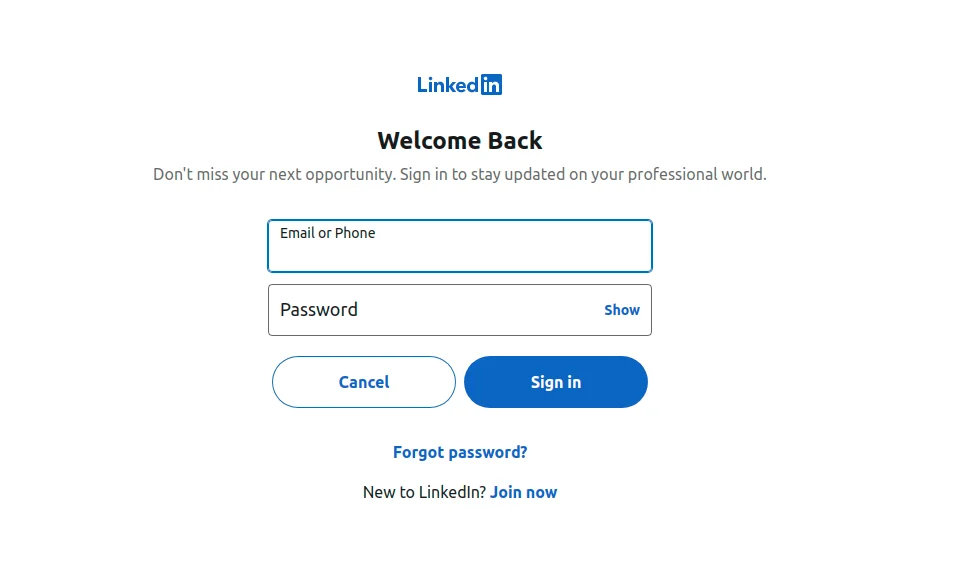
First, click on the LinkedIn login button below the page will be open.
How To Set-Up Application For LinkedIn
You can create a LinkedIn application using this link https://www.linkedin.com/developers/
To create an application Please follow these steps:
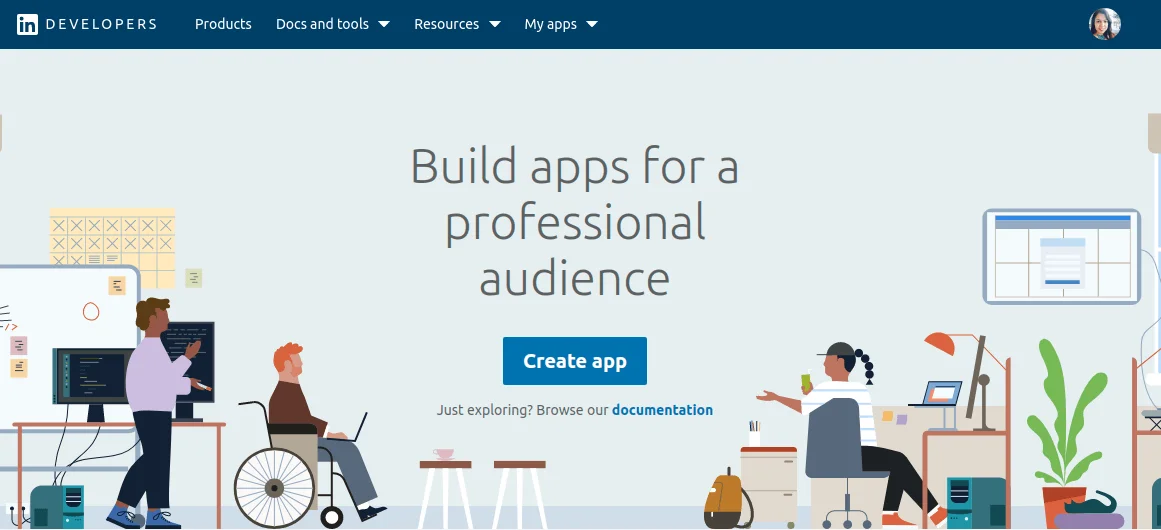
1. Clicking the above link will navigate the user to the “Building App” page. Here, the user will click on the “Create Application” button.
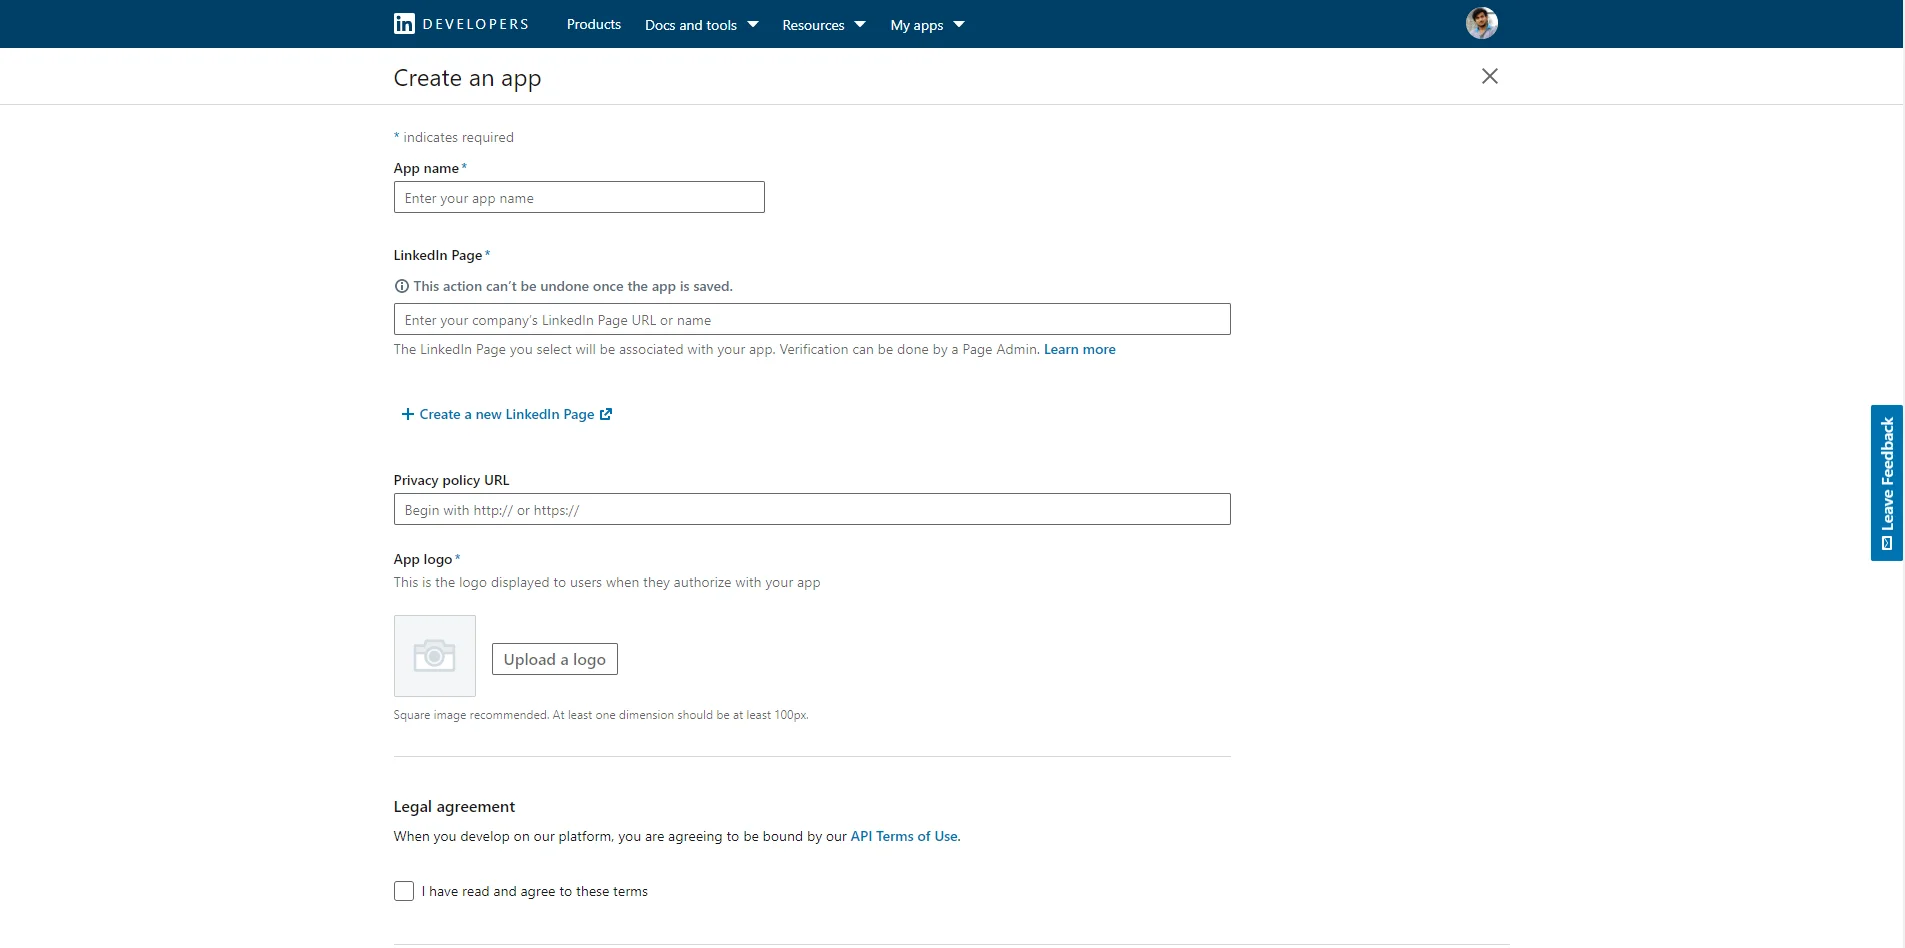
2. Moreover, fill out the form to register a New Application
3. You can see the settings and have to click on auth.
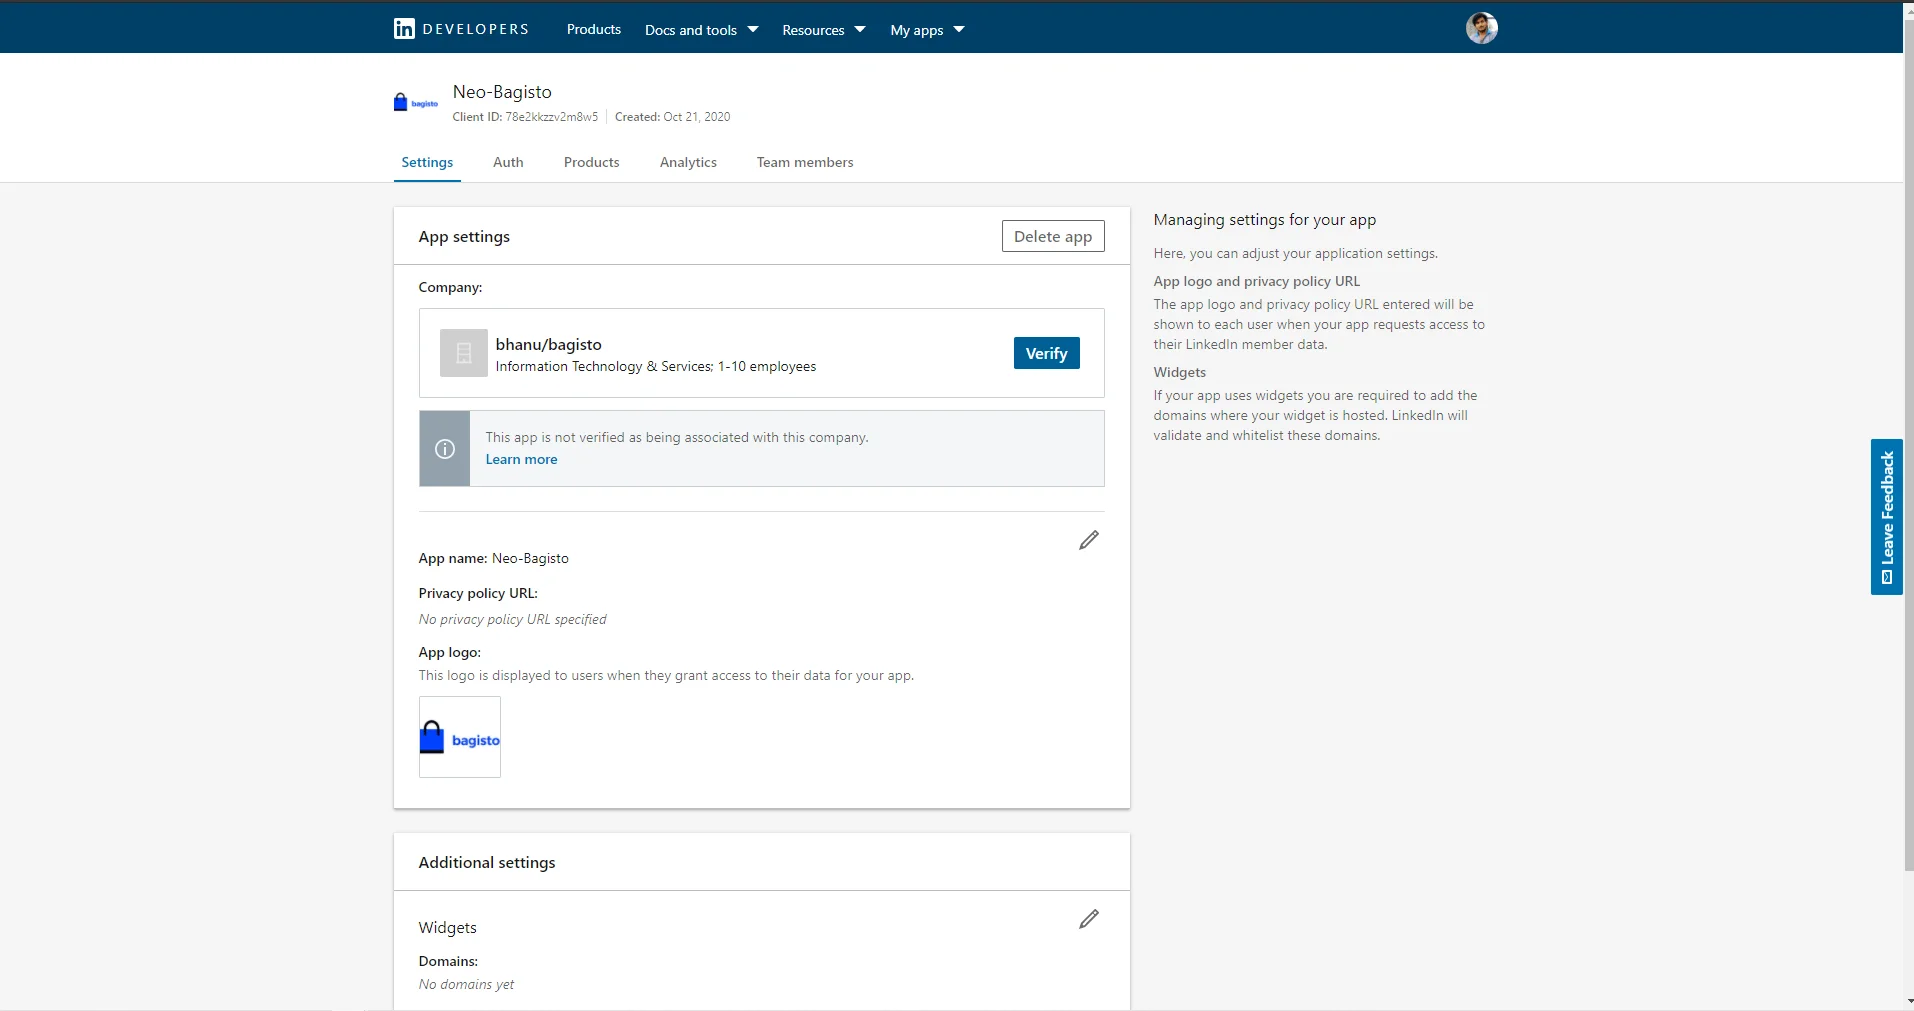
4. Here you can see your client Id and secret and you will have to put your callback URL.
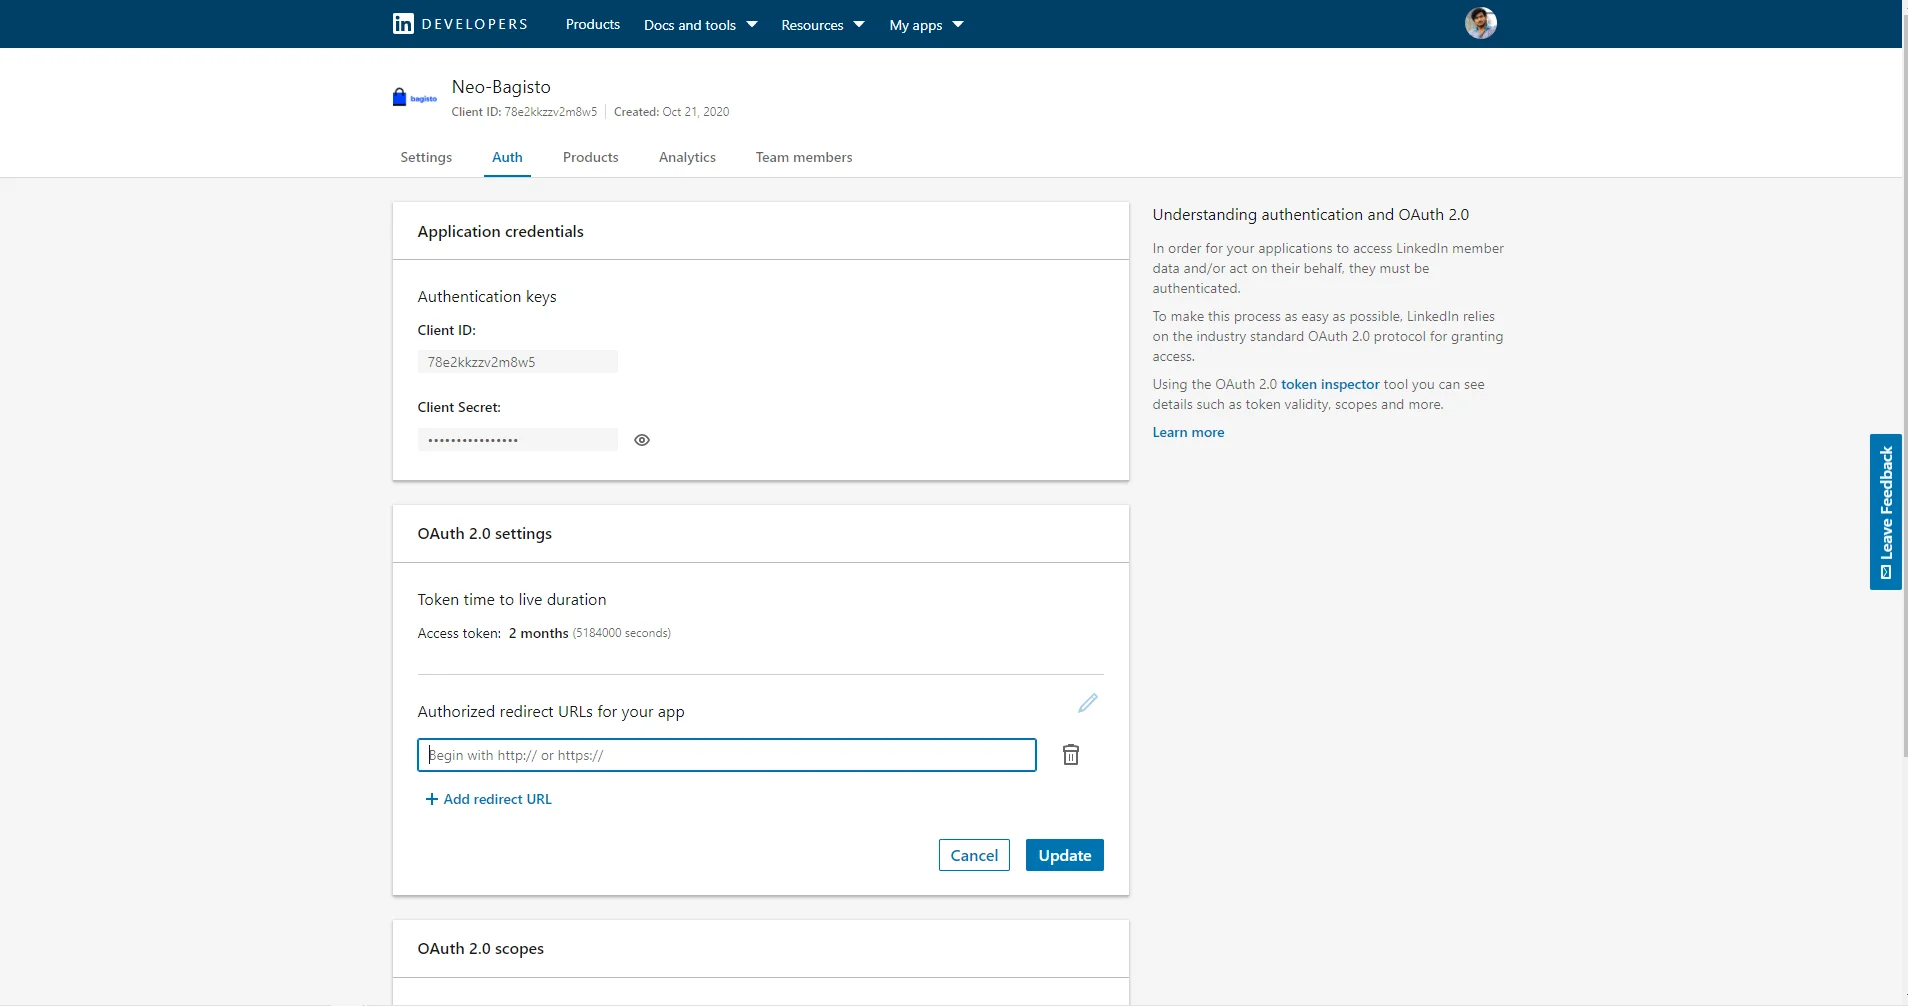
5. After that, you will receive Application details with your “Client ID” and “Client Secret”. Which you will have to add in the .env file in LinkedIn section as shown in the snapshot where in the link instead of yourhost you will have to give your link to the website and remaining part will be same after the yourhost.
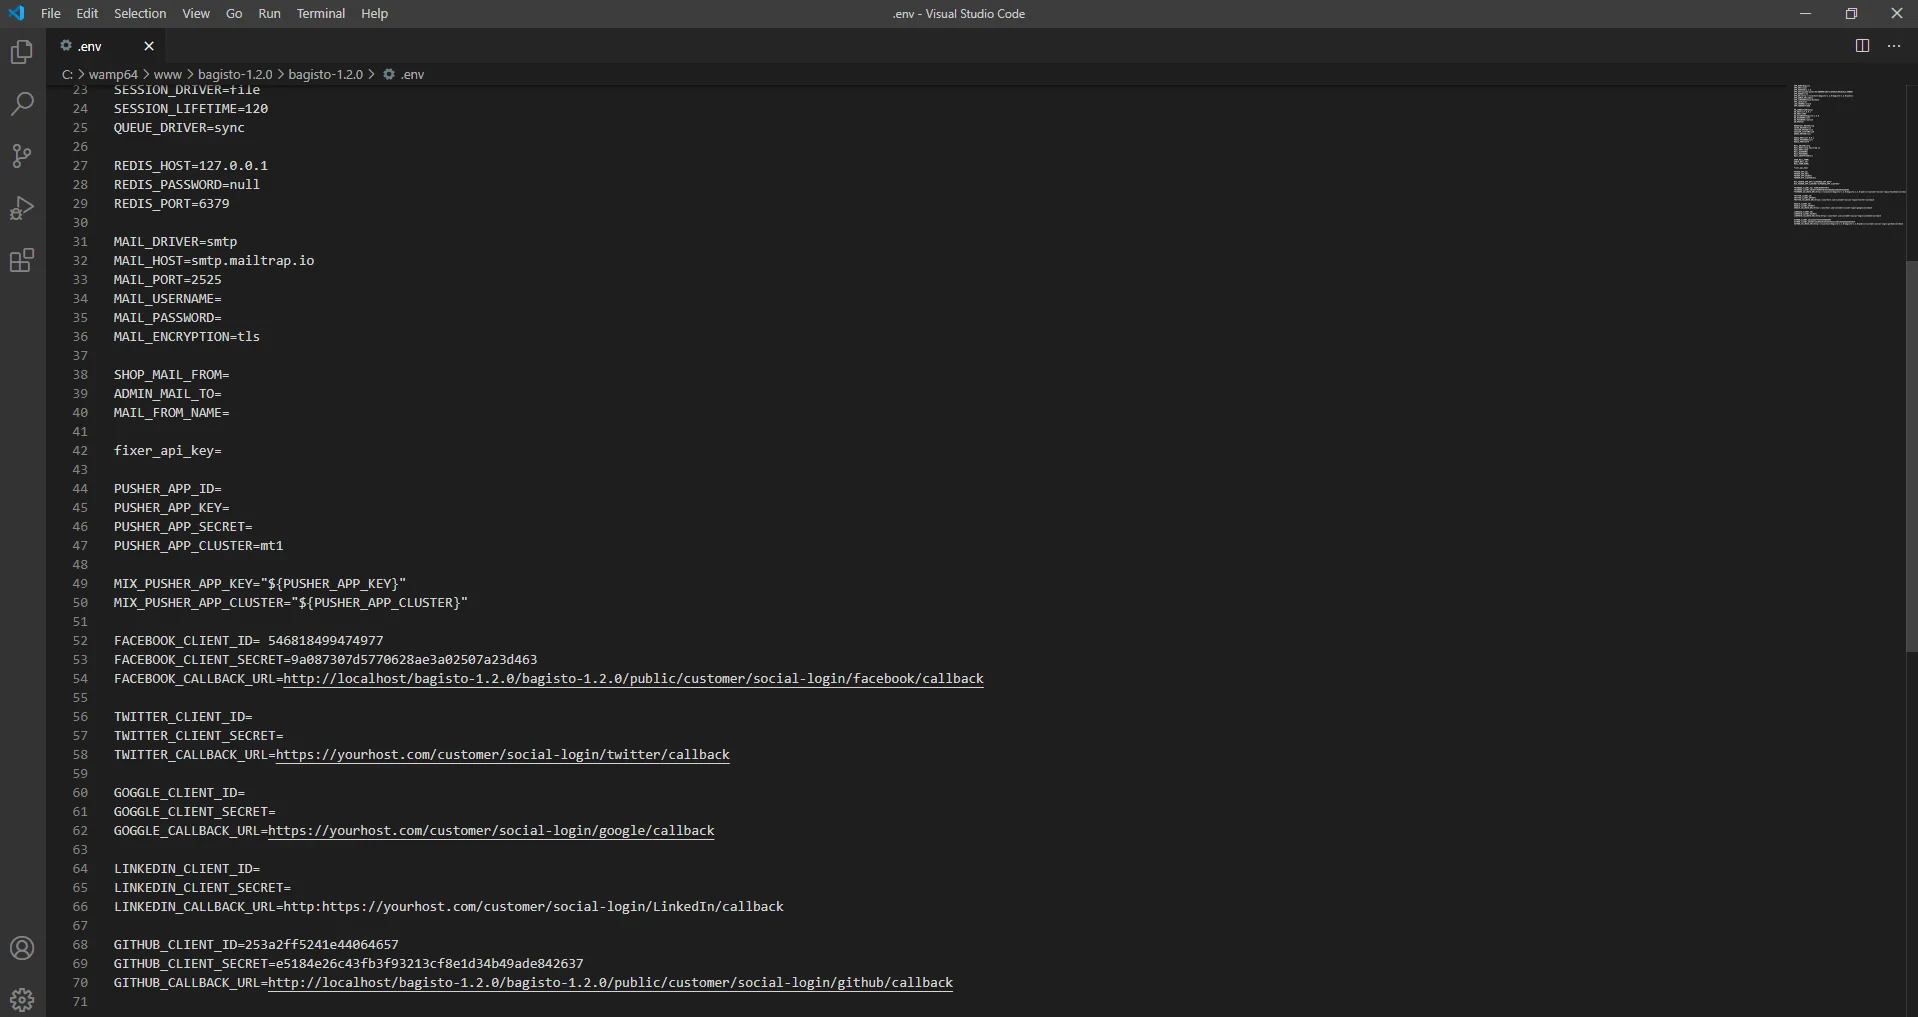
Google API Credentials.
After clicking on the Google login button below page will be open.
You can create a Google application using this link https://console.developers.google.com/project
Steps to create an Application:
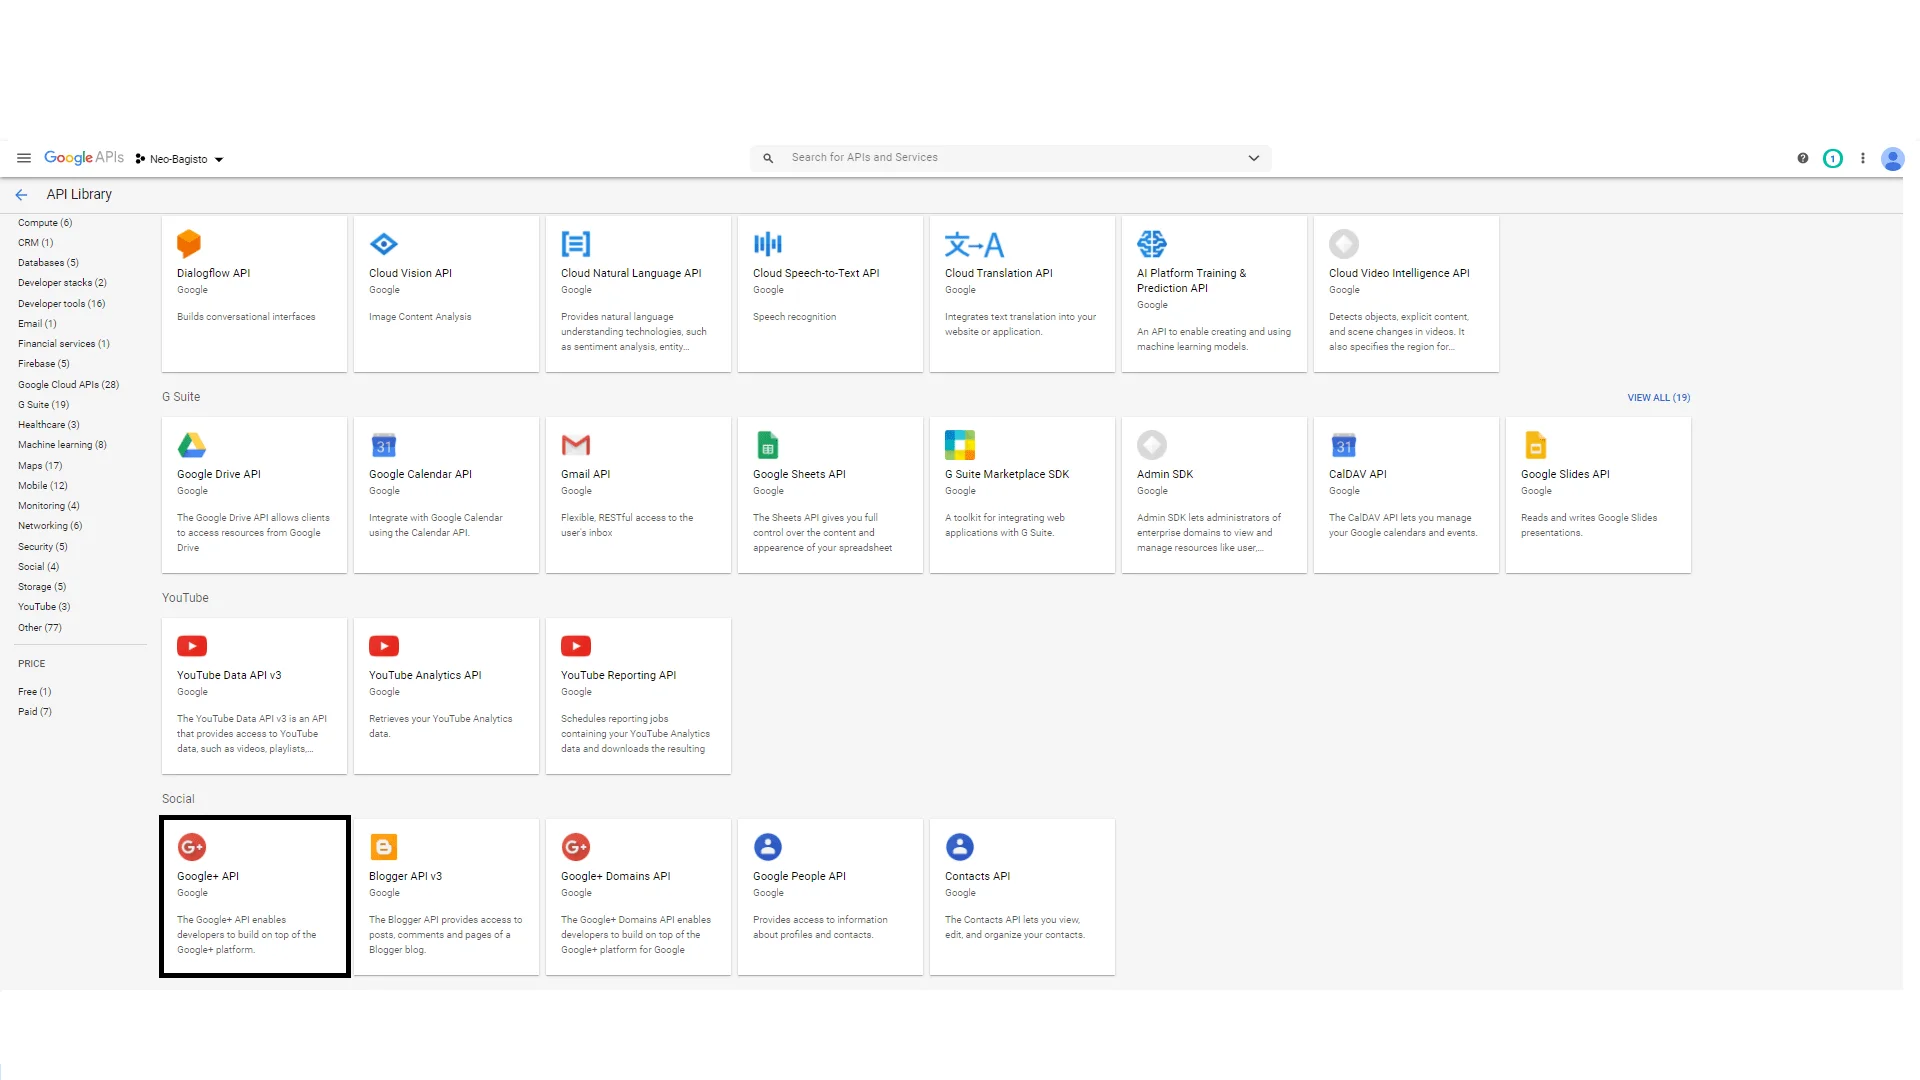
1. Go to your API & Services ->Library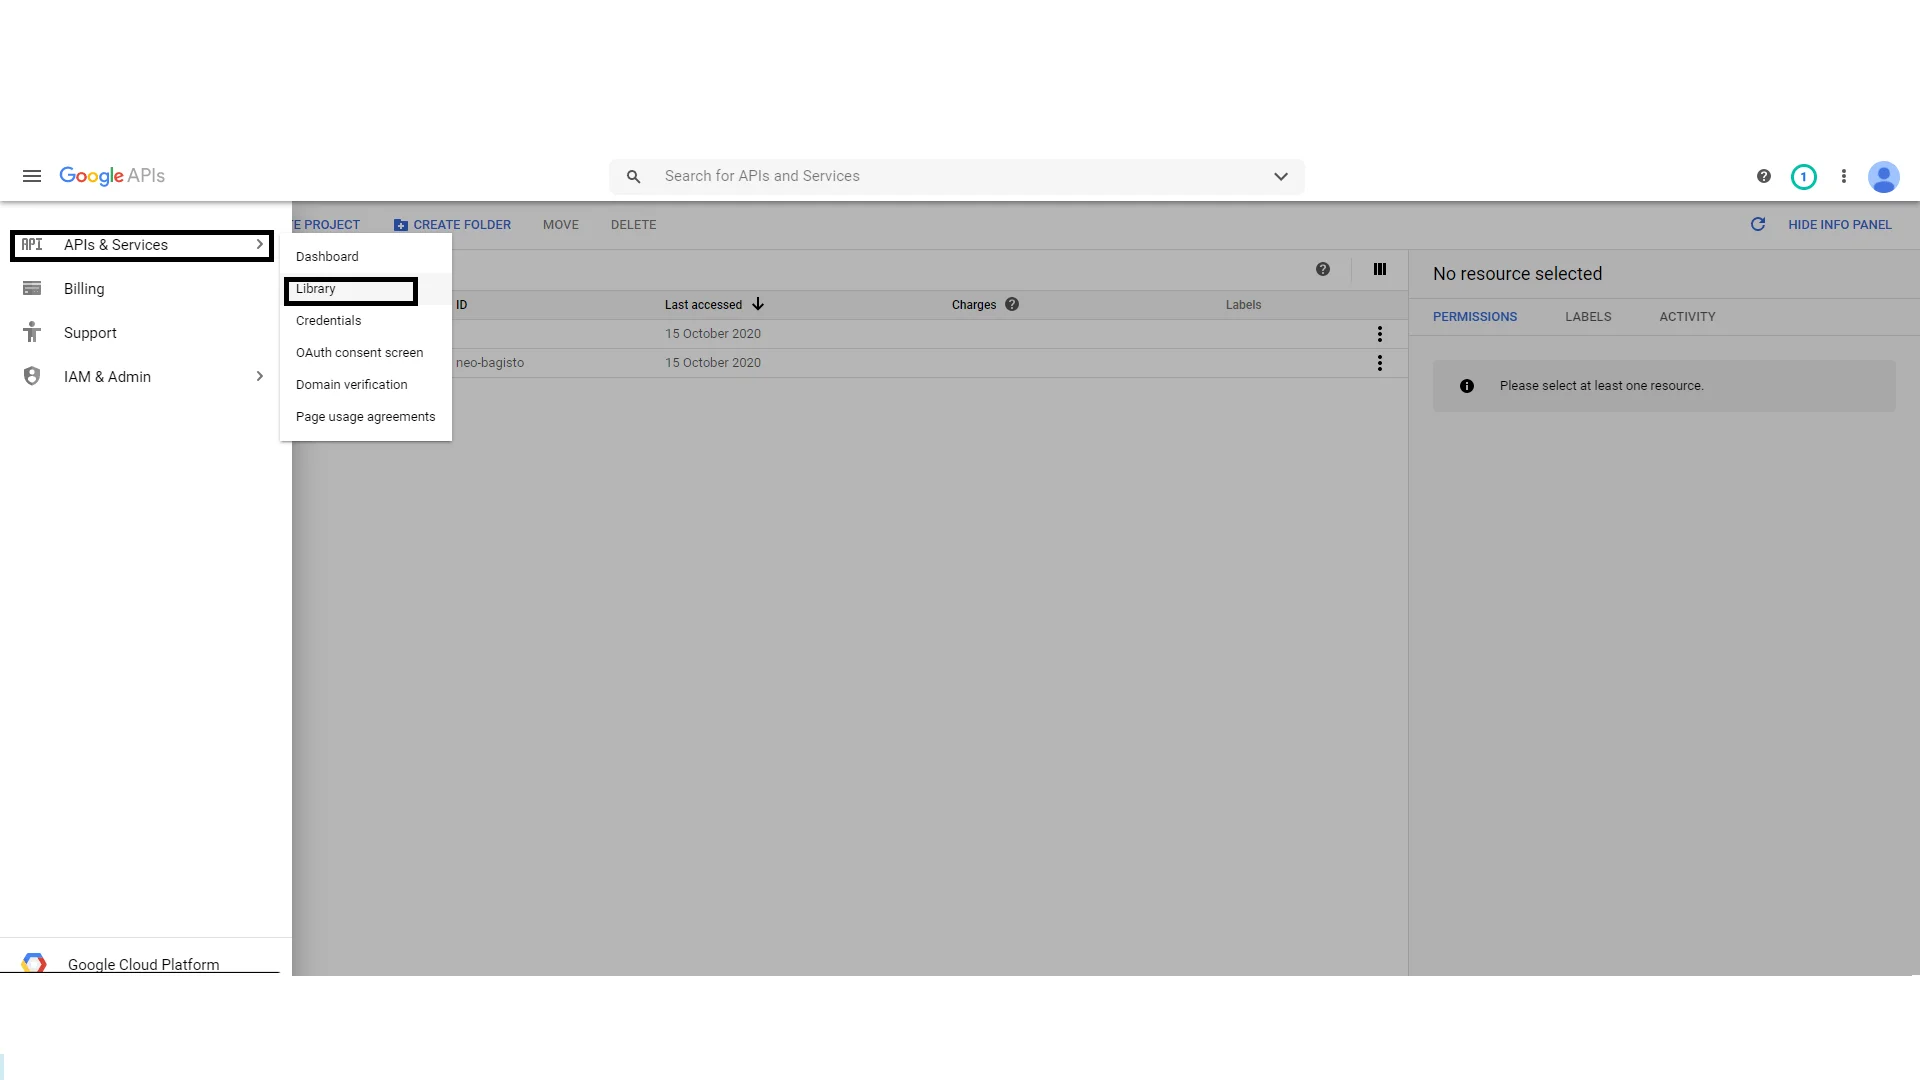
2. Now click Google+API under the section Social.
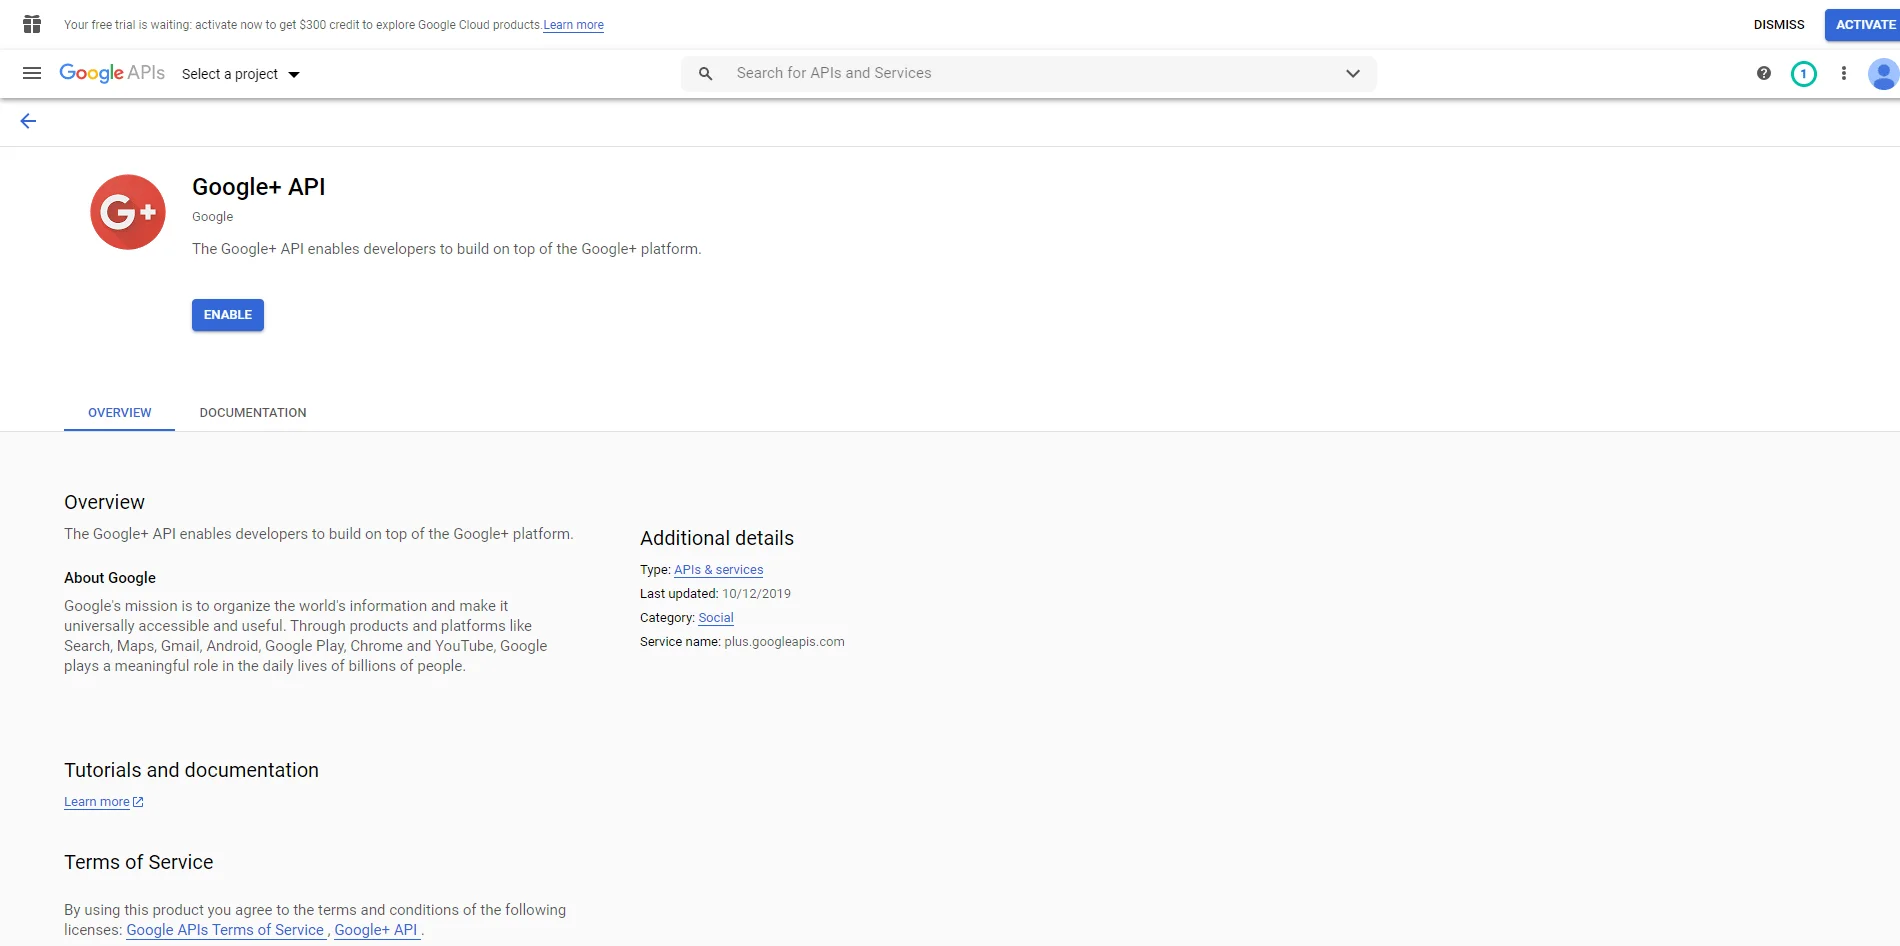
3. Now, click the Enable button to enable the Google+ API.
4. Now, click My Project to create a new project.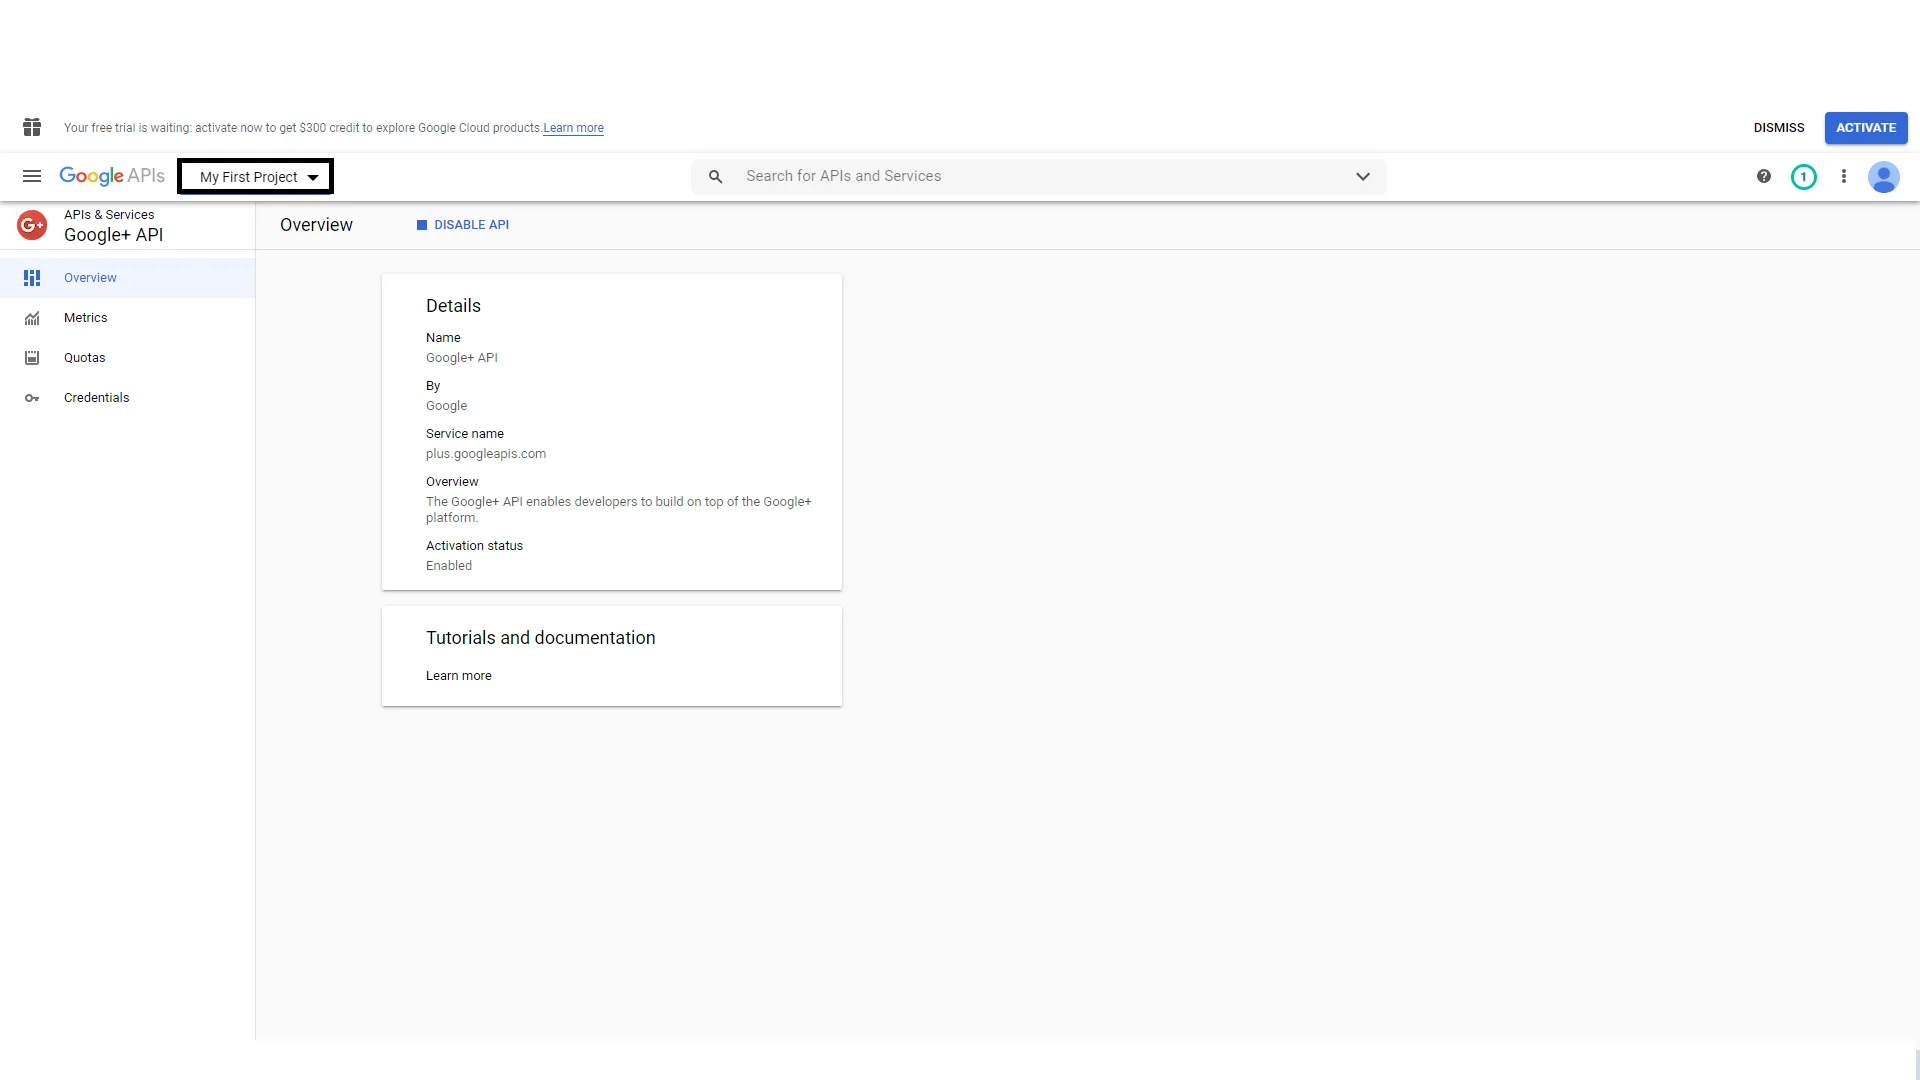
5. On clicking My Project, a pop-up will appear. Click “New Project” link.
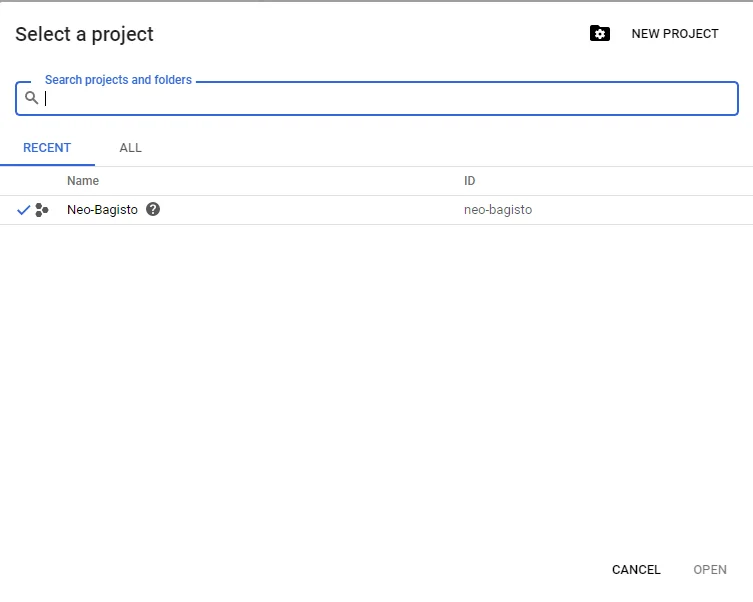
6. Enter the name for your project so that you can identify your project. Please note that you should not include any Google word for your project name.
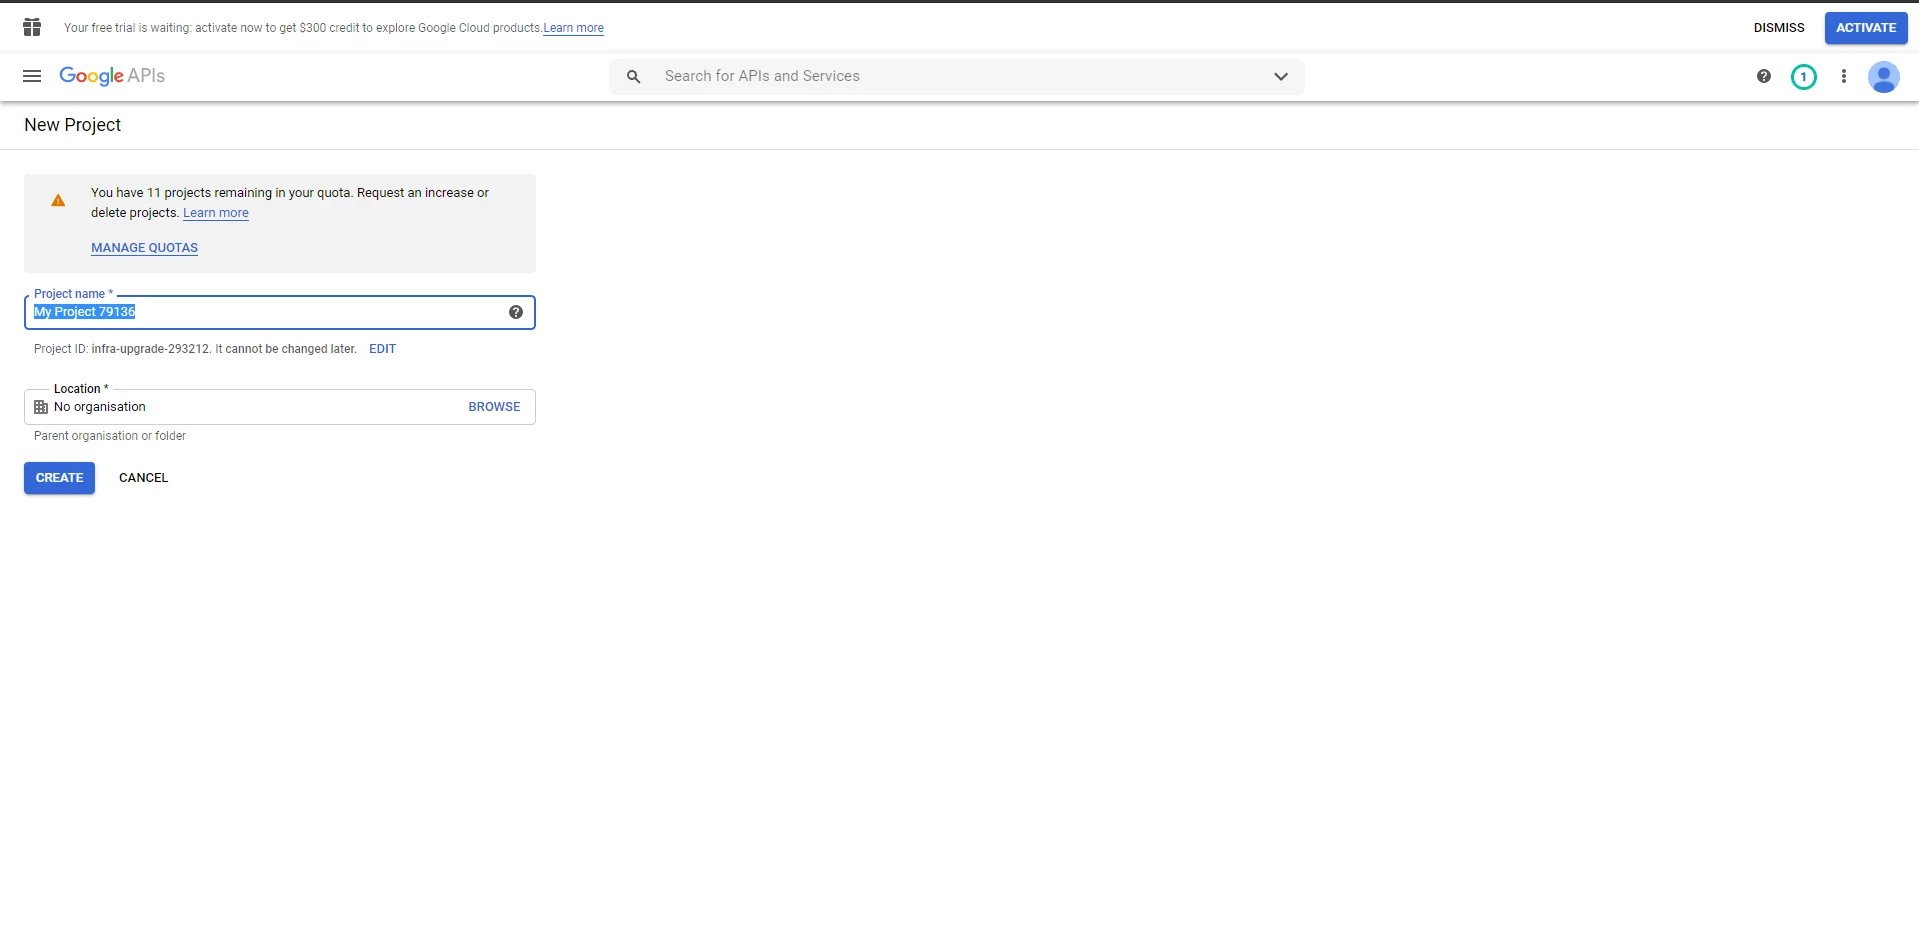
7. Meanwhile, go to the Credentials menu option and then click on Create credentials.
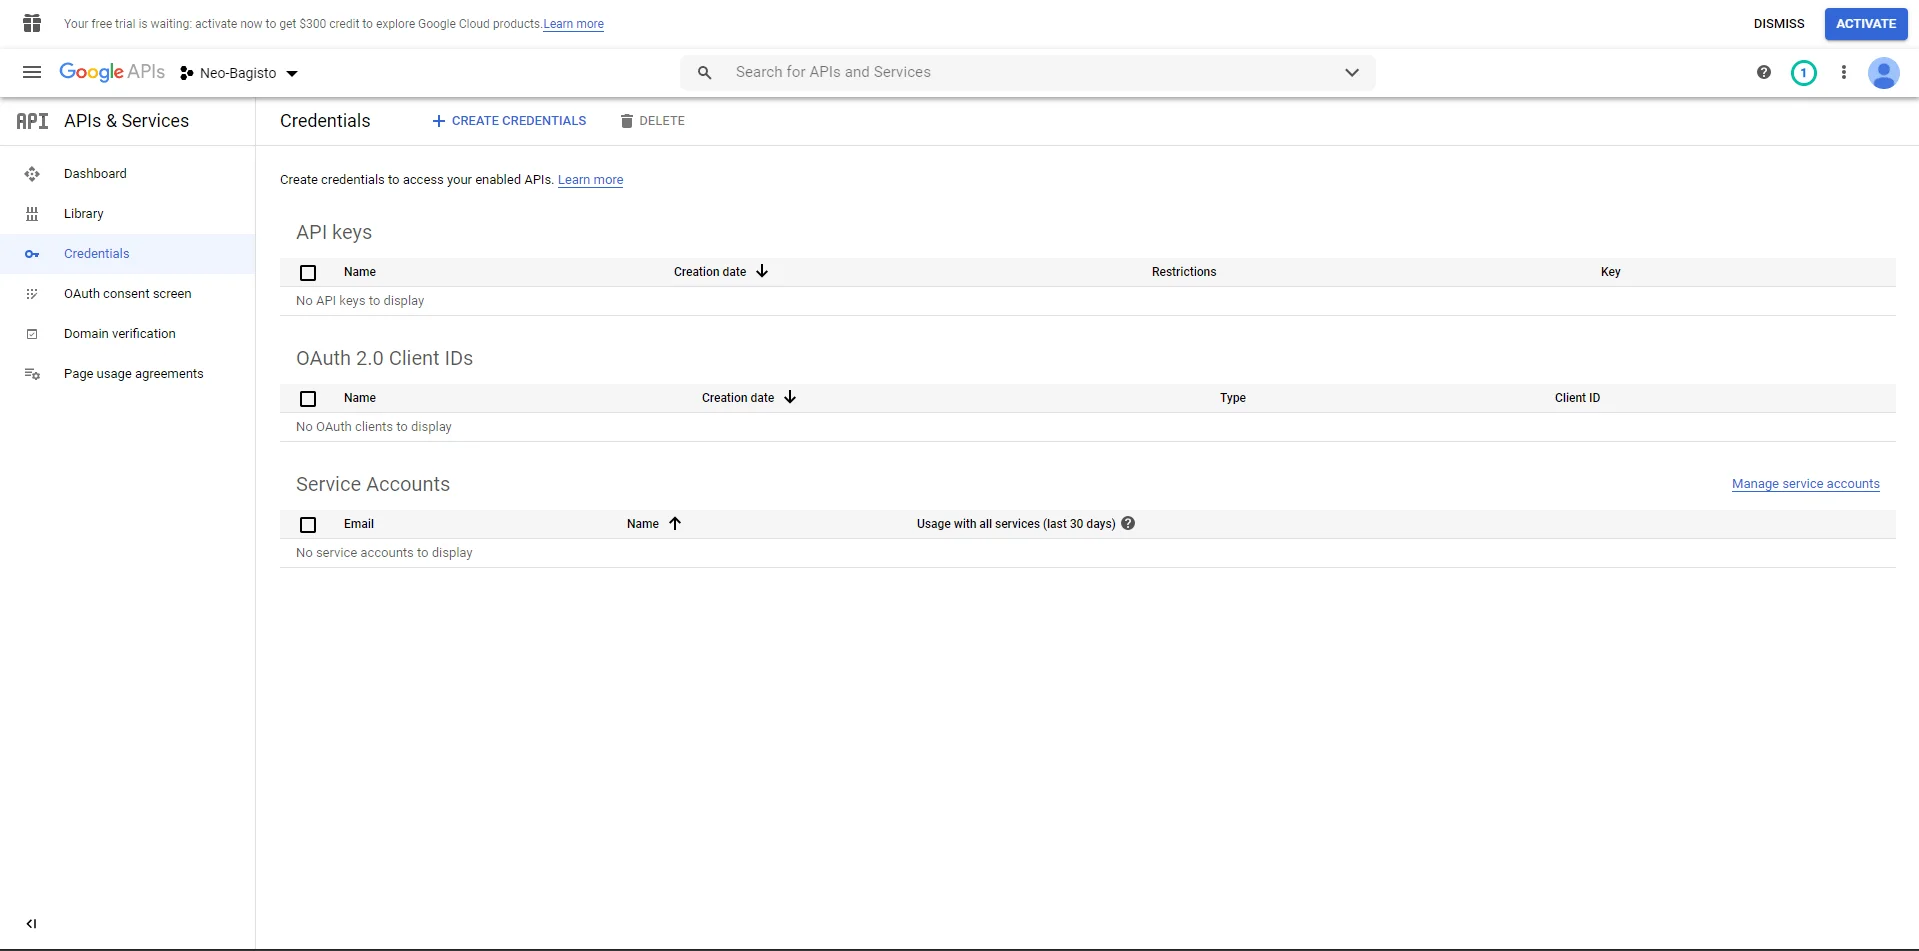
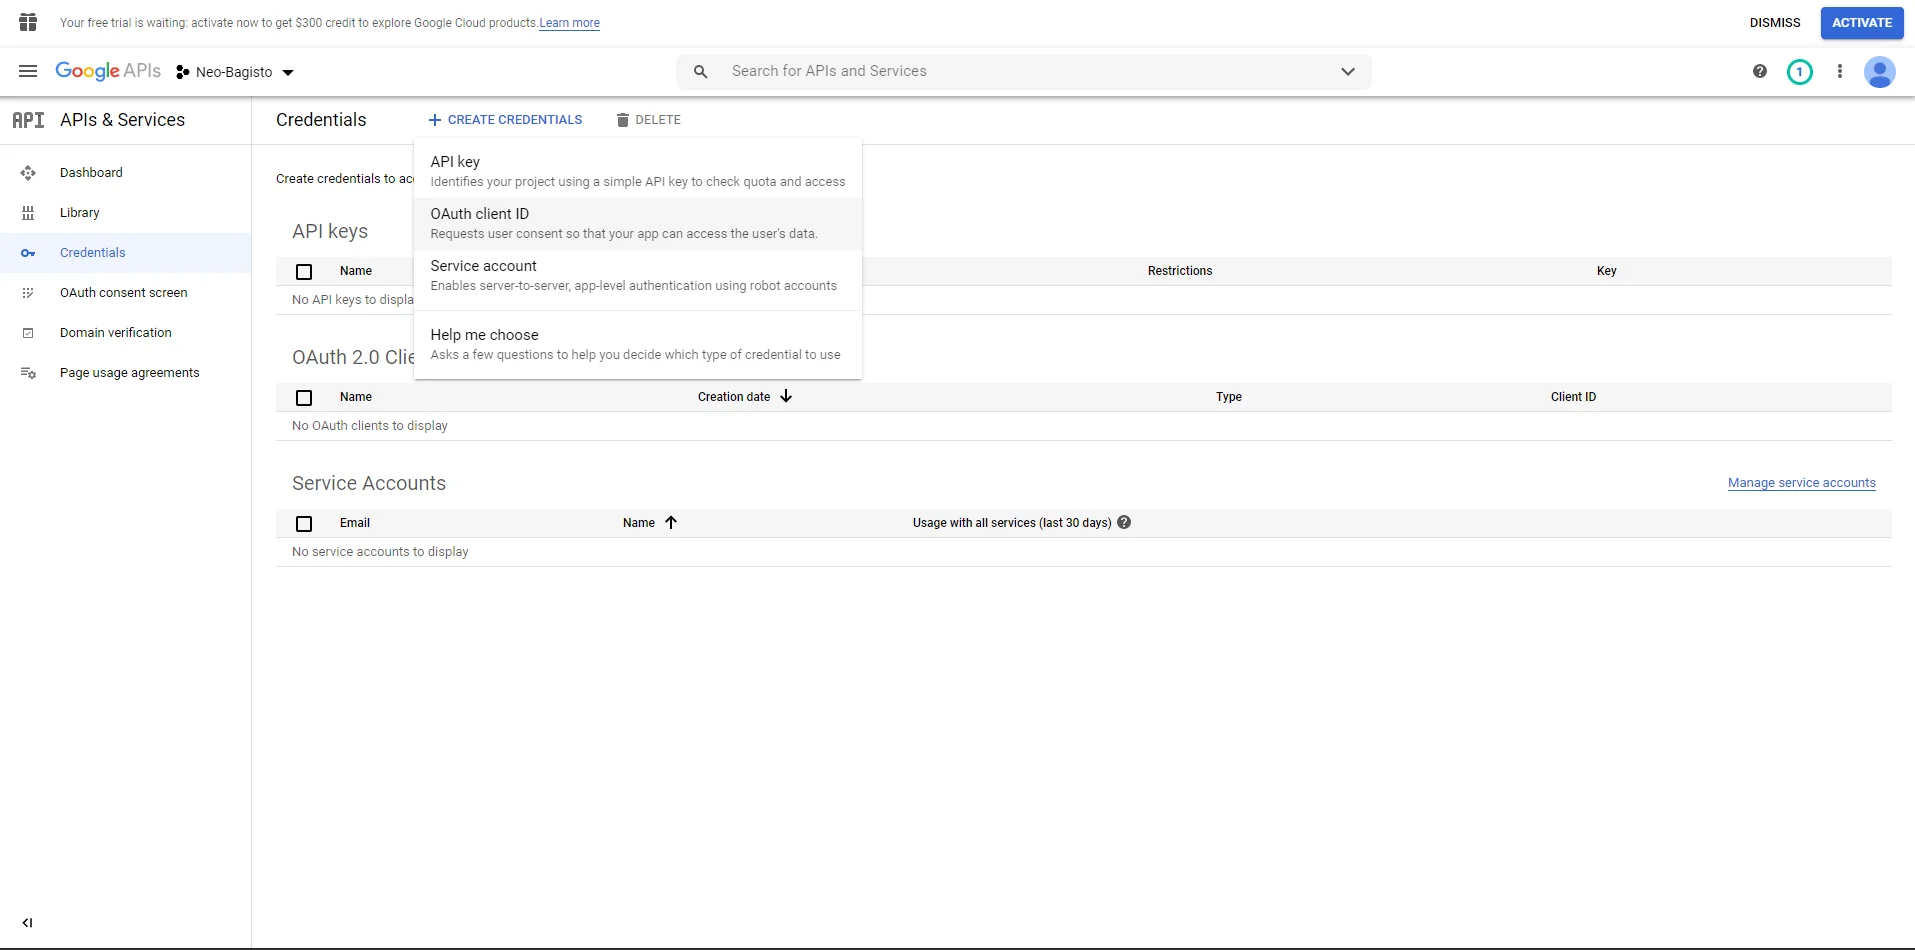
8. After that, click to create the OAuth client ID.
9. Select the Application type and enter the Authorized JavaScript origins and the Authorized redirect URLs. Click the Create button.
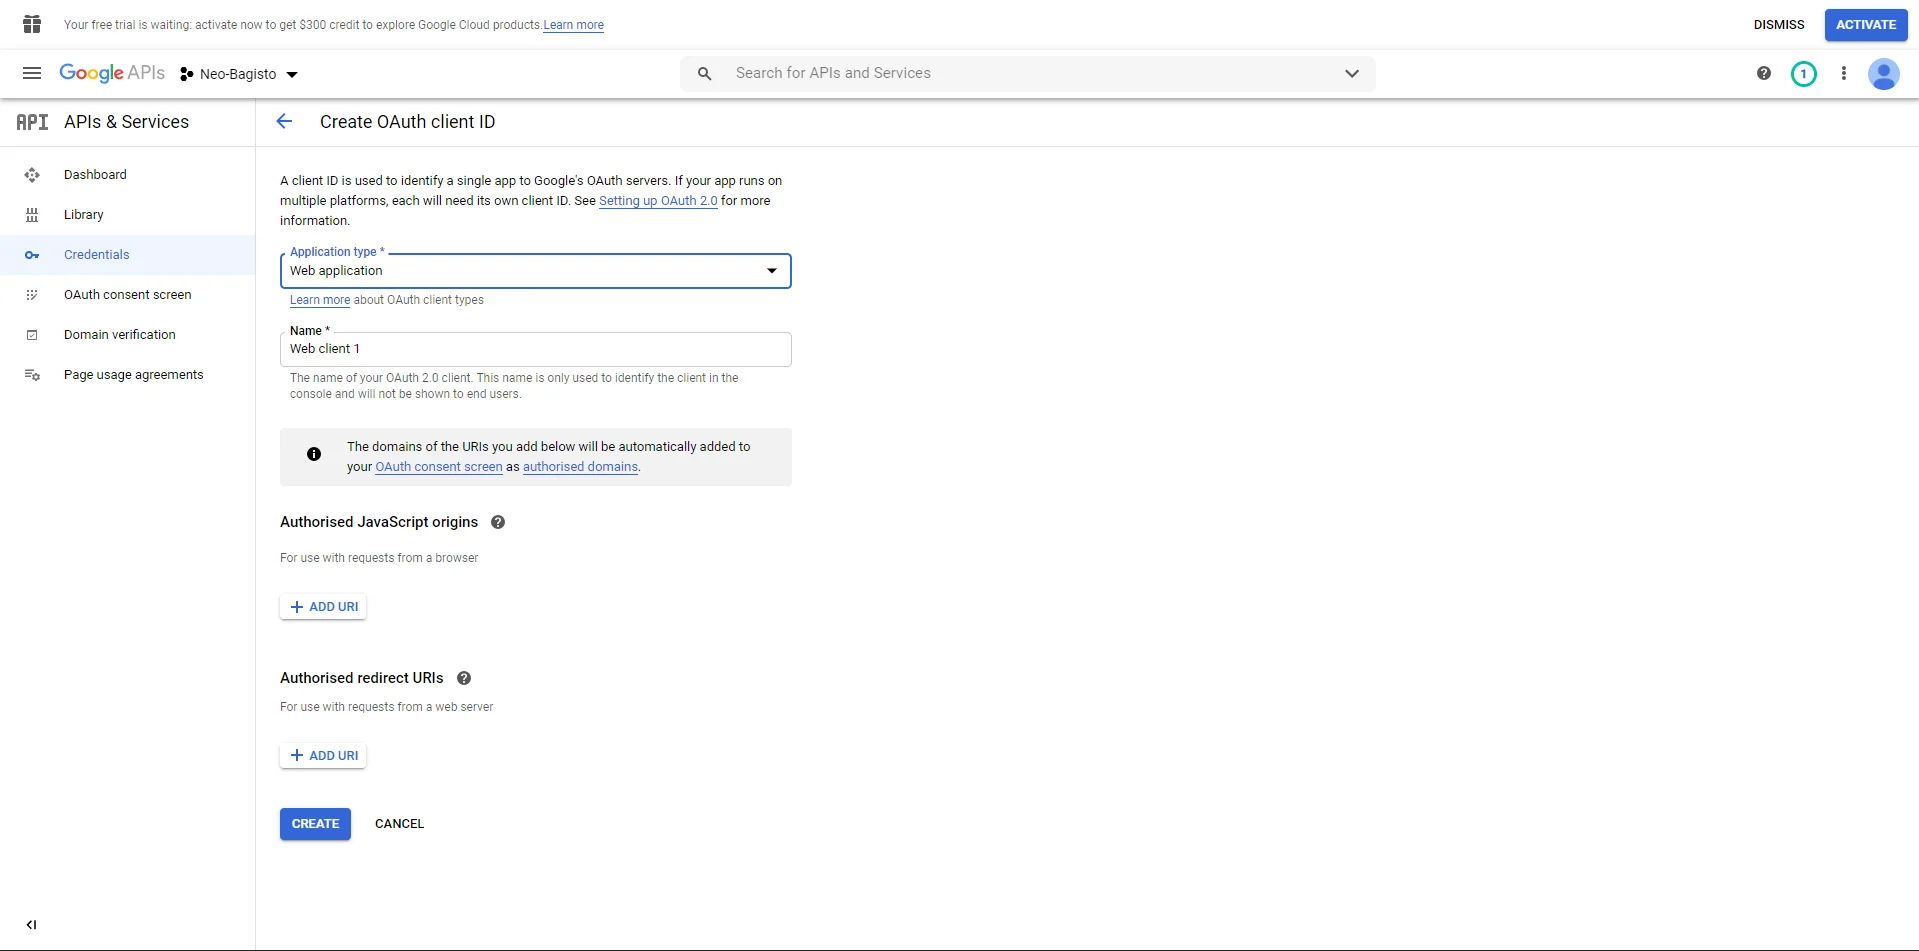
**Note:
Set the OAuth Redirect URL like this – https://www.example.com/customer/social-login/google/callback/
10.Finally, after clicking the Create button in the above step you will get the Client Id and Client Secret.
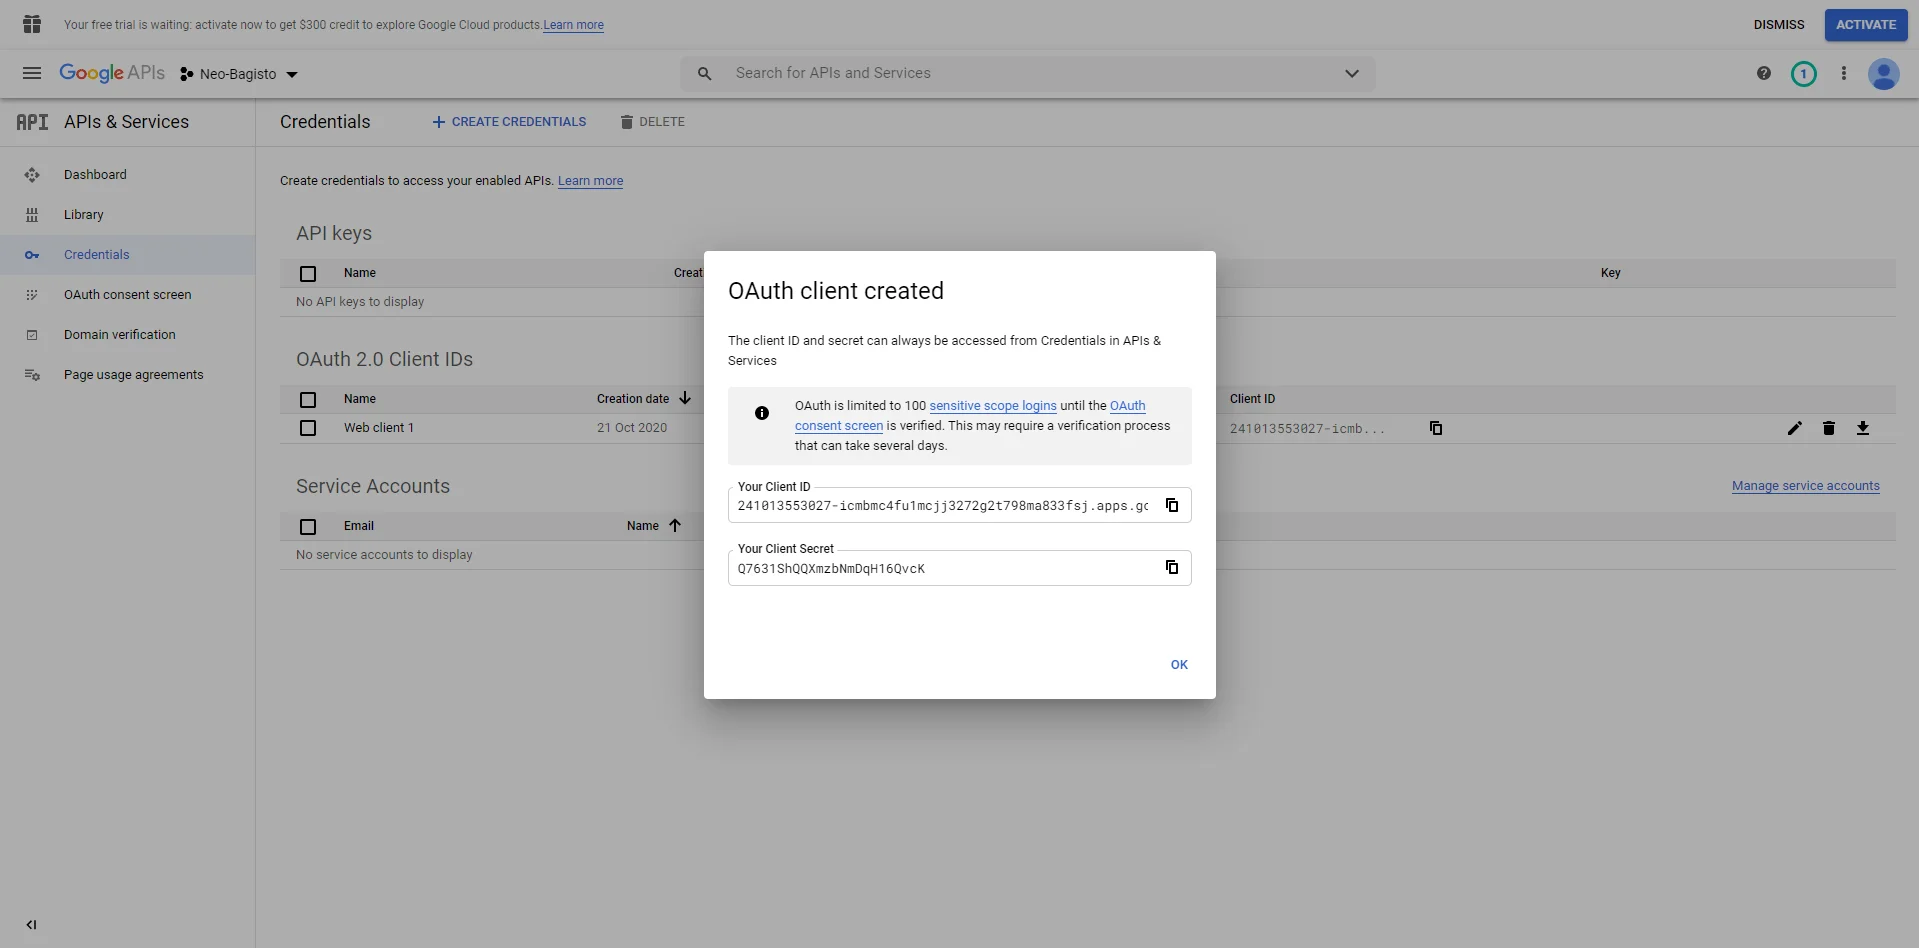
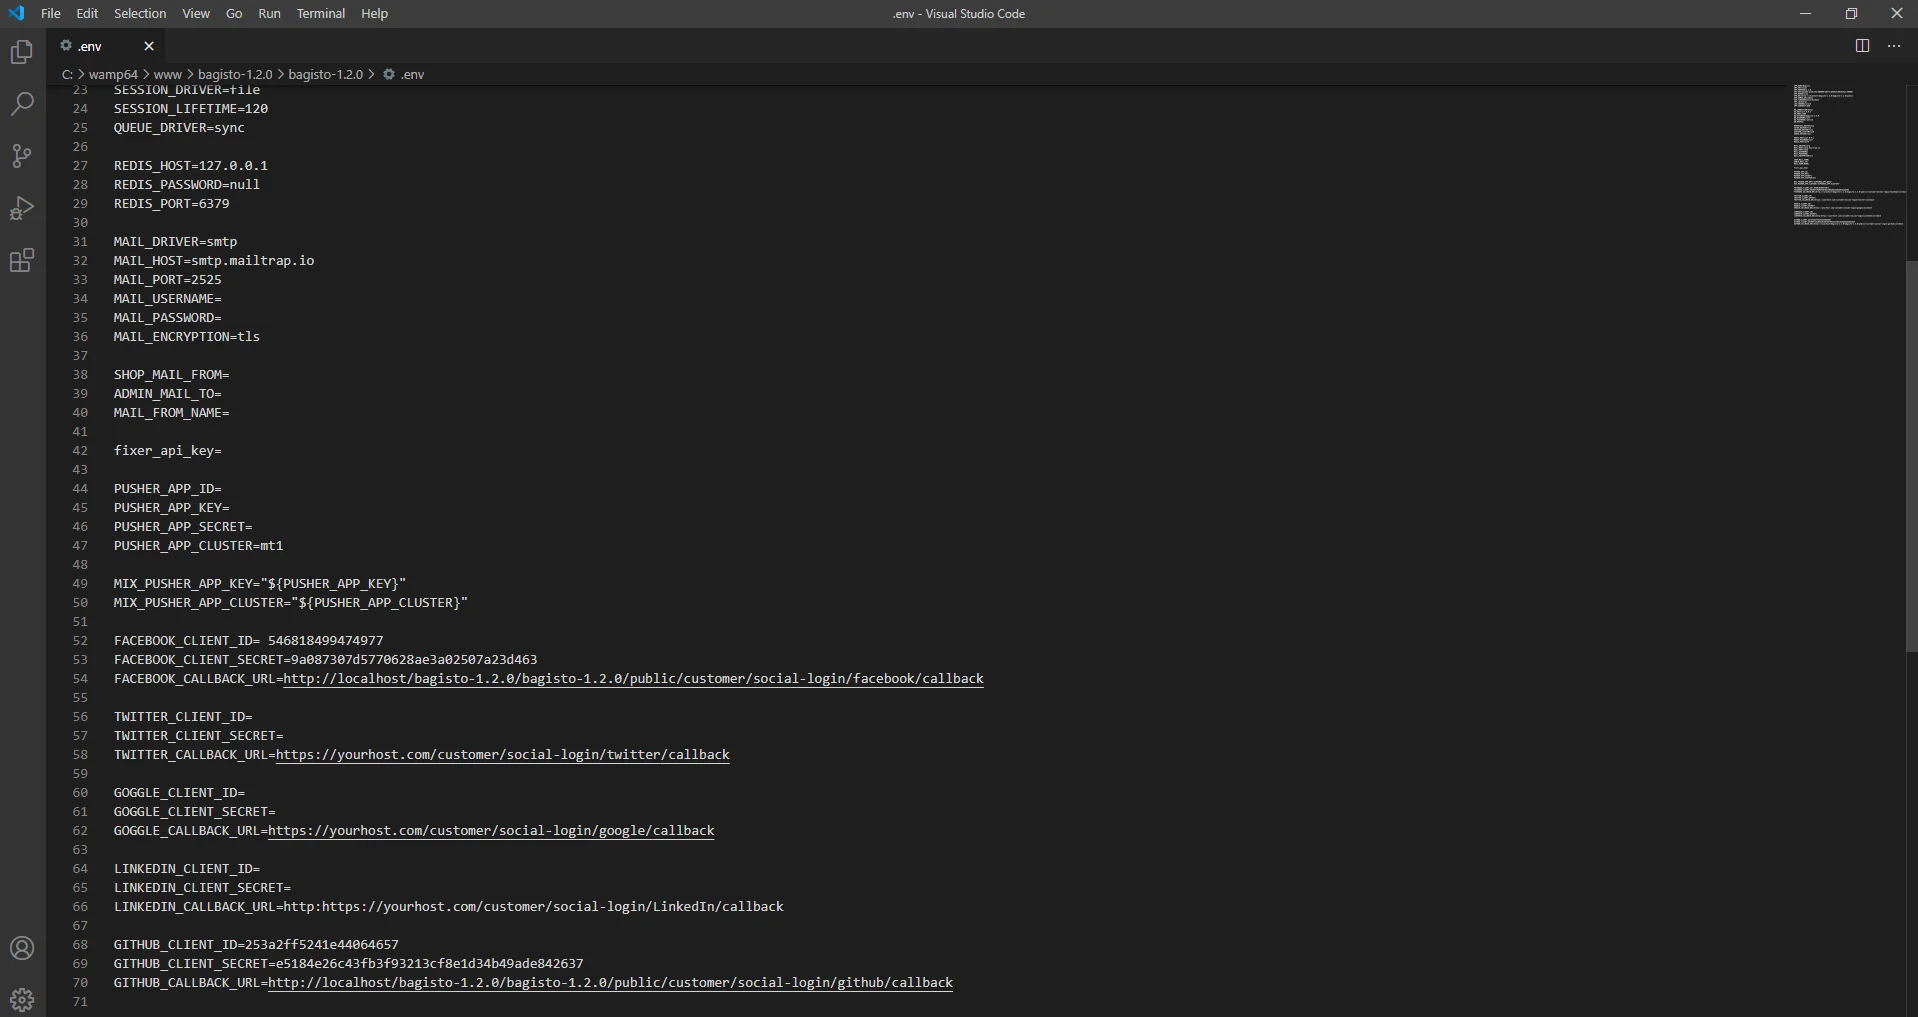
11. After that, you can receive Application details with your “Client ID” and “Client Secret”. Which you will have to add in the .env file in Google section in the snapshot where in the link instead of yourhost you will have to give your link to the website and remaining part will be same.
Facebook API Credentials.
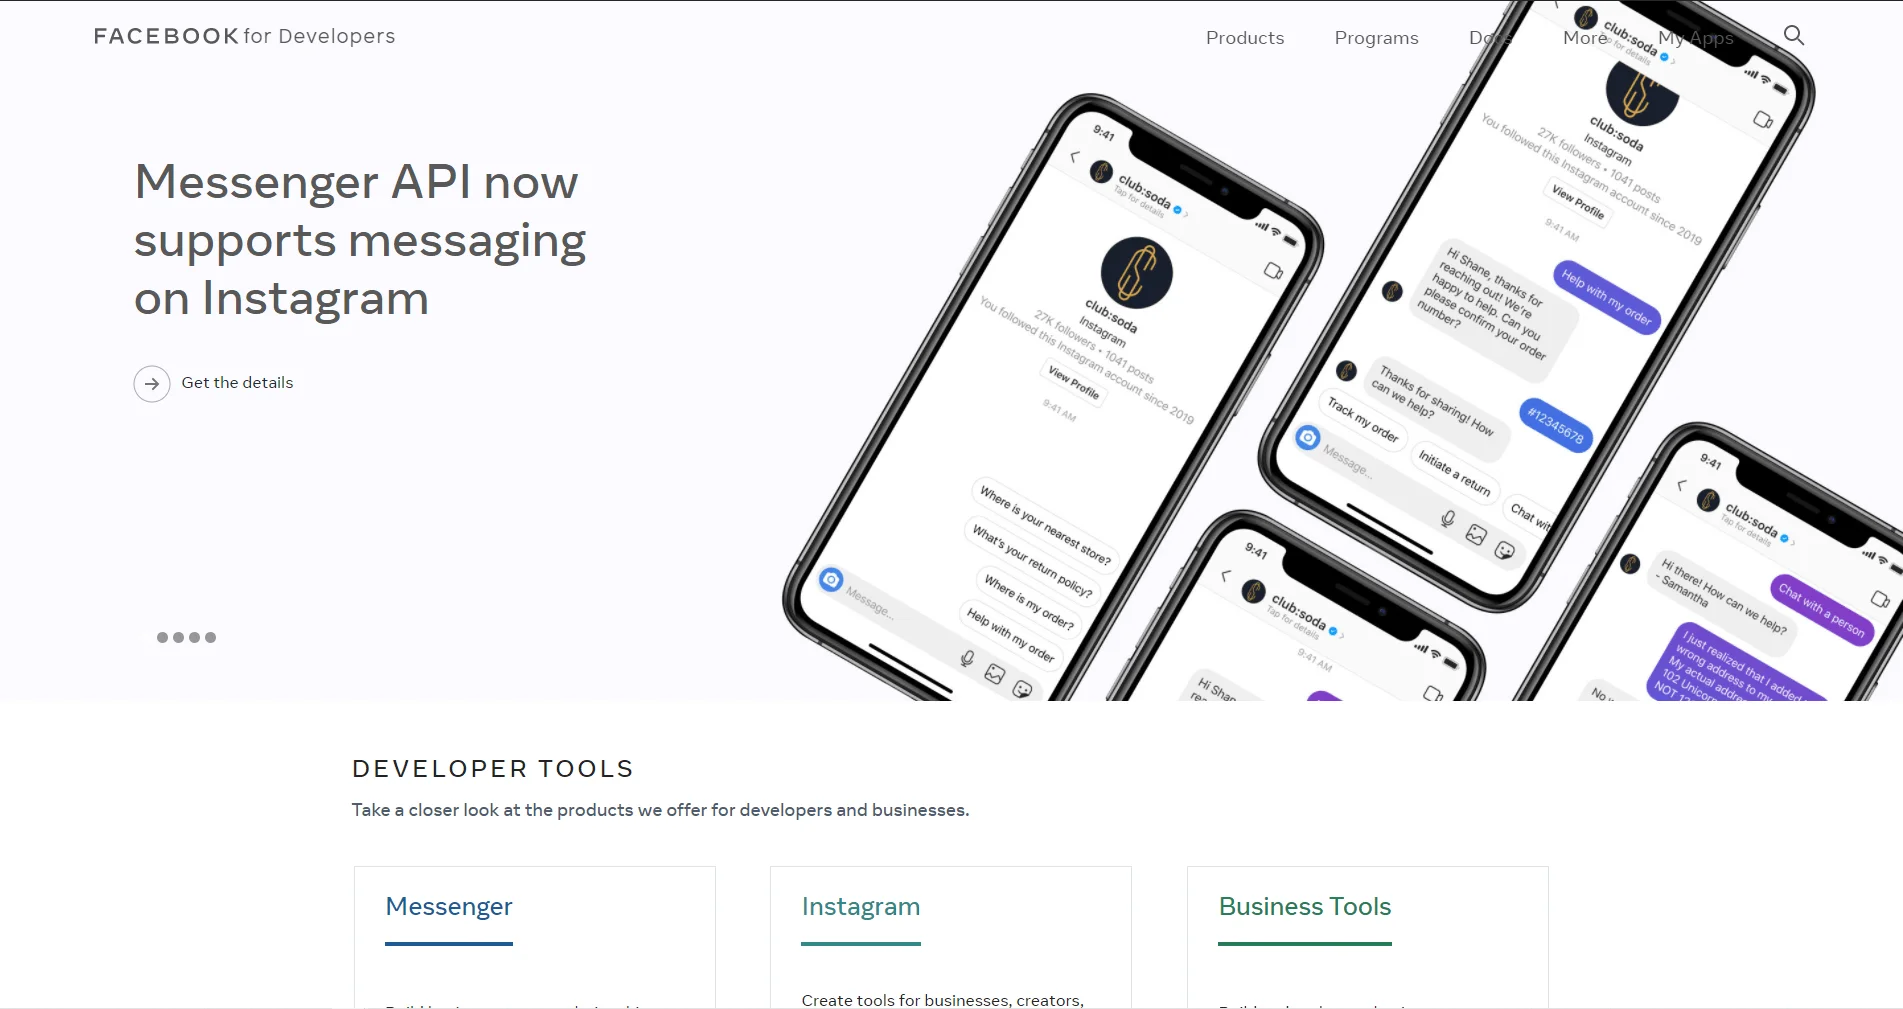
1.Clicking on the link https://developers.facebook.com/
2.After login in the Facebook Id. You need to click on the My apps button.
3.Now click on the create new app. And select everything else.
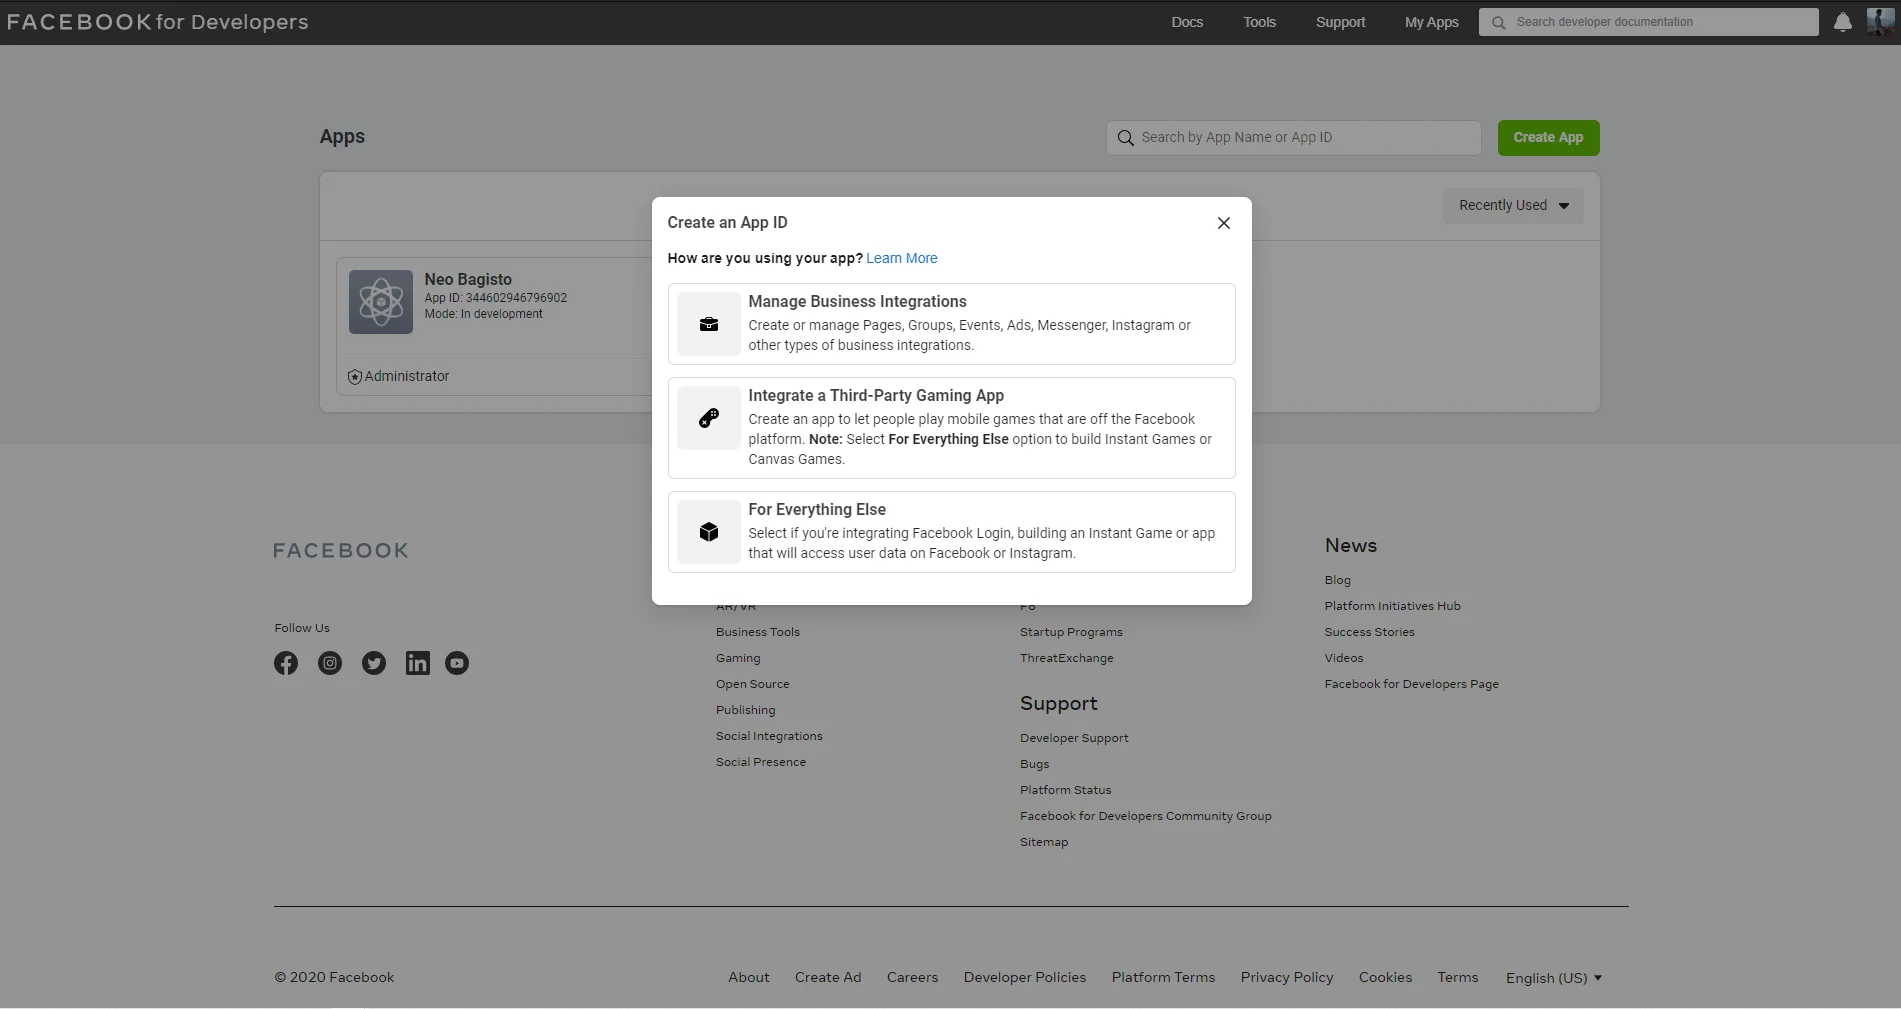
4. Now insert the required details in their specific section.
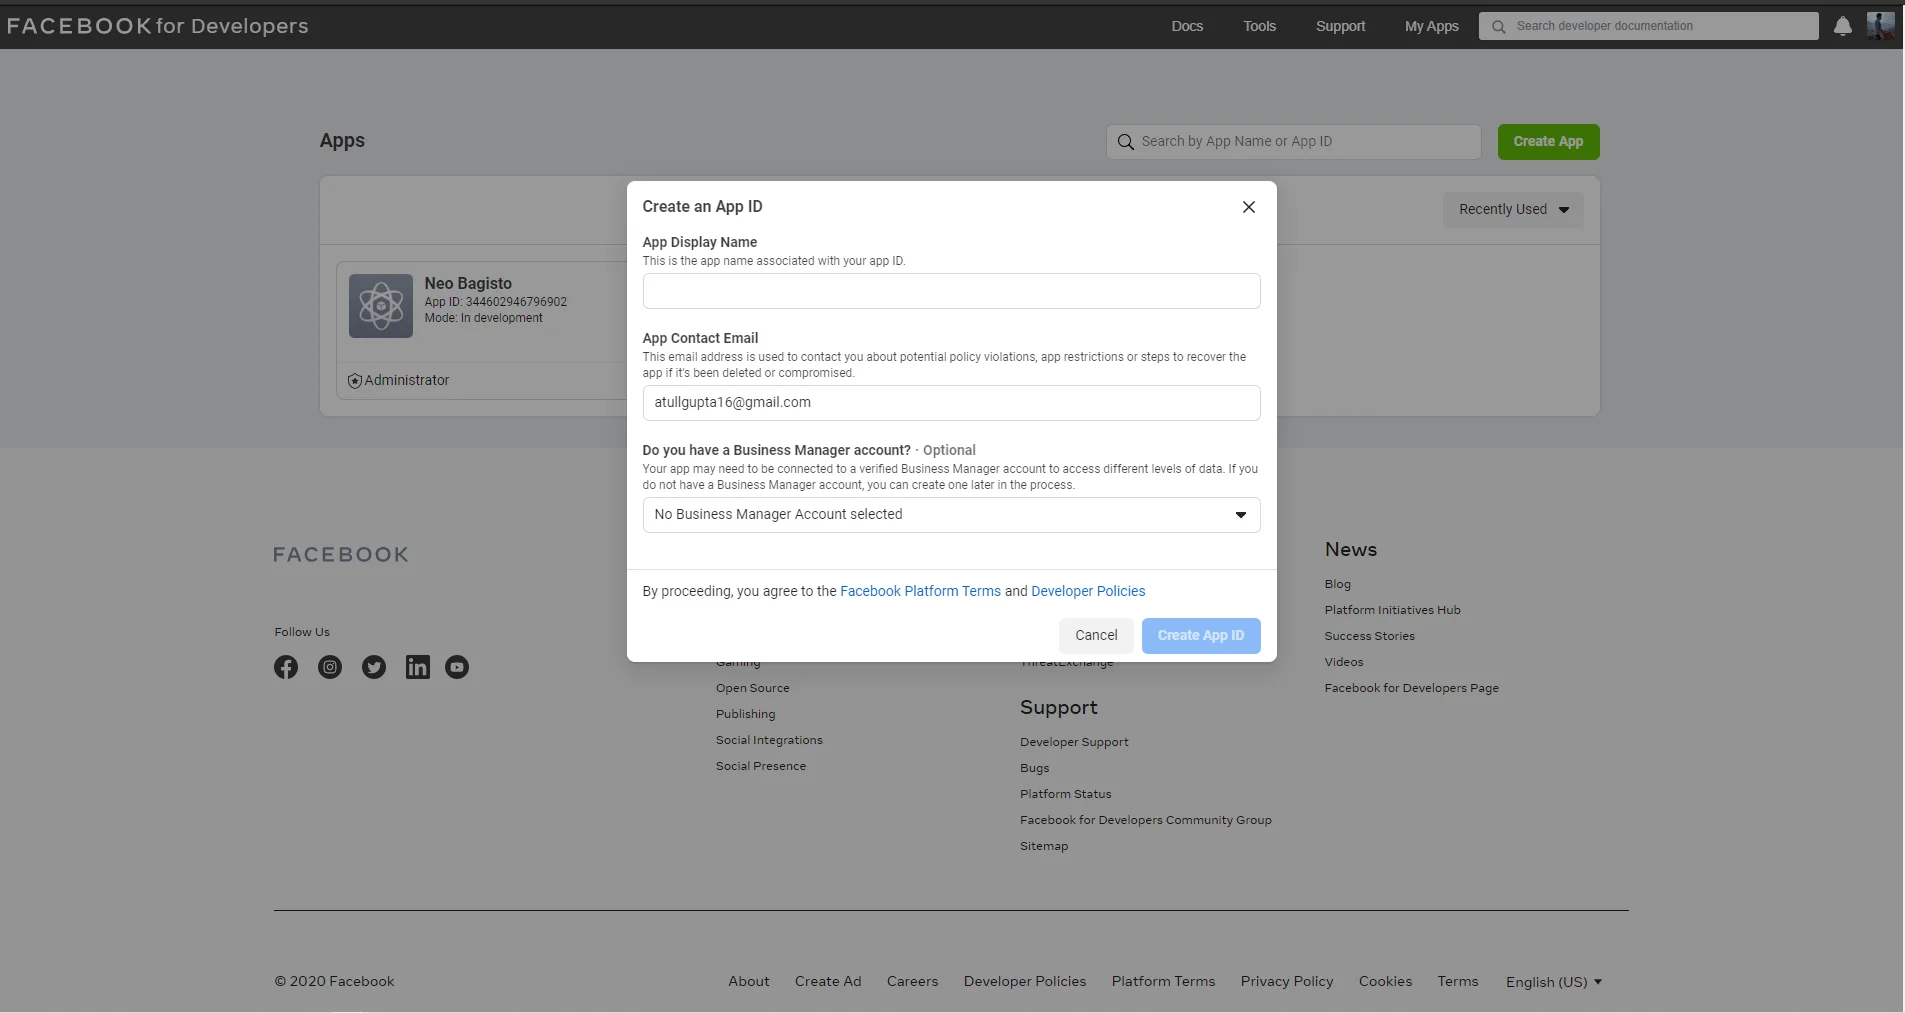
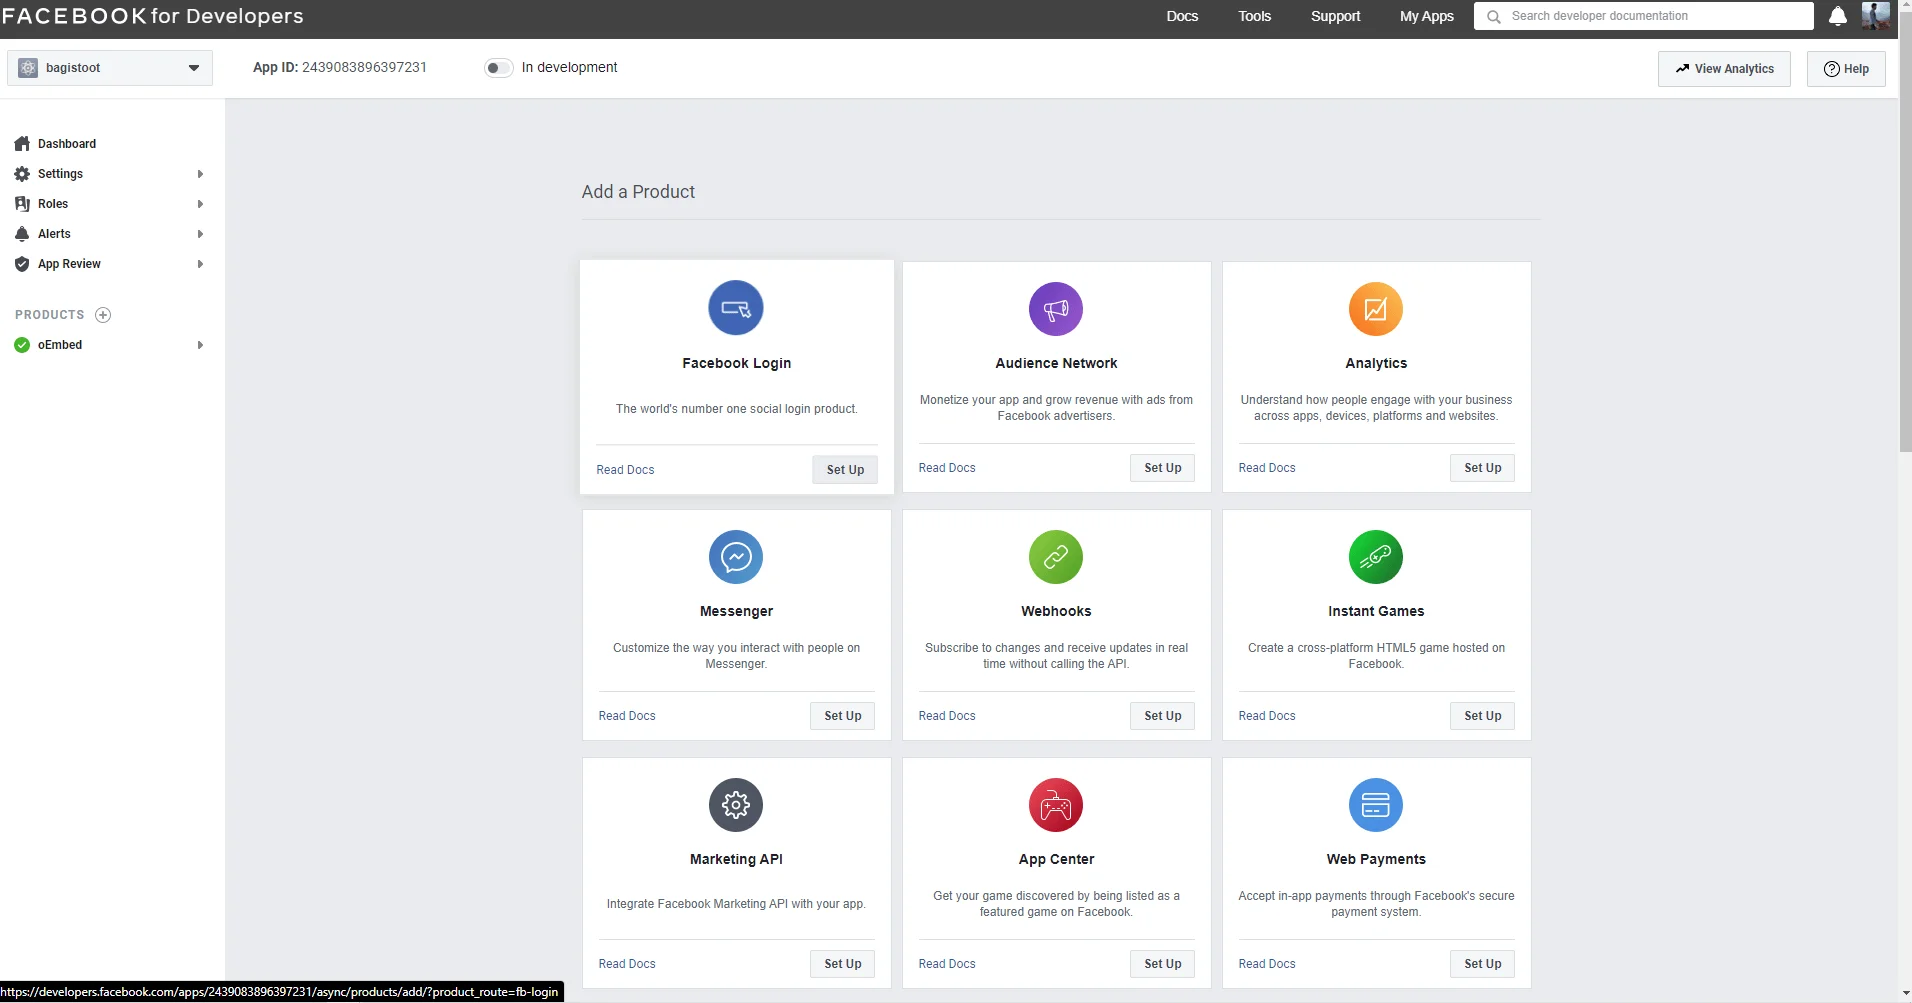
5. Now choose the facebook login app and setup it.
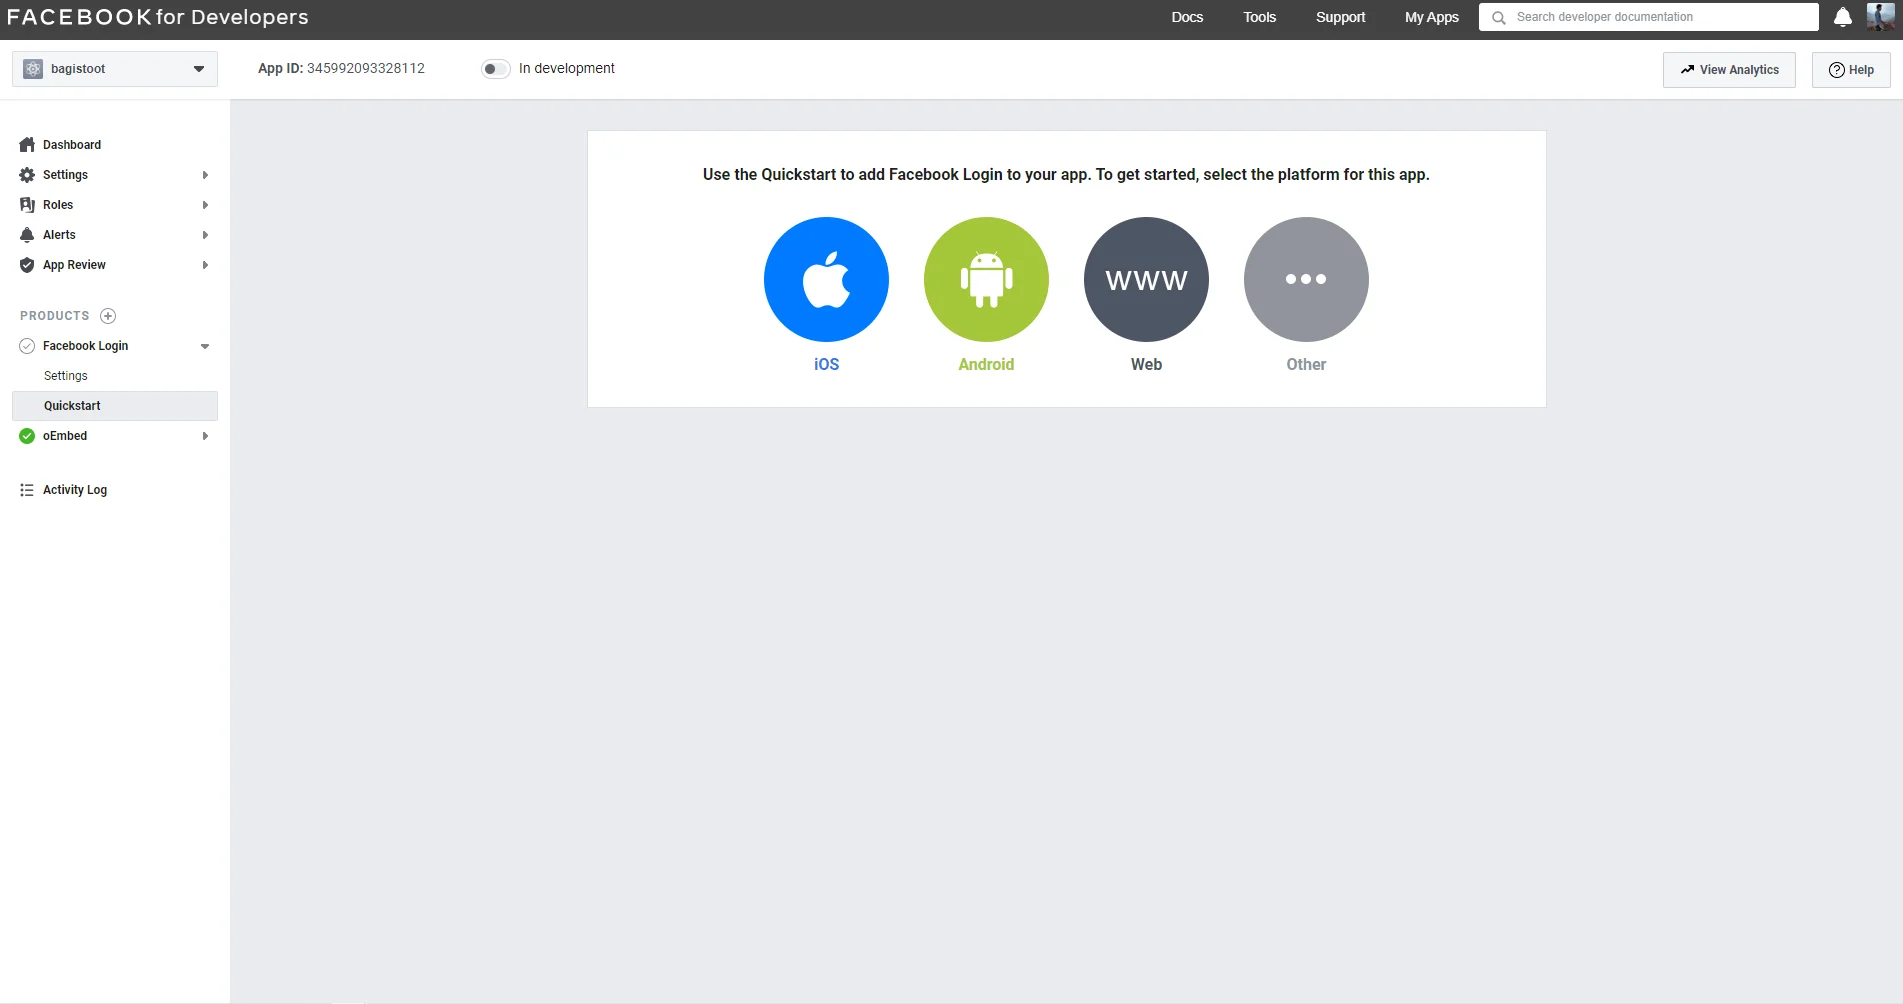
6. Now choose a web platform for the website.
7. Now, give your website link in their specific section and the domain. After that go to setting and you will be able to find the client ID and secret key.
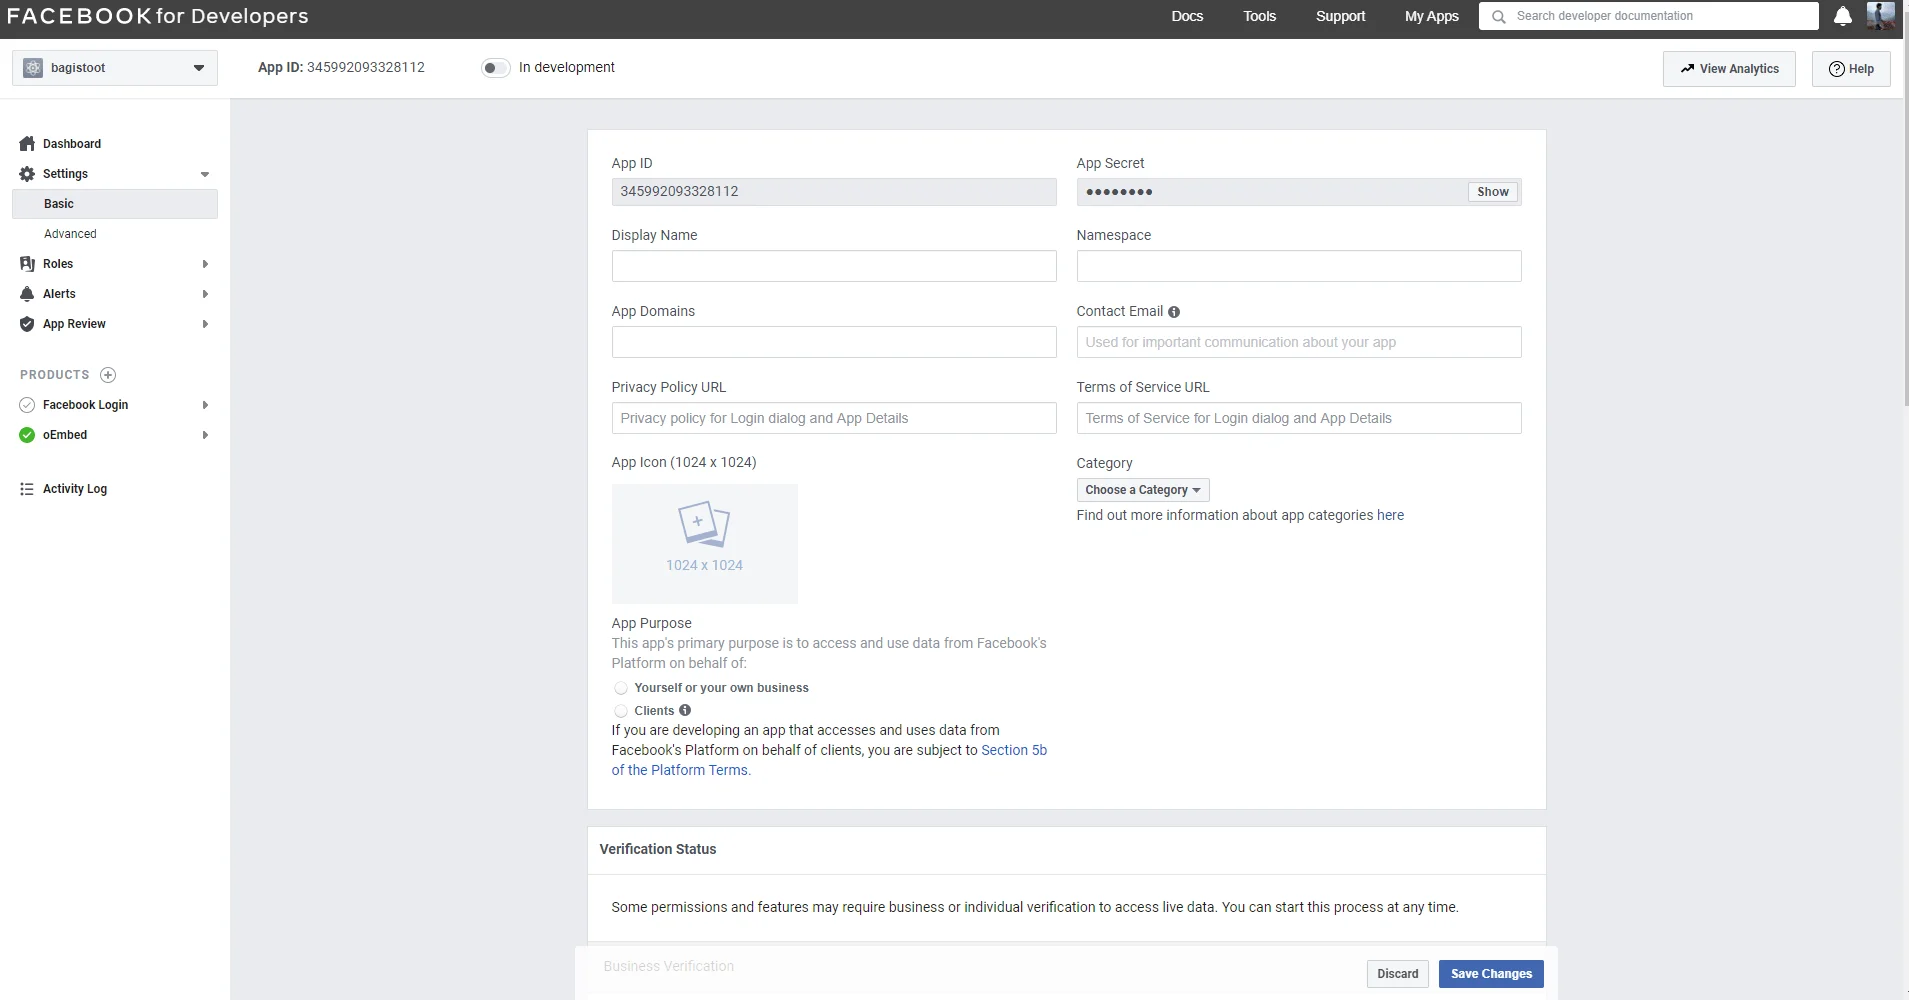
8. Now insert the required details and the call back URL in the Facebook Login settings .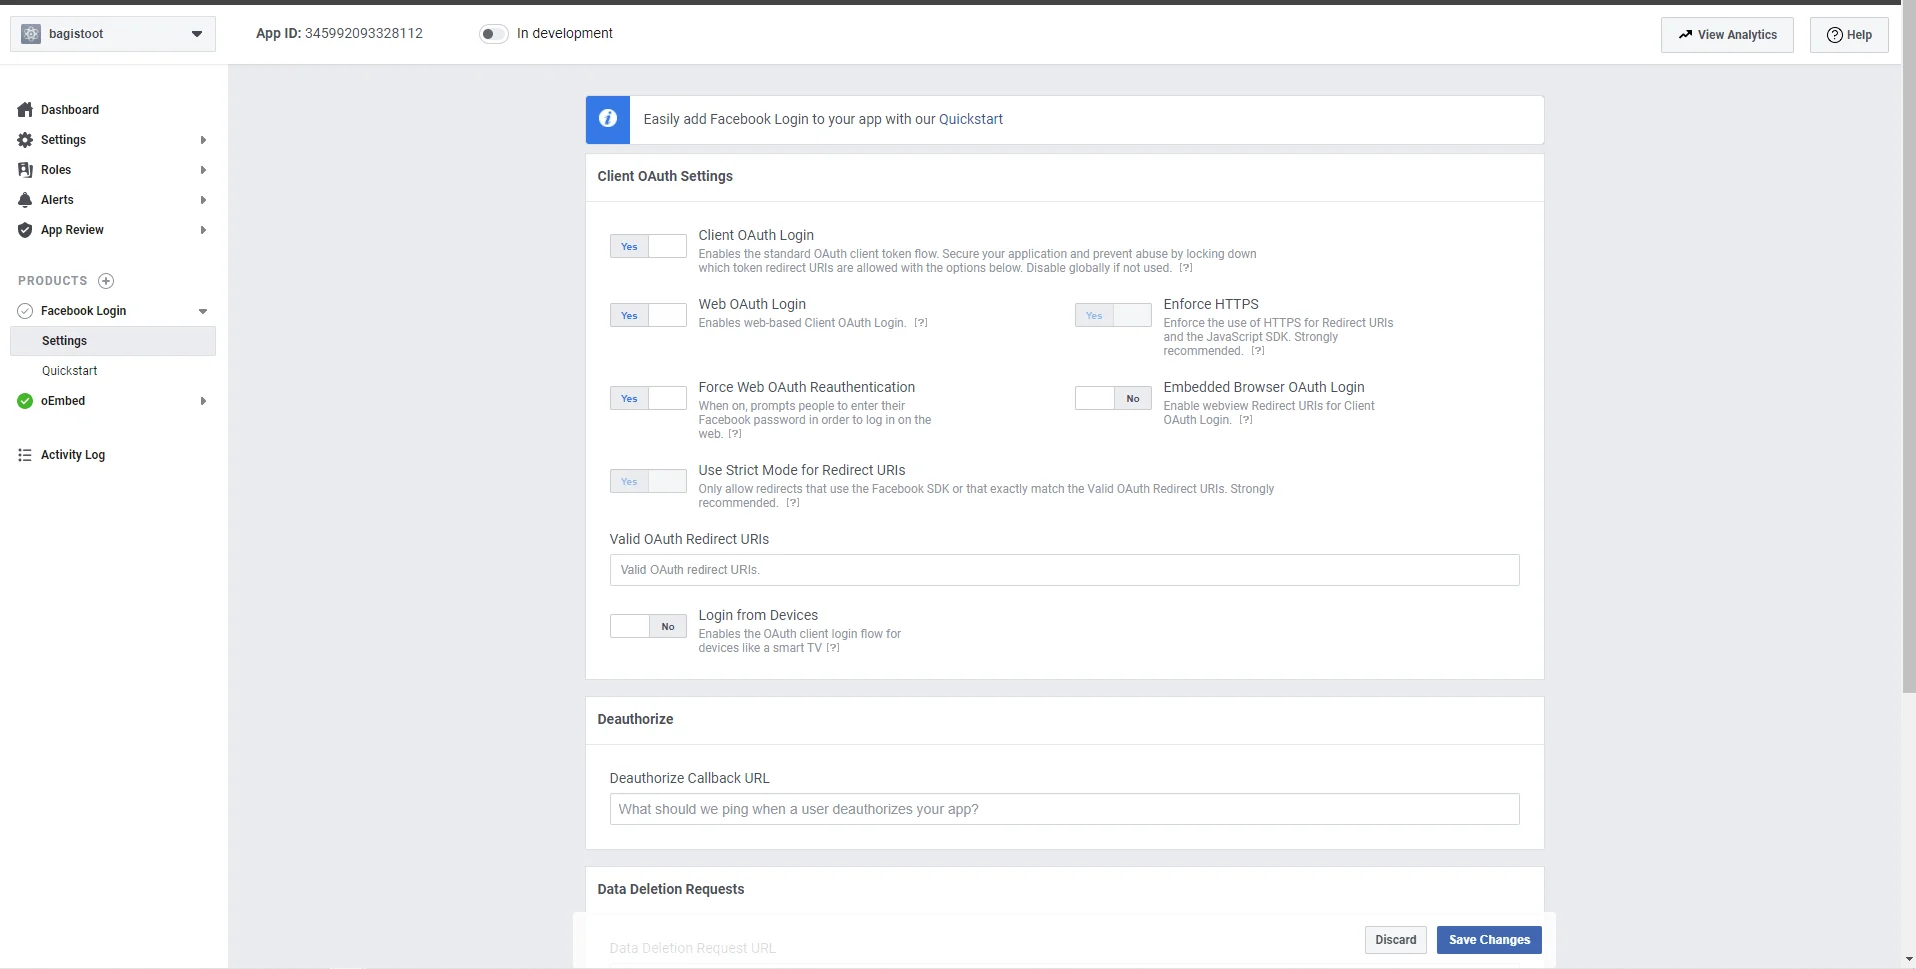
9. After that, you have to update “Client ID” and “Client Secret”. in the .env file in Facebook section in the snapshot where in the link instead of your host you will have to give your link to the website and remaining part will be same.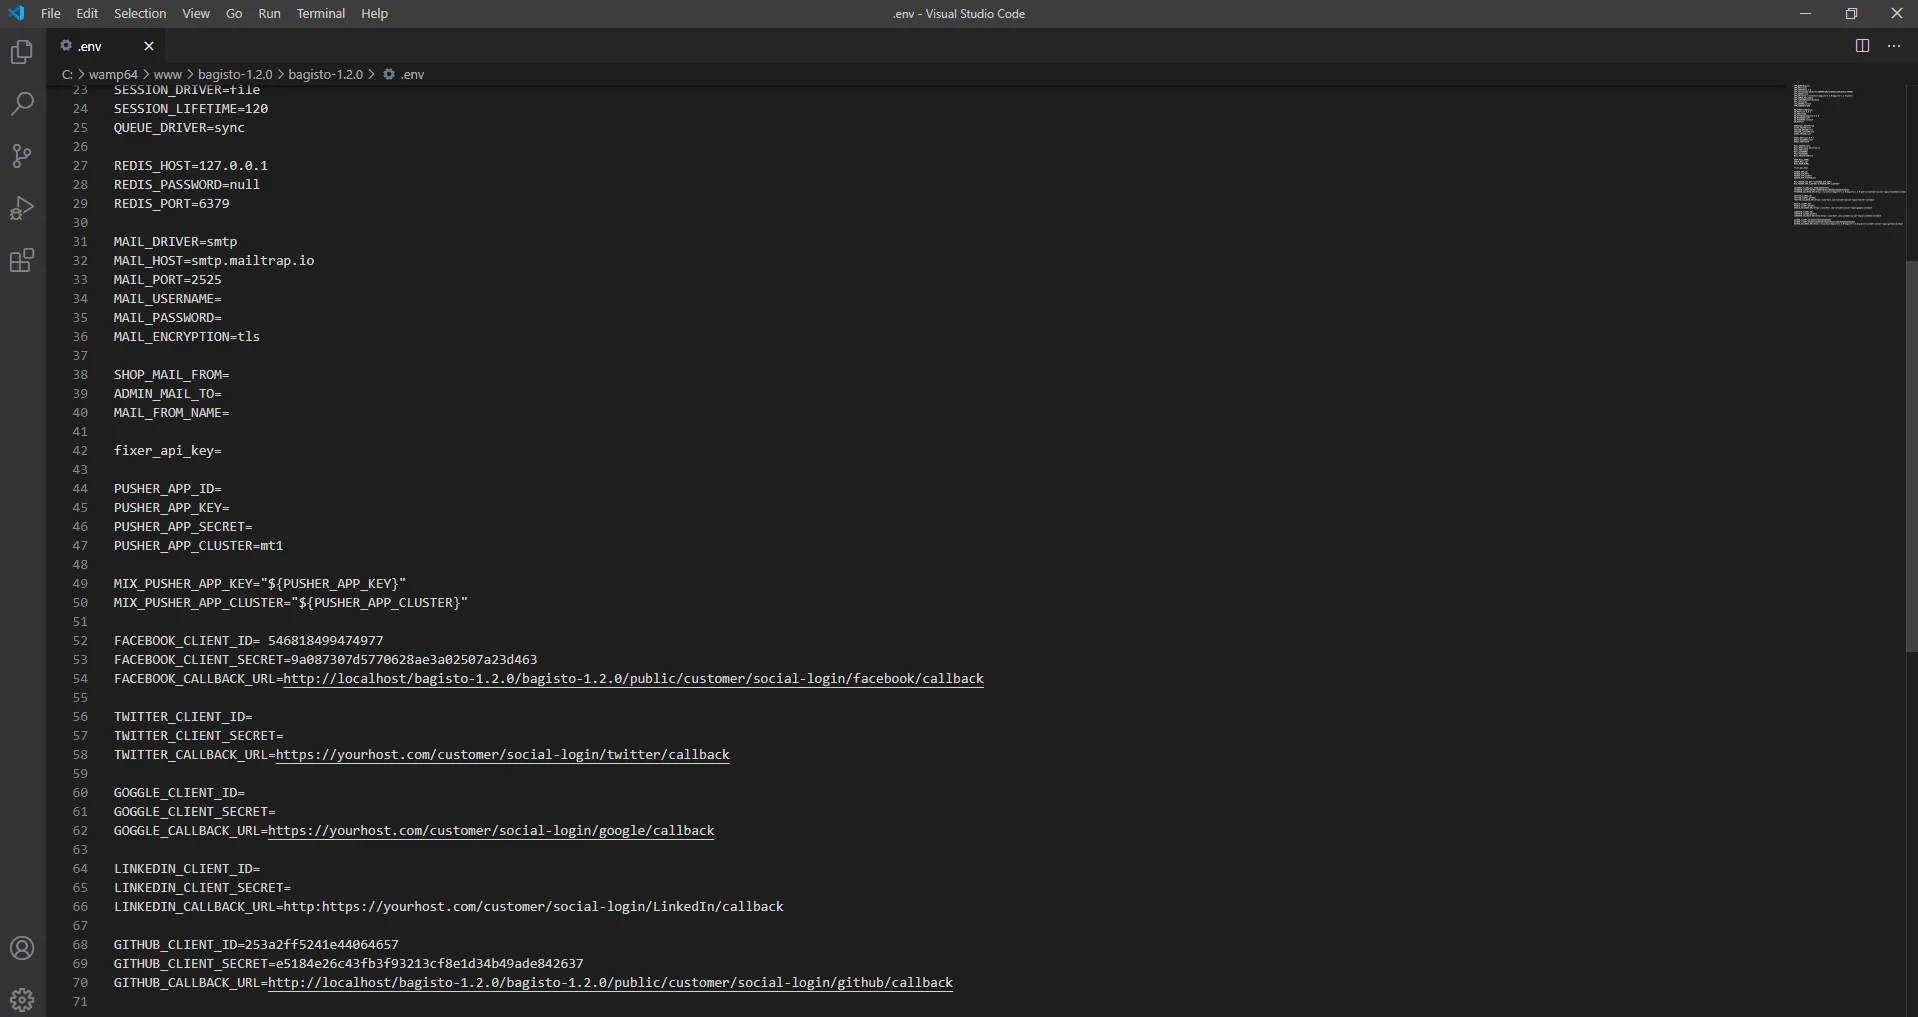
Twitter API Credentials.
1. Click on the link https://developer.twitter.com/
2. And click on the create new app
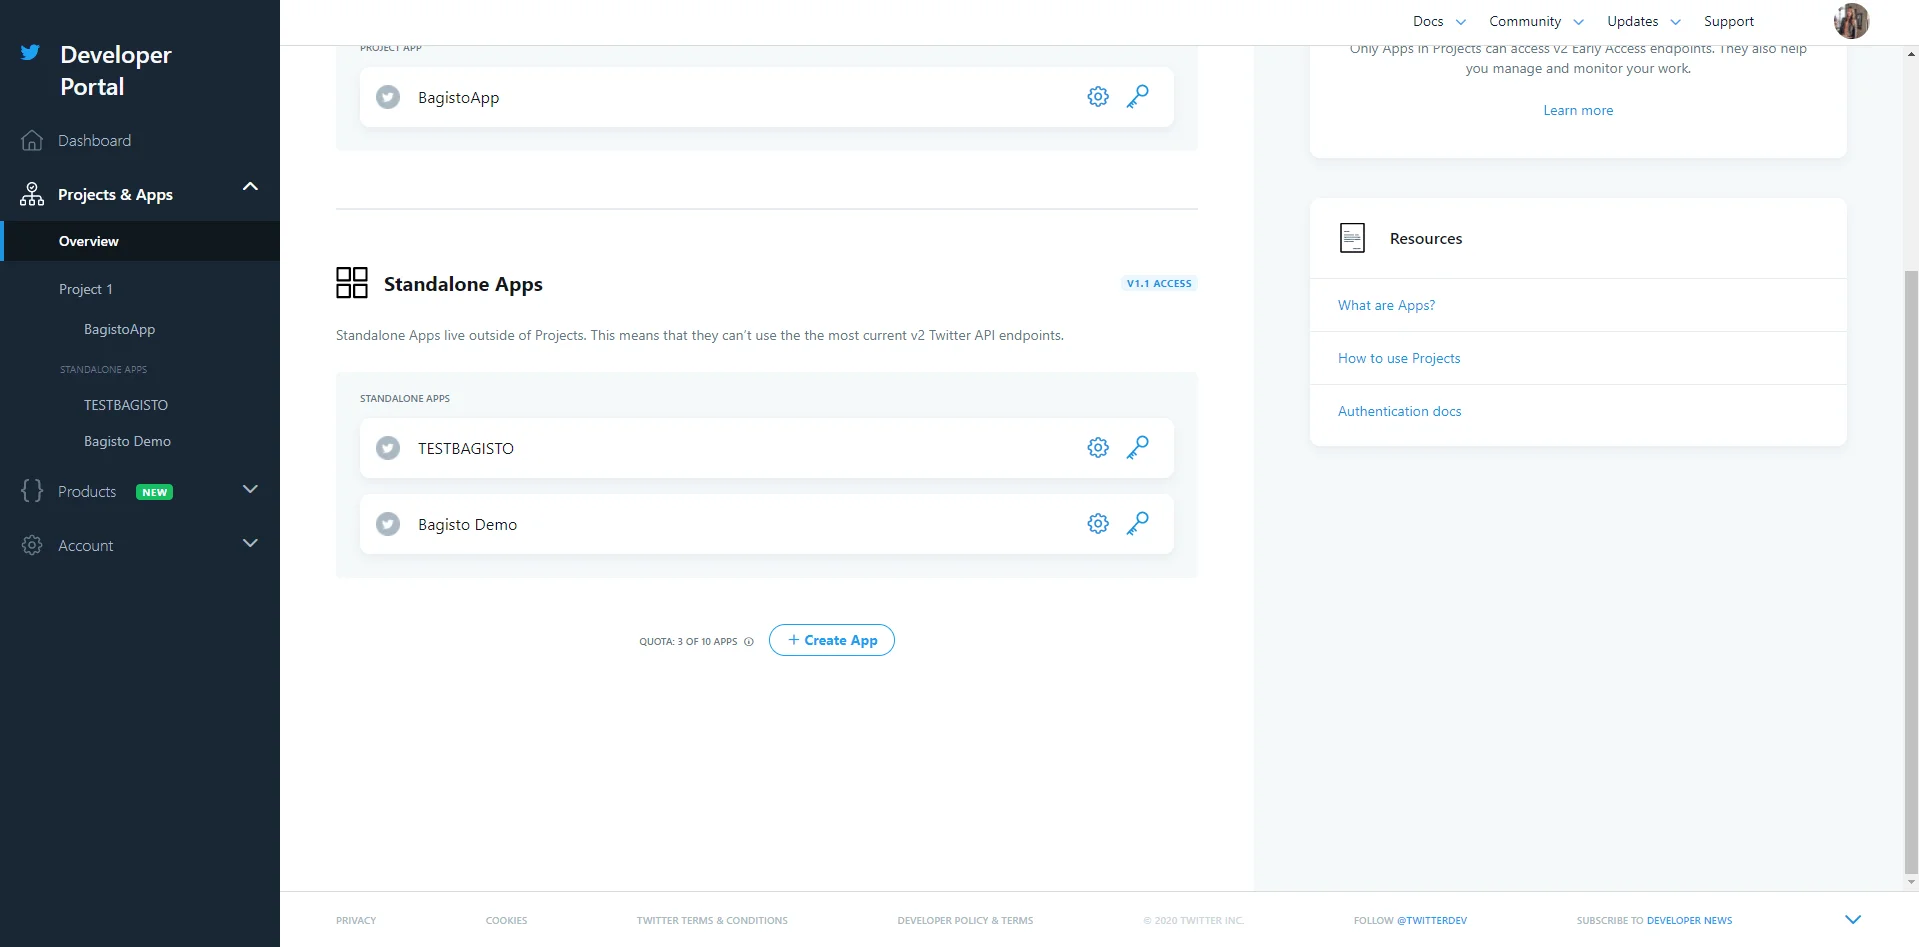
3. Insert the app name and create app after that you will be able to see your API key
and secret.
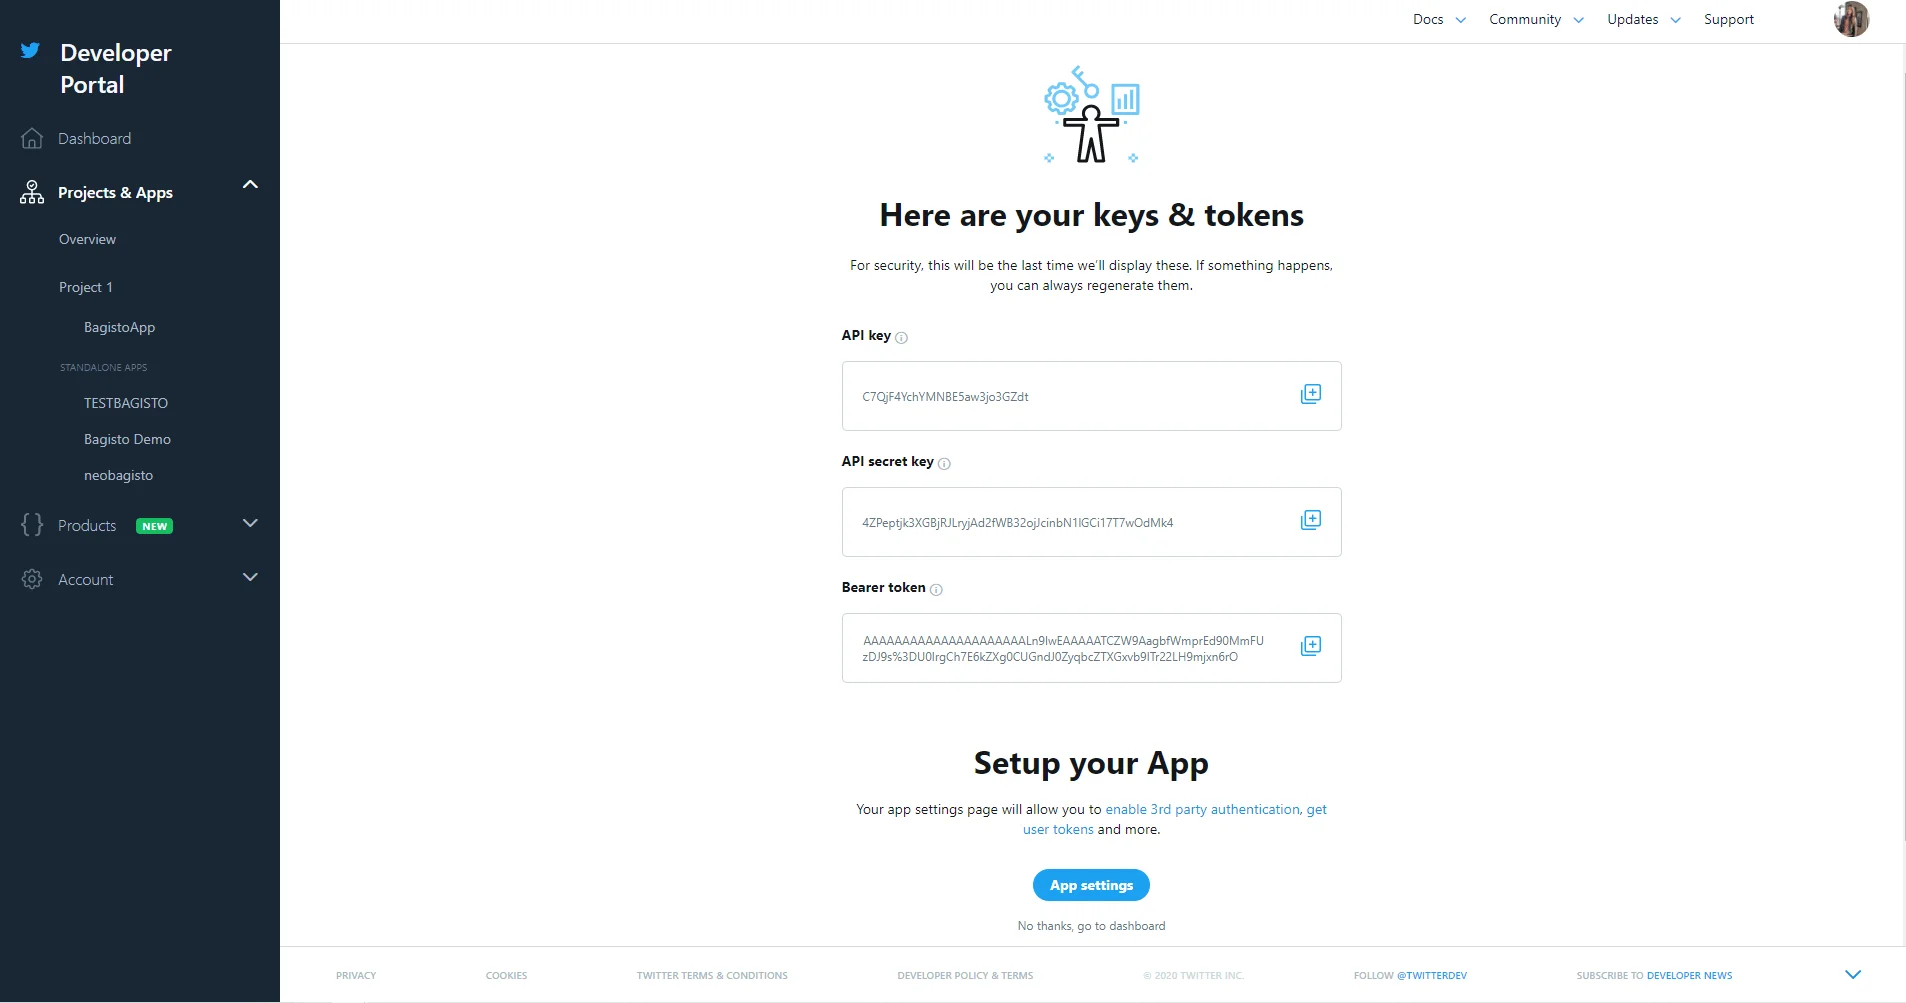
4.Now you will be able to see authentication by clicking on the app setting.
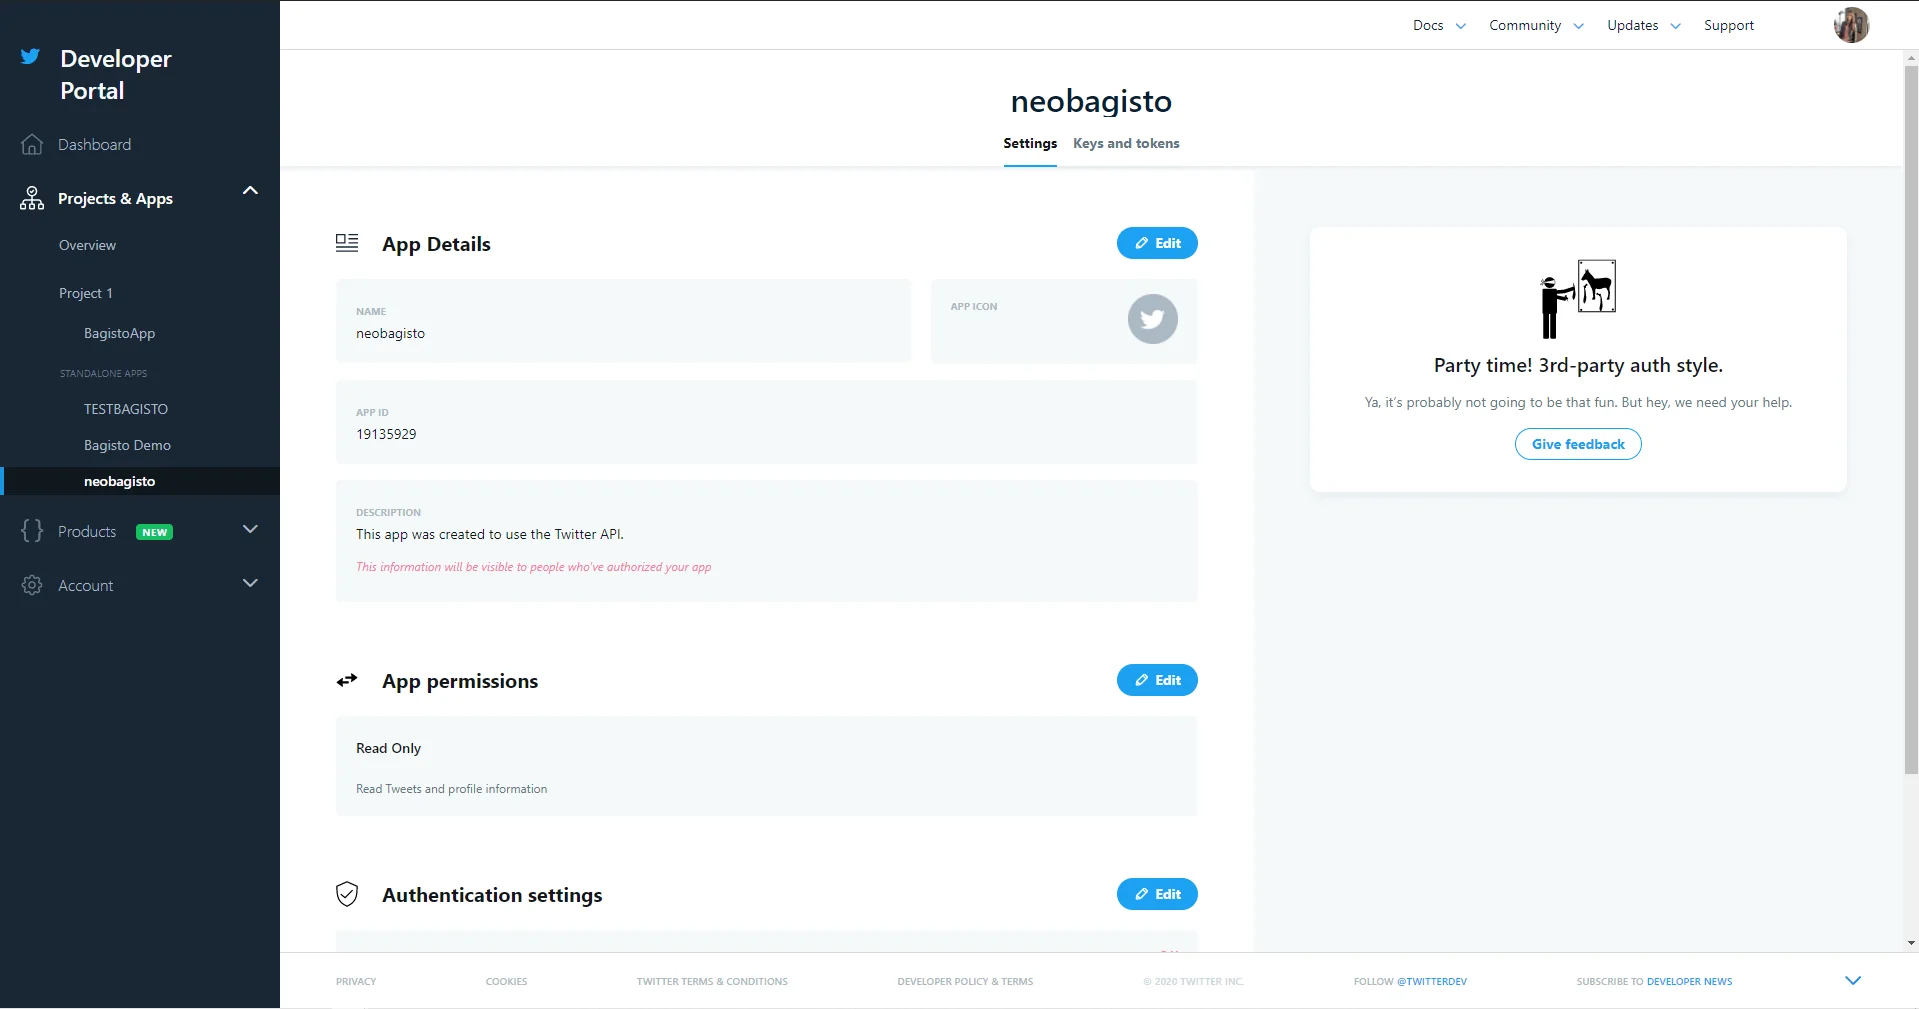
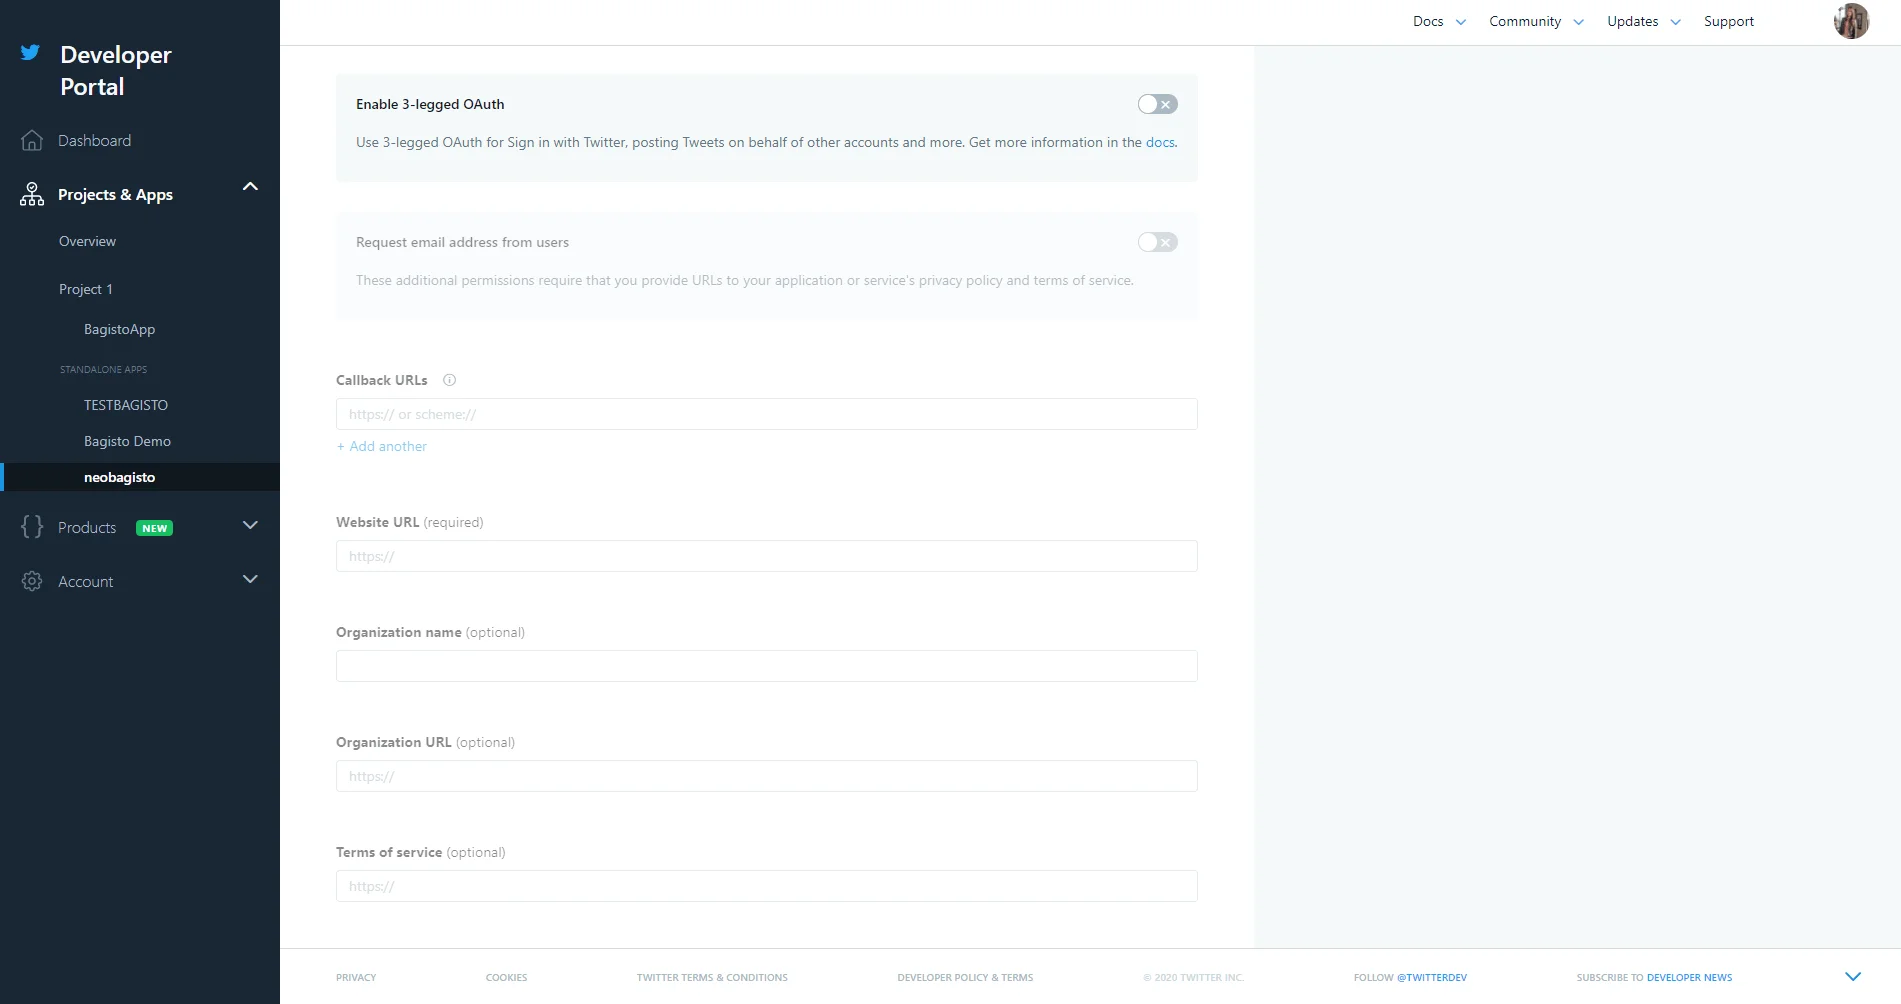
5.Now enable the Oauth and insert your callback url in this and save.
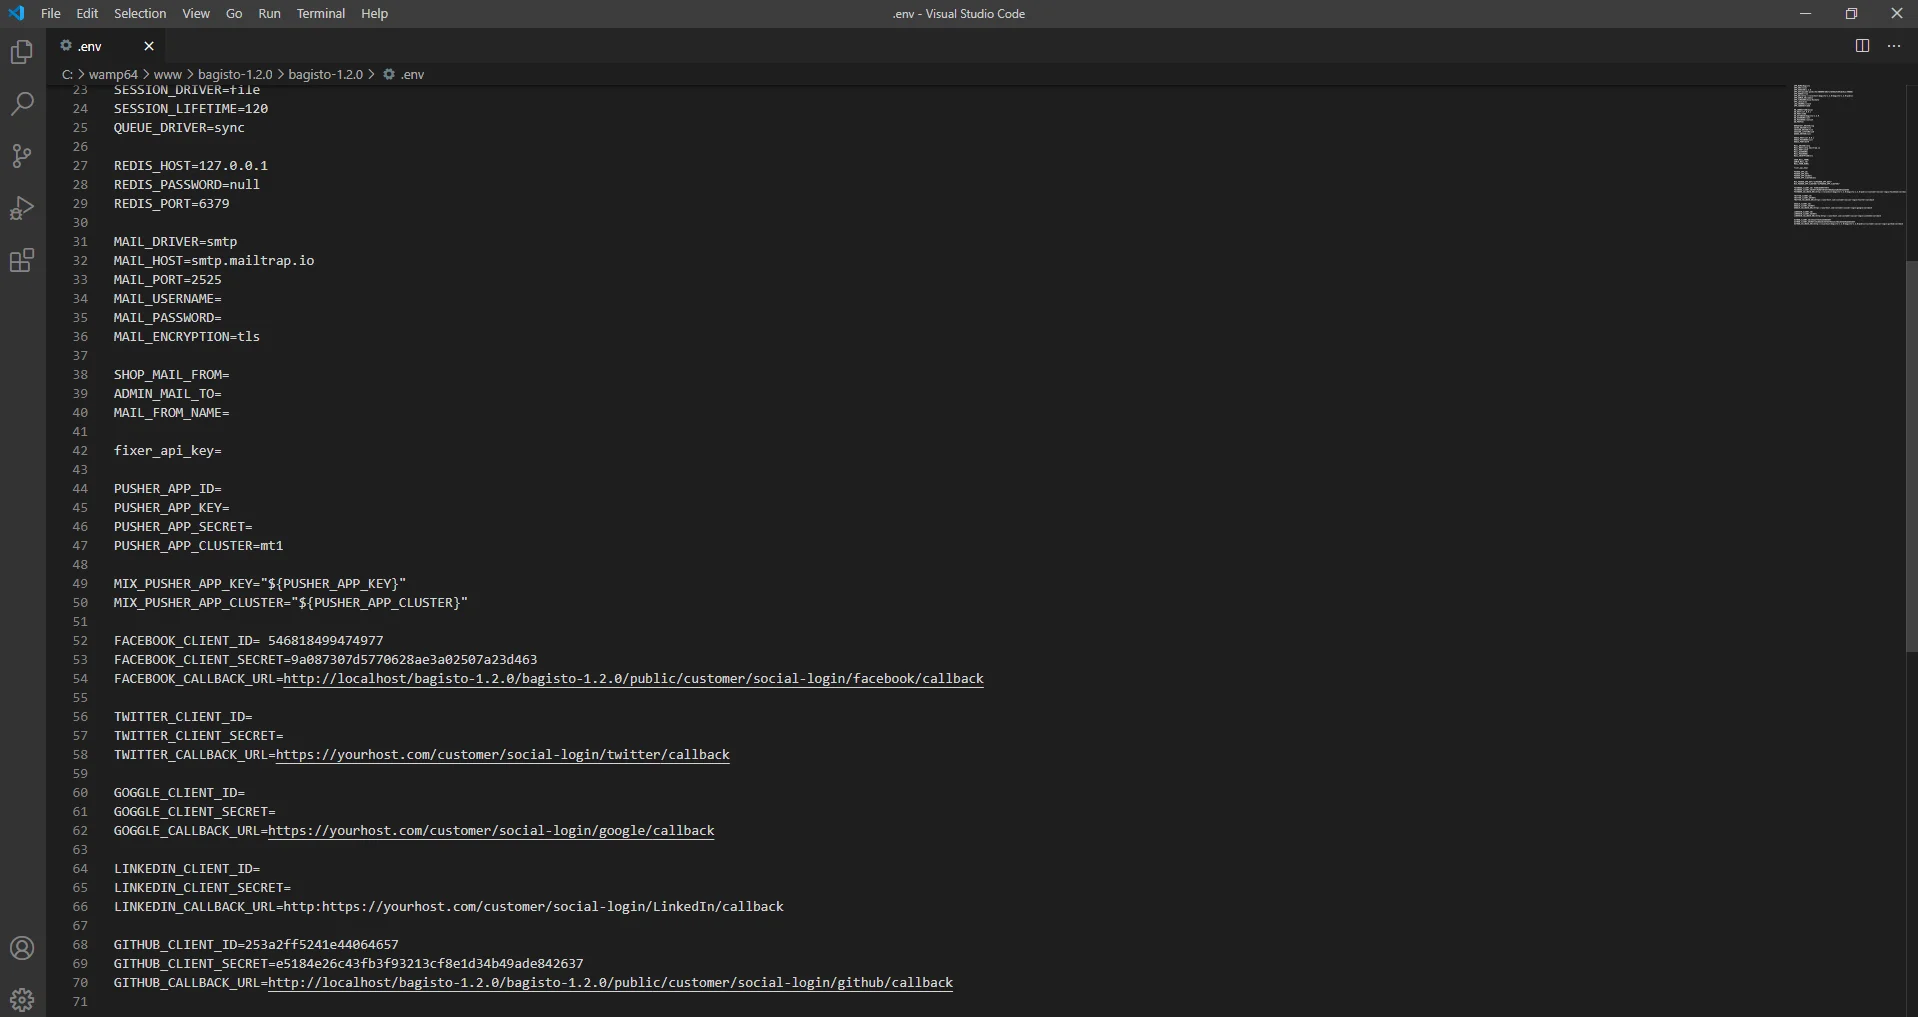
6. Now you can add this API key and secret in the .env file and edit the callback URL from there to your URL in place of your host and the rest will be the same.
That’s all for the Social Login for Bagisto , still, have any issue feel free to add a ticket and let us know your views to make the search better http://bagisto.uvdesk.com/


Regards