S3 Storage in Bagisto: Develop Locally, Deploy with Confidence
Set up S3 Storage in Bagisto and test it on your laptop first. Use a free RustFS bucket now, and switch to AWS S3 later.
No AWS account, no bill and no code changes.
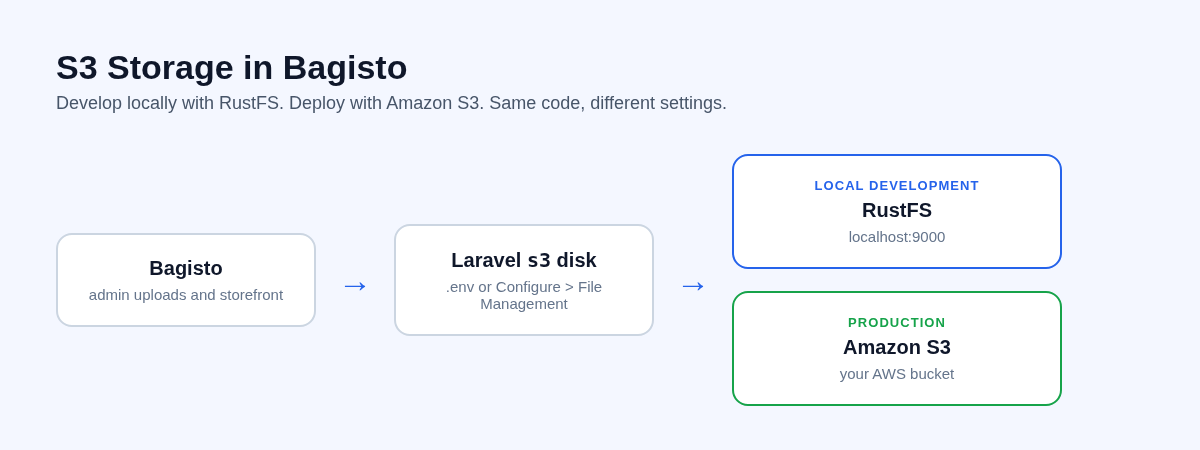
The Challenge: S3 in Production, But What About Local Development?
Growing stores keep their files in a bucket. Product images and other uploads then live in one safe place, instead of on a single server.
Your local store should behave the same way. Otherwise, a bug that only shows with remote storage reaches your customers first.
The obvious fix is a real AWS bucket for every developer. It works, but it brings extra work:
- More keys to protect and rotate.
- Test uploads mixed with real files.
- Storage charges for throwaway data.
- One wrong setting that can delete files that matter.
A local S3-compatible server removes all of this, and S3 Storage in Bagisto works with it out of the box.
Introducing S3 Storage in Bagisto
Bagisto lets the admin choose where uploads are saved. Open Configure > File Management, and the Default Storage Driver offers three choices:
- File (Local Storage): the web server’s disk.
- Amazon S3: Amazon S3, or any service that speaks the S3 API.
- Cloudflare R2: Cloudflare’s object storage.
Once S3 is on, new product images, Appearance images and return request attachments land in the bucket.
Older files stay where they were. A Sync Existing Files button copies them across for you.
You enter the connection details on the Amazon S3 screen of the same group. No code is needed.
Why RustFS for Local Development?
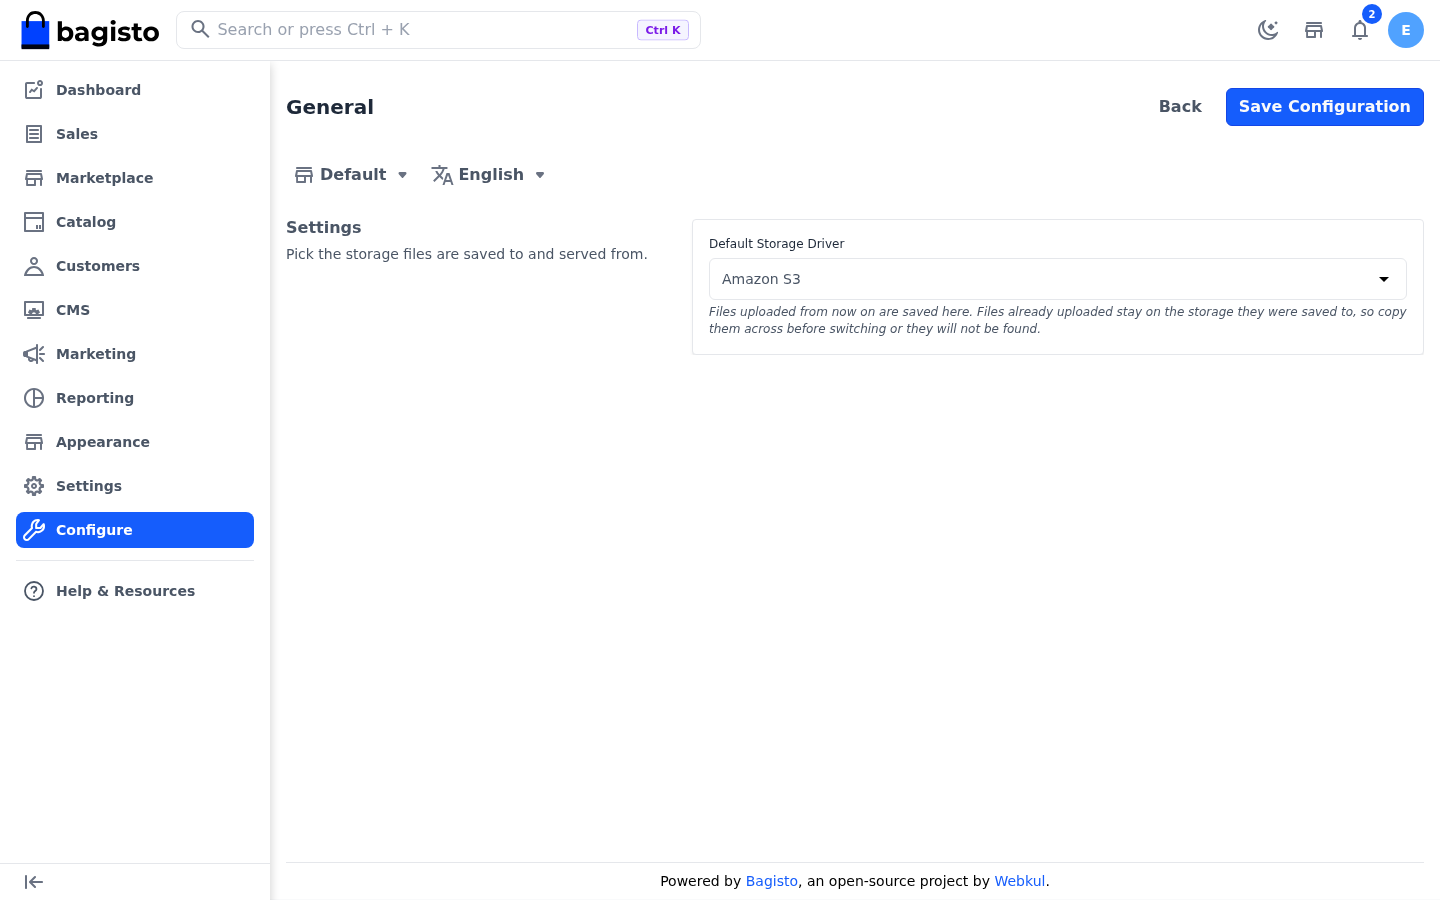
RustFS is a free, open-source server that speaks the S3 API. It runs as one Docker container, and Bagisto treats it like any other S3 service.
Here is what you get on your machine:
- An S3 API on port
9000, which Bagisto talks to. - A web console on port
9001, where you browse buckets and files. - Data in a plain folder, so you can delete it and start fresh.
- Support for the AWS CLI, by adding an
--endpoint-urloption.
Because RustFS follows the S3 API, the Bagisto code you test locally is the same code that runs against AWS.
How S3 Storage in Bagisto Works
Bagisto uses Laravel’s filesystem layer. The s3 disk and its adapter are already in the project, so you install nothing. You only add connection details.
The Amazon S3 screen has seven fields:
- Access Key ID and Secret Access Key: the credentials.
- Region and Bucket: where the bucket lives, and its name.
- URL: the address files are served from. Leave it empty to use the address the service provides.
- Endpoint: only for a service other than Amazon S3. Leave it empty for Amazon S3.
- Use Path Style Endpoint: turn it on for a self-hosted service that puts the bucket name in the path.
Files then travel in two ways. Product images are read from the bucket by Bagisto’s /cache route, using your credentials.
Other files, such as language flags, are linked straight to the URL you set, so the browser loads them from the bucket itself.
Setting Up RustFS Locally
You only need Docker. The AWS CLI is optional, but it makes the next steps quick.
Step 1: Start RustFS. The command runs the container as your own user, so you do not need sudo:
|
1 2 3 4 5 |
mkdir -p data logs docker run -d --name rustfs -p 9000:9000 -p 9001:9001 \ --user "$(id -u):$(id -g)" \ -e RUSTFS_ACCESS_KEY=bagisto-local -e RUSTFS_SECRET_KEY=bagisto-local-secret \ -v "$(pwd)/data:/data" -v "$(pwd)/logs:/logs" rustfs/rustfs:latest |
Open http://localhost:9001 and sign in with the same key and secret.
Step 2: Create a bucket. Make one named bagisto in the console, or from the terminal:
|
1 2 |
export AWS_ACCESS_KEY_ID=bagisto-local AWS_SECRET_ACCESS_KEY=bagisto-local-secret AWS_DEFAULT_REGION=us-east-1 aws --endpoint-url http://localhost:9000 s3 mb s3://bagisto |
Step 3: Allow public reads. A new bucket is private, but the shopper’s browser loads some files straight from it.
This read-only policy lets anyone open files, and nothing else:
|
1 2 |
aws --endpoint-url http://localhost:9000 s3api put-bucket-policy --bucket bagisto \ --policy '{"Version":"2012-10-17","Statement":[{"Effect":"Allow","Principal":"*","Action":"s3:GetObject","Resource":"arn:aws:s3:::bagisto/*"}]}' |
Public read is fine for a local test bucket. The production section below covers the safe way on AWS.
Configuring S3 Storage in Bagisto
S3 Storage in Bagisto has a built-in admin screen. Fill in the bucket details first, then switch the driver. The File Management docs describe each field.
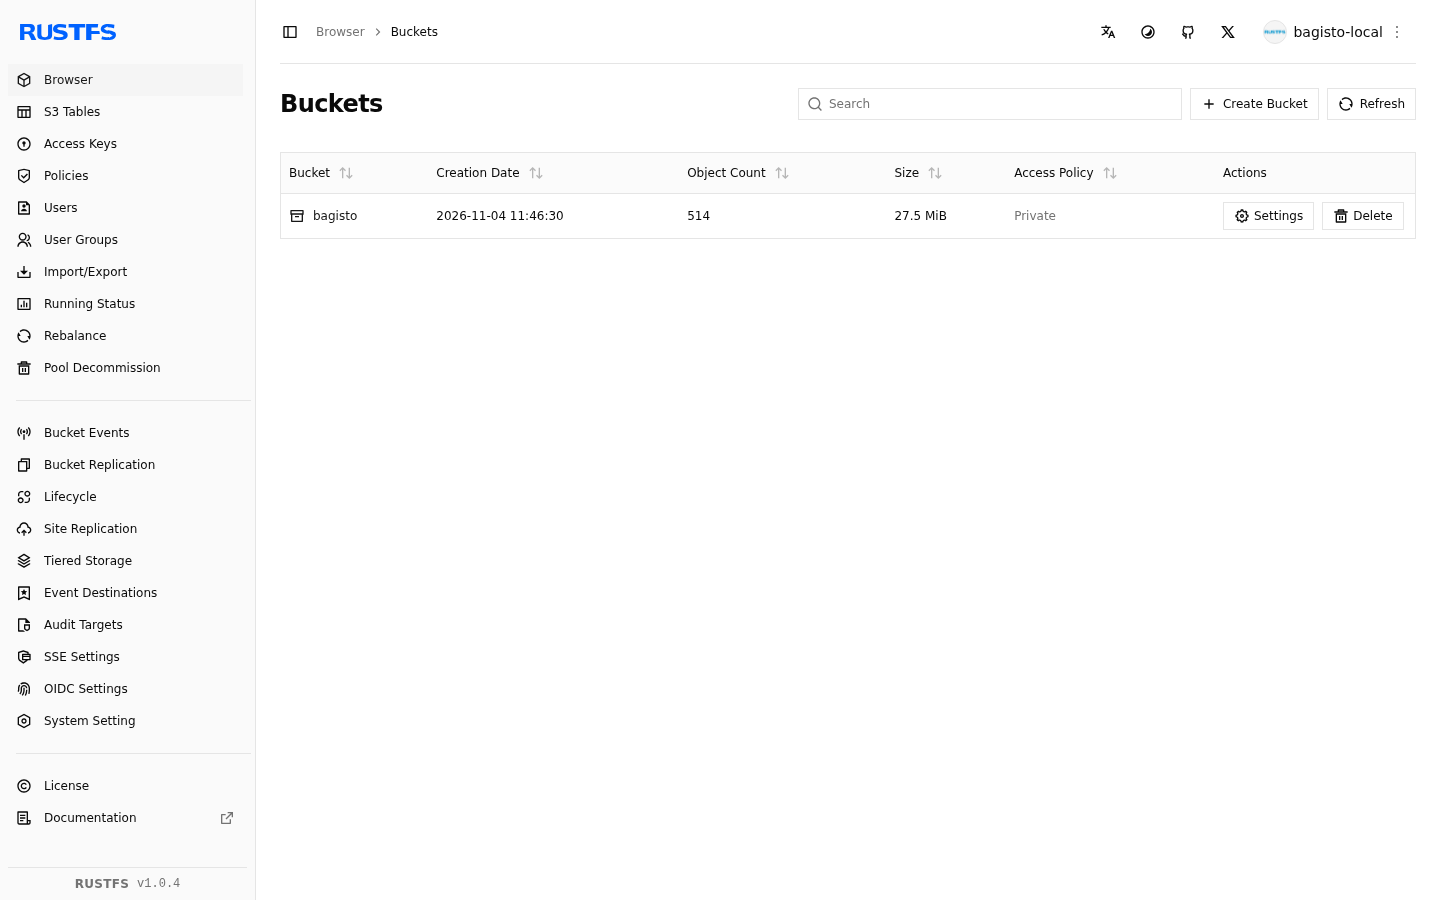
Step 1: Fill in the Amazon S3 screen. Go to Configure > File Management > Amazon S3 and enter your RustFS values:
- Access Key ID:
bagisto-local - Secret Access Key:
bagisto-local-secret - Region:
us-east-1 - Bucket:
bagisto - URL:
http://localhost:9000/bagisto - Endpoint:
http://localhost:9000 - Use Path Style Endpoint: turned on, because a local server has no separate address for each bucket.
Click Save Configuration.
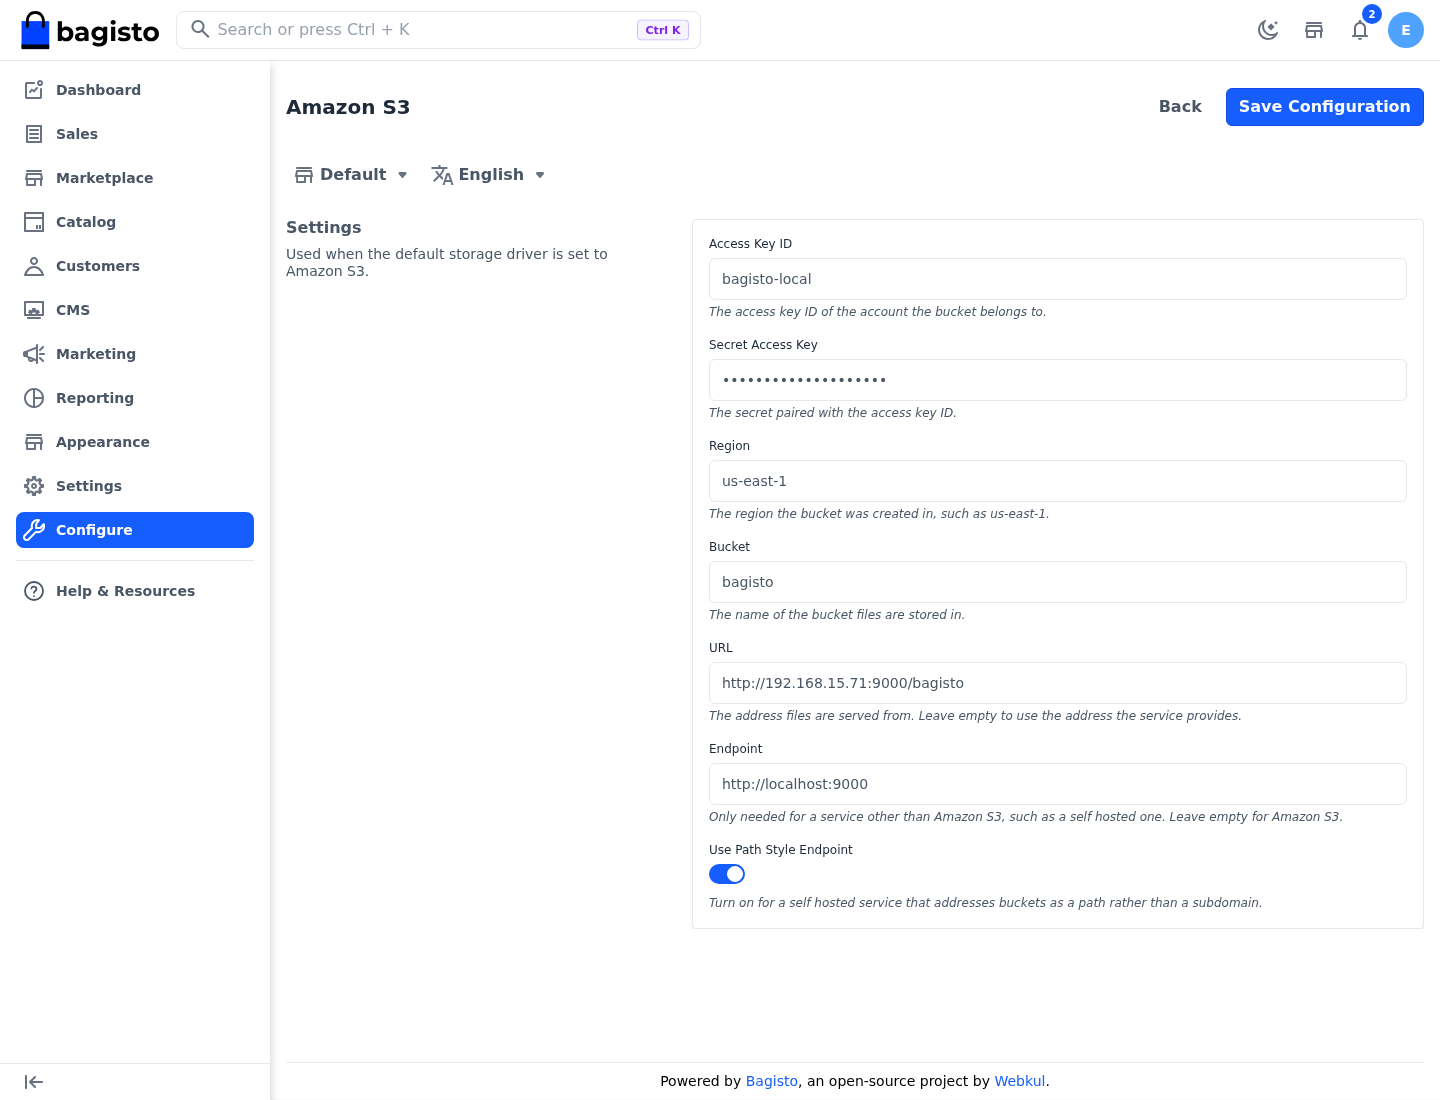
Step 2: Switch the driver. Go to Configure > File Management > General, set Default Storage Driver to Amazon S3 and save.
Step 3: Sync existing files. Once Amazon S3 is selected and the Amazon S3 fields are filled in, a Sync Existing Files button appears on the same screen.
It copies the files already uploaded on your server into the bucket, in the background. It skips anything already there and leaves the originals in place.
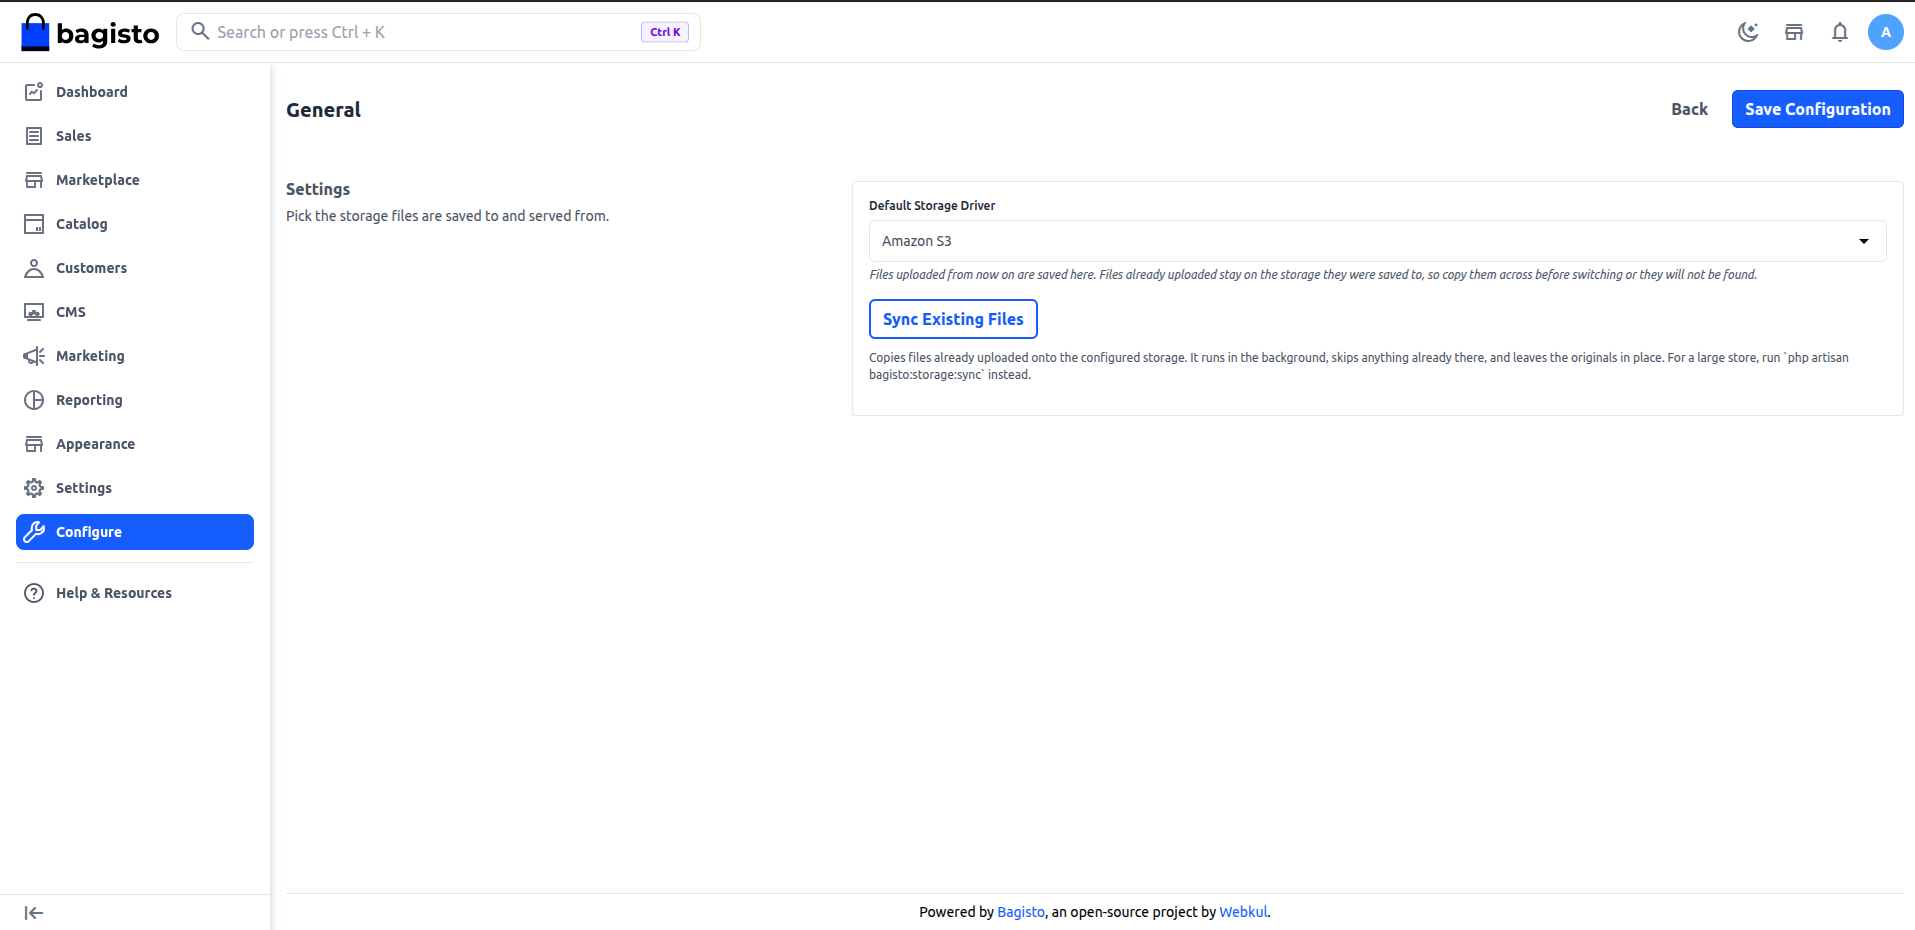
For a large store, run php artisan bagisto:storage:sync instead.
Testing S3 Storage Locally
Now test S3 Storage in Bagisto with a real upload:
- In the admin panel, open a product, upload an image and save.
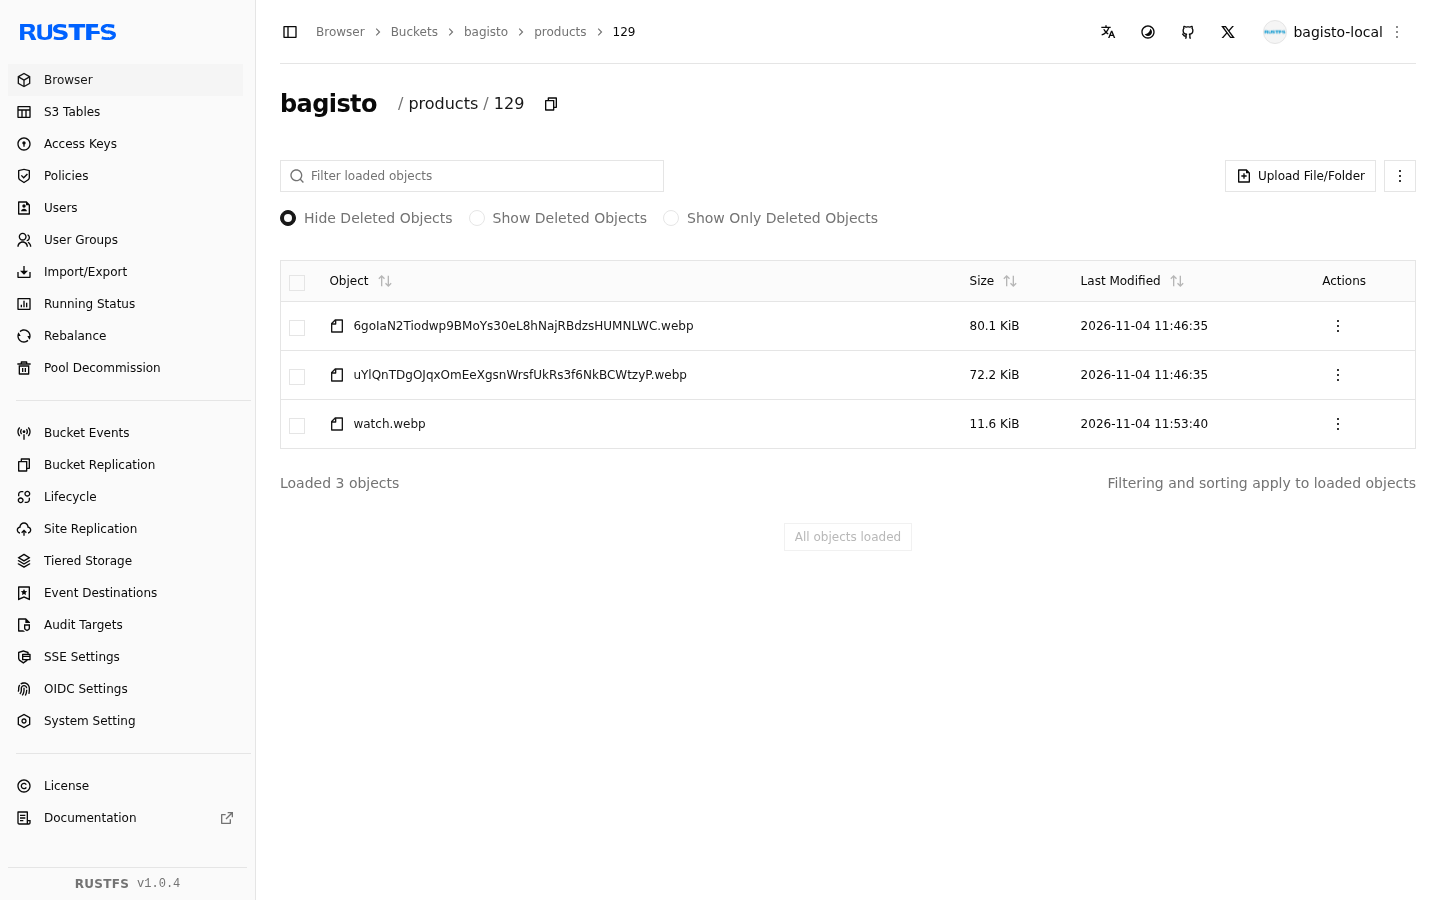
- Open the RustFS console. The image sits under
products/, followed by the product ID. - Visit the product page on your storefront. The image should load.
If something looks off, the FAQ below covers the common causes.
From RustFS to AWS S3
Only the settings change, on the Amazon S3 screen:
- Access Key ID and Secret Access Key: use an AWS access key.
- Region: your bucket’s region, such as
ap-south-1. - Bucket: your AWS bucket name.
- Endpoint: leave it empty.
- Use Path Style Endpoint: turn it off.
- URL: leave it empty, or use your CloudFront domain.
Create the bucket in the AWS console, near your servers. To bring existing files across, click Sync Existing Files on the General screen.
Preparing Your Storage for Production
A bucket that works is not yet a bucket that is ready. Before S3 Storage in Bagisto goes live, take care of three things:
- A dedicated IAM user: never use root keys. Create an IAM user that can only list your bucket and get, put and delete files in it.
- Public files: a new AWS bucket blocks public access. Serve files through CloudFront and keep the bucket private, or allow public read on purpose.
- Safe keys: keep access keys out of version control, use one IAM user per environment, rotate keys and turn on bucket versioning.
Keep only files you want public in this bucket, and never store private documents beside product images.
Then repeat the upload test. If the image appears in your AWS bucket and on the storefront, you are ready.
S3 Storage in Bagisto FAQ
What happens to files I uploaded before?
They do not move on their own. Click Sync Existing Files on the General screen, and Bagisto copies them in the background.
It skips files already in the bucket. For a large store, run php artisan bagisto:storage:sync instead.
Images are broken, but the upload worked. Why?
The bucket is still private. Apply the public read policy from the setup steps.
Bagisto runs inside Docker or Sail. Which address do I use?
Keep URL on localhost for the browser. Set Endpoint to an address the container can reach, such as http://rustfs:9000.
The RustFS container exits right after it starts. Why?
The data folder is not writable by the user the container runs as. Run it with --user as shown above.
Works with Bagisto extensions:
- Multi Vendor Marketplace: transform your store into a marketplace.
- Multi Tenant Commerce: a SaaS solution to launch and scale online.
- Headless eCommerce: API-first, flexible headless commerce.
- B2B Commerce: build B2B with bulk orders and catalogs.
- B2B Marketplace: launch a B2B marketplace for scalable trade.
- Mobile App: a customizable open-source eCommerce app.
- Bagisto Themes: pre-built stores for every business type.
- POS: sell in your offline store and online.
….. all other Extensions.
From Local Development to Production
S3 Storage in Bagisto is not a leap of faith. Develop against RustFS, deploy against AWS S3, and keep your code the same in both.
Get started today: follow the Bagisto developer docs.

Be the first to comment.