Building a REST API with Laravel from Scratch
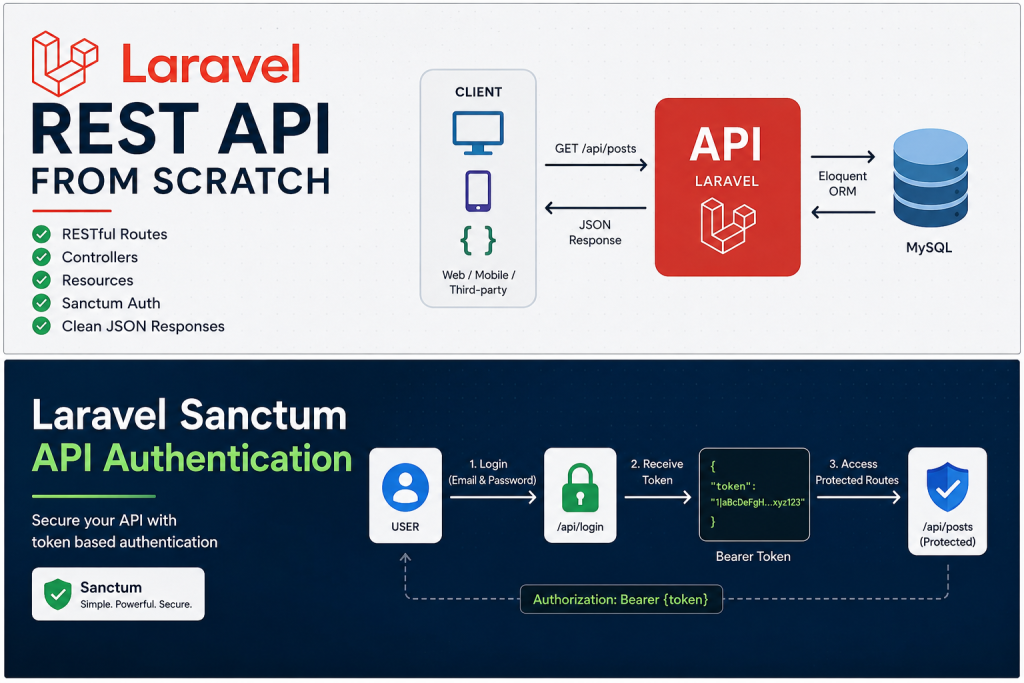
If you’ve ever built a mobile app, a Vue/React frontend, or a third-party integration — you needed a REST API.
Laravel makes building one surprisingly clean. Let me walk you through it from zero.
What is a REST API in Laravel?
A REST API lets your Laravel app send and receive data over HTTP — usually JSON.
Instead of returning a view, your controller returns data. The frontend or mobile app handles the display.
Step 1: Set up a fresh Laravel project
|
1 2 3 |
composer create-project laravel/laravel rest-api cd rest-api php artisan serve |
That’s your app running at http://localhost:8000. Now let’s build the API on top of it.
Step 2: Create the model, migration, and controller
We’ll build a simple Posts API as the example.
|
1 |
php artisan make:model Post -mcr |
The -mcr flag creates the model, migration, and a resource controller in one command.
Open the migration and add the fields:
|
1 2 3 4 5 6 |
Schema::create('posts', function (Blueprint $table) { $table->id(); $table->string('title'); $table->text('body'); $table->timestamps(); }); |
Run it:
|
1 |
php artisan migrate |
Step 3: Define your REST API routes in Laravel
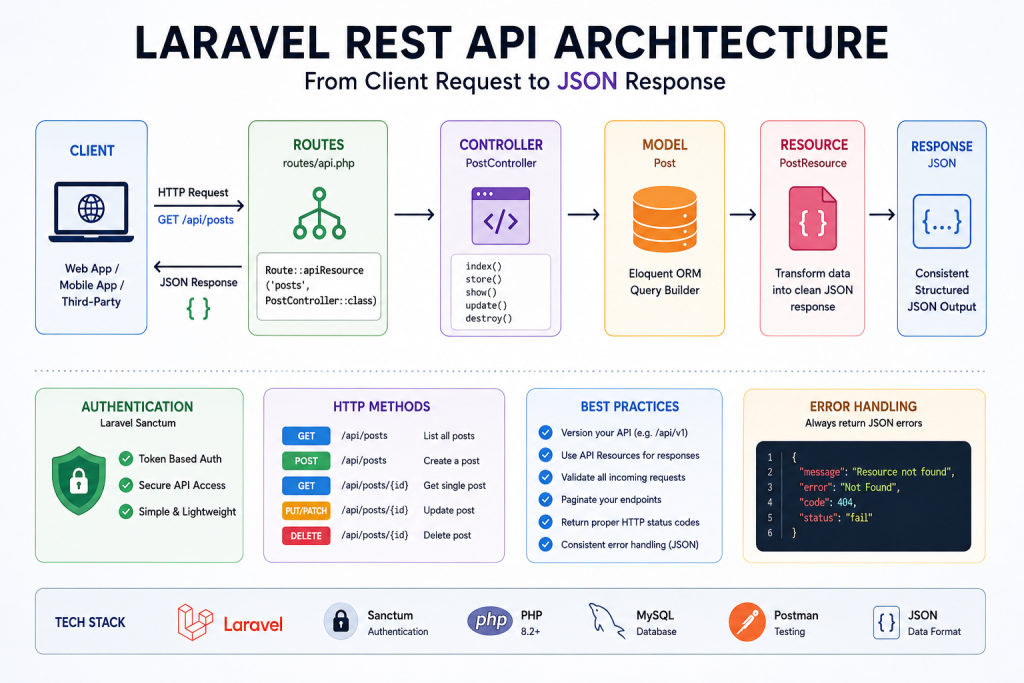
Open routes/api.php — this is where all API routes live.
|
1 2 3 |
use App\Http\Controllers\PostController; Route::apiResource('posts', PostController::class); |
One line gives you all 5 routes: index, store, show, update, destroy.
Check them with:
|
1 |
php artisan route:list |
All routes are automatically prefixed with /api/ — so /api/posts, /api/posts/{id}, etc.
Step 4: Write the controller logic
Open app/Http/Controllers/PostController.php and fill in the methods:
|
1 2 3 4 5 6 7 8 9 10 11 12 13 14 15 16 17 18 19 20 21 22 23 24 25 26 27 28 29 30 31 32 33 34 35 |
public function index() { return Post::latest()->paginate(10); } public function store(Request $request) { $data = $request->validate([ 'title' => 'required|string|max:255', 'body' => 'required|string', ]); return Post::create($data); } public function show(Post $post) { return $post; } public function update(Request $request, Post $post) { $post->update($request->validate([ 'title' => 'sometimes|string|max:255', 'body' => 'sometimes|string', ])); return $post; } public function destroy(Post $post) { $post->delete(); return response()->noContent(); } |
Also add fillable to the Post model:
|
1 |
protected $fillable = ['title', 'body']; |
Step 5: Format responses with API Resources
Raw Eloquent output exposes every column. Use API Resources to control what gets returned.
|
1 |
php artisan make:resource PostResource |
|
1 2 3 4 5 6 7 8 9 |
public function toArray($request): array { return [ 'id' => $this->id, 'title' => $this->title, 'body' => $this->body, 'created_at' => $this->created_at->toDateString(), ]; } |
Now wrap your controller responses:
|
1 2 3 4 5 6 7 8 9 10 11 |
use App\Http\Resources\PostResource; public function index() { return PostResource::collection(Post::latest()->paginate(10)); } public function show(Post $post) { return new PostResource($post); } |
Clean, consistent output — no surprise fields leaking to the client.
Step 6: Add authentication to your REST API with Laravel Sanctum
Sanctum is Laravel’s lightweight token-based auth — perfect for REST APIs.
|
1 2 3 |
composer require laravel/sanctum php artisan vendor:publish --provider="Laravel\Sanctum\SanctumServiceProvider" php artisan migrate |
Add the HasApiTokens trait to your User model:
|
1 2 3 4 5 6 |
use Laravel\Sanctum\HasApiTokens; class User extends Authenticatable { use HasApiTokens, HasFactory, Notifiable; } |
Create a login route that issues a token:
|
1 2 3 4 5 6 7 8 9 10 11 12 13 14 15 16 |
Route::post('/login', function (Request $request) { $request->validate([ 'email' => 'required|email', 'password' => 'required', ]); $user = User::where('email', $request->email)->first(); if (! $user || ! Hash::check($request->password, $user->password)) { return response()->json(['message' => 'Invalid credentials'], 401); } return response()->json([ 'token' => $user->createToken('api-token')->plainTextToken, ]); }); |
Protect your routes with the auth:sanctum middleware:
|
1 2 |
Route::apiResource('posts', PostController::class) ->middleware('auth:sanctum'); |
Now every request needs an Authorization: Bearer {token} header.
For a deeper look at token-based auth, see our guide on Laravel Sanctum API authentication.
Step 7: Handle errors properly
By default Laravel returns HTML for errors. For APIs you want JSON.
Add this to app/Exceptions/Handler.php:
|
1 2 3 4 5 6 7 8 9 10 |
public function render($request, Throwable $e) { if ($request->expectsJson()) { return response()->json([ 'message' => $e->getMessage(), ], $this->getHttpCode($e)); } return parent::render($request, $e); } |
Now 404s and validation errors return clean JSON — not an HTML error page.
Quick tips before you ship
- Always version your API — use
Route::prefix('v1')from day one - Never return raw Eloquent collections — always use API Resources
- Use
response()->noContent()(204) for delete endpoints, notnull - Paginate list endpoints — never return all rows at once
- Test every endpoint with Postman or Insomnia before going live
For handling background tasks in your API — like sending emails after a POST — check out our guide on Laravel Queues from zero to production.
Quick recap
- Use
routes/api.phpandRoute::apiResource()for clean route setup - API Resources control exactly what data gets returned
- Sanctum handles token auth with minimal setup
- Always return JSON errors — not HTML
- Version from day one — you’ll thank yourself later
That’s a fully working REST API in Laravel — routes, resources, auth, and error handling.
Start with the Posts example, then replace it with whatever your app actually needs.


Be the first to comment.